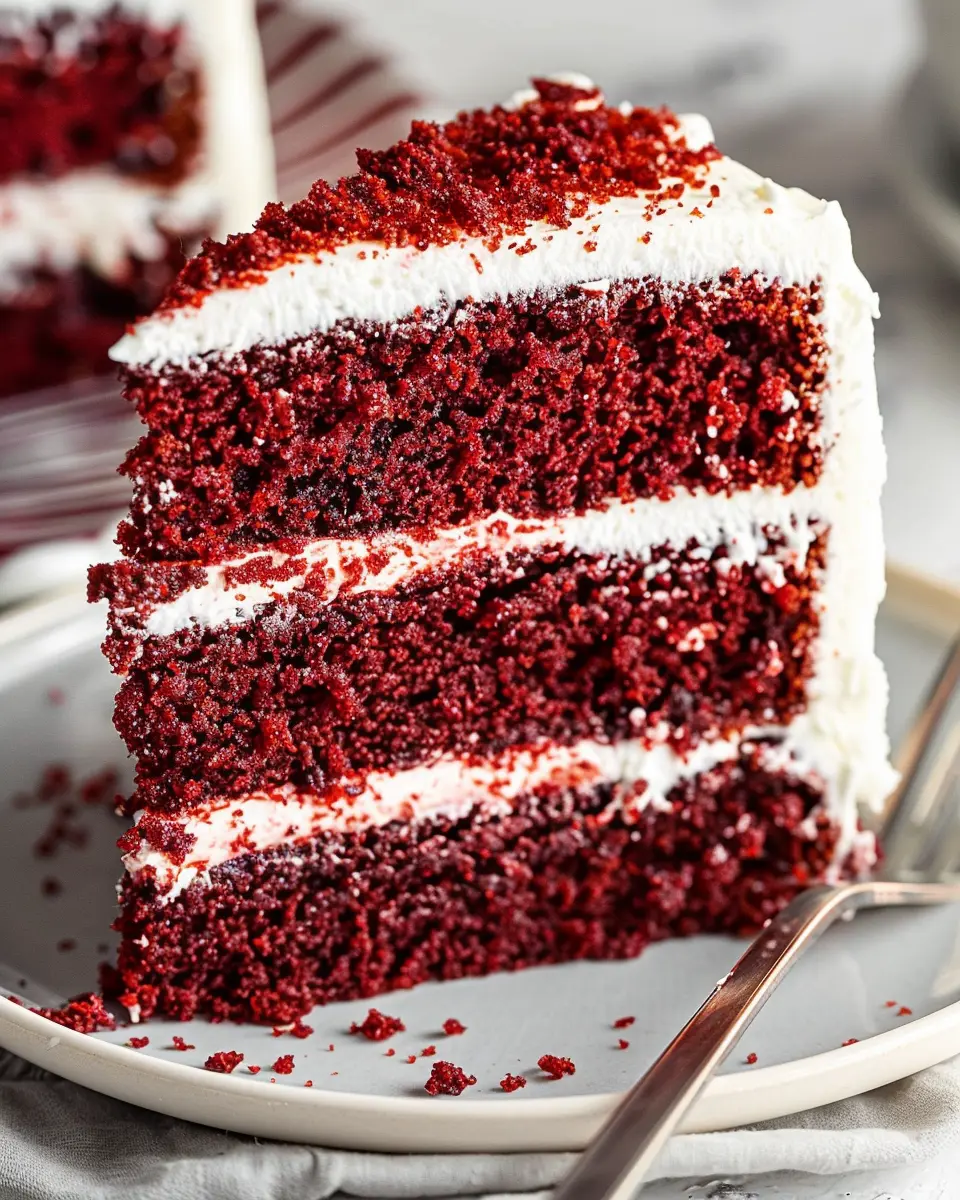
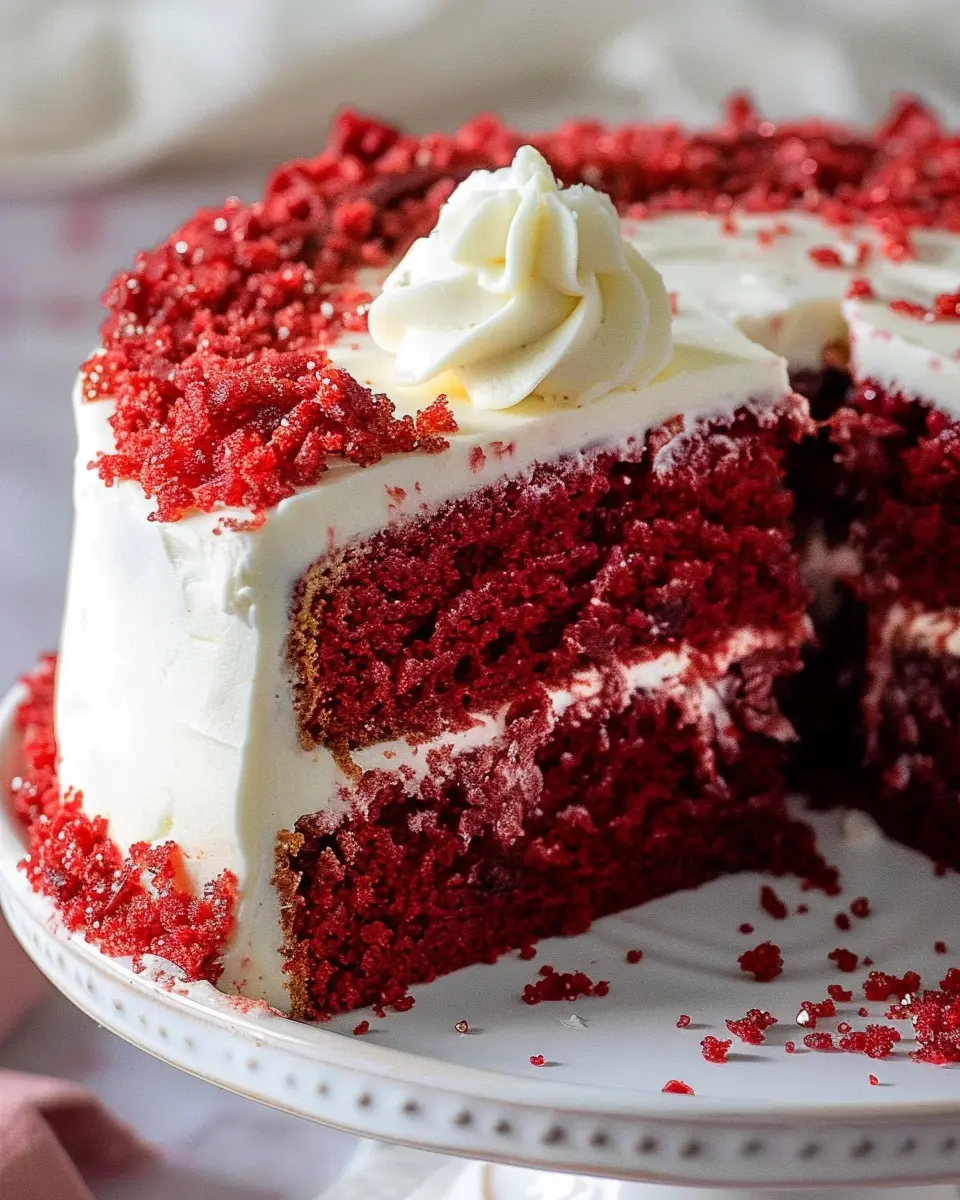
Small Red Velvet Cake: A Delicious Homemade Dessert
Making a small red velvet cake is an easy, yet elegant way to indulge in a classic dessert without going overboard. If you’re a young professional balancing a busy work-life schedule, this cake is the perfect solution for satisfying your sweet tooth without overwhelming your kitchen.
Why Small Cakes Are Perfect for Young Professionals
For many of us who are in the 25-to-35 age range, life can get pretty hectic. Between deadlines, social obligations, and the occasional Netflix binge, finding time to bake can feel like a daunting task. Enter the small cake—our savior. Here’s why a small red velvet cake fits seamlessly into your lifestyle:
-
Portion Control: A smaller cake means fewer servings, which is great for portion control. Instead of having an entire cake calling to you from the kitchen, you can enjoy a couple of slices and share the rest with friends or co-workers.
-
Less Time Commitment: With a small red velvet cake, you can whip up something decadent in less time than it takes to watch an episode of your favorite show. Most recipes take about 30-45 minutes from start to finish—perfect for a weeknight treat.
-
Easier Storage: If you do happen to have leftovers, a small cake is far easier to store. Just pop it in the fridge, and you’ll have a delightful sweet treat waiting for you after a long workday.
Wondering how to elevate your small cake experience? Consider pairing it with a cup of freshly brewed coffee or tea. It’s not only a lovely complement to the cake, but it can also make a great excuse to invite a friend over for a cozy catch-up session.
In summary, a small red velvet cake is not just any dessert—it’s an ideal solution for the modern young professional, striking the perfect balance between taste, convenience, and indulgence. For more ideas on quick and delightful desserts, check out this resource on quick bakes.
Whether you choose to keep the cake all to yourself or share it with loved ones, this dessert is sure to add a slice of happiness to your day.
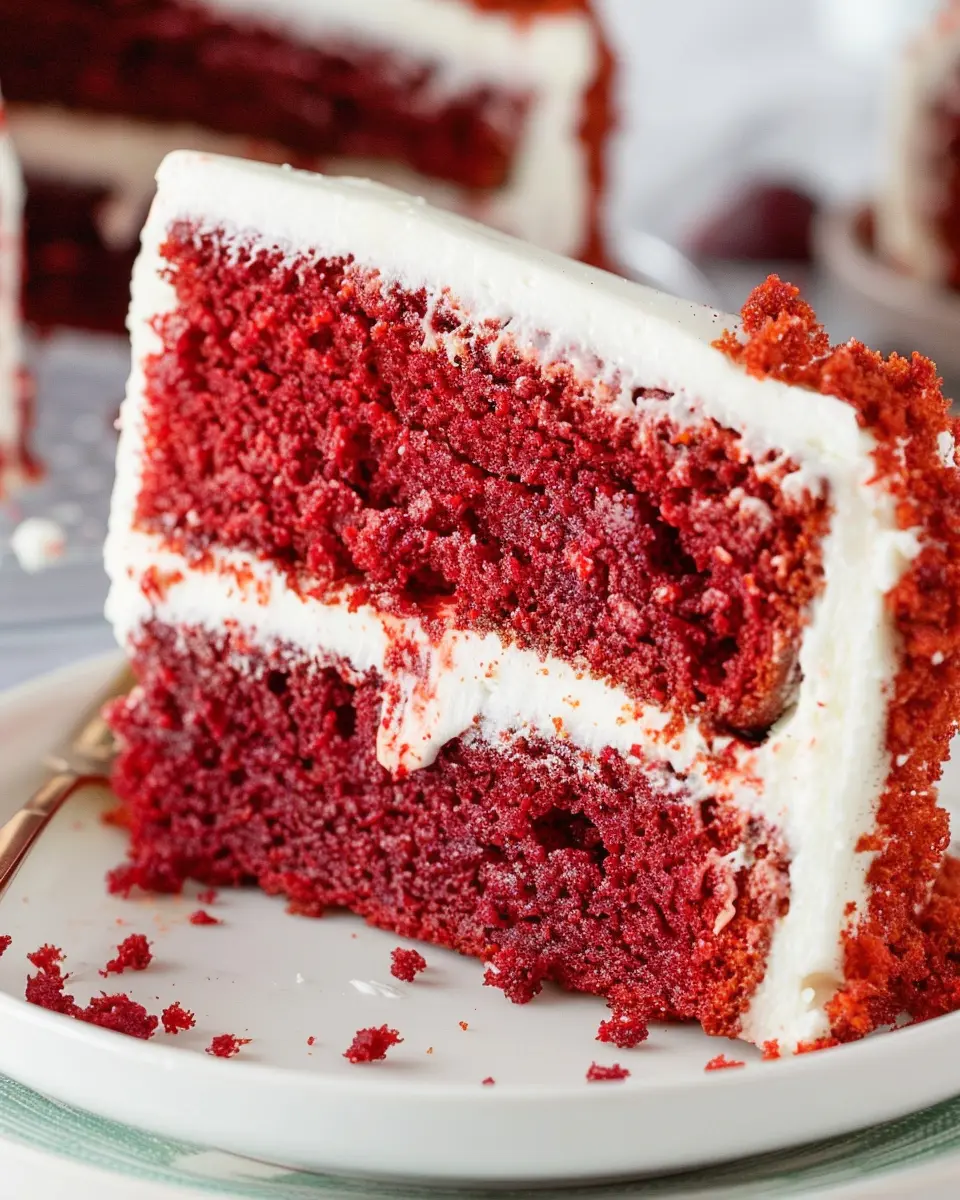
Ingredients for Small Red Velvet Cake
Creating a small red velvet cake is as delightful as it sounds! Let’s break down the essential ingredients you’ll need to whip up this tasty treat.
Essential Ingredients for the Cake
To capture that signature flavor and vibrant hue, gather the following:
- All-purpose flour (1 cup) – provides the cake’s structure.
- Granulated sugar (1 cup) – adds just the right amount of sweetness.
- Cocoa powder (1 tablespoon) – gives a subtle chocolate flavor.
- Baking soda (1 teaspoon) – for a perfect rise.
- Vegetable oil (1/2 cup) – keeps the cake moist.
- Buttermilk (1/2 cup) – essential for that tender crumb and tanginess.
- Egg (1) – binds everything together.
- Red food coloring (1 tablespoon) – this is where the magic happens!
- Vanilla extract (1 teaspoon) – for an aromatic touch.
- Vinegar (1 teaspoon) – balances the flavors wonderfully.
For a detailed guide on cake structure and textures, check out resources from Serious Eats.
Ingredients for Cream Cheese Frosting
Now, for that delectable topping, you’ll want:
- Cream cheese (8 ounces, softened) – the star of the frosting.
- Unsalted butter (1/4 cup, softened) – for a creamy consistency.
- Powdered sugar (2 cups) – sweetens and thickens the frosting.
- Vanilla extract (1 teaspoon) – adds depth to the flavor.
This heavenly frosting elevates your small red velvet cake to perfection, giving it that classic taste everyone loves!
Creating a smaller version of a classic can be incredibly rewarding. Trust me, once you try this cake, you’ll want to share it, or maybe keep it all to yourself!
Preparing the Small Red Velvet Cake
Baking a small red velvet cake can be a delightful experience, especially when you know exactly how to prepare the ingredients and equipment. A beautifully baked red velvet cake is perfect for a small gathering or a celebratory treat at home. Let’s break down the process step-by-step for a seamless baking experience.
Preheat and Prepare Your Bakeware
Before we dive into the mixing, it’s crucial to prepare our baking environment. Preheat your oven to 350°F (175°C). While that’s heating up, grab your favorite 6-inch cake pans. This smaller size is ideal for intimate occasions and helps prevent delicious leftovers from going stale.
- Prepare the cake pans: Grease each pan with a touch of butter or a non-stick spray to ensure your cake slips right out after baking. An optional step is to line the bottom with parchment paper—this can provide extra security against sticking. Trust me, you don’t want to battle with a stuck cake!
Whisk the Dry Ingredients Together
Now, let’s focus on the dry ingredients, which form the backbone of your cake’s texture. In a mixing bowl, combine:
- 1 cup all-purpose flour
- 1 tablespoon unsweetened cocoa powder
- 1 teaspoon baking soda
- 1/2 teaspoon salt
Whisk these ingredients together until well blended. It’s important to incorporate air into the mix, as this can affect the final lightness of your small red velvet cake. For a little extra guidance on baking techniques, check out Food Network’s baking basics.
Combine the Wet Ingredients
In a separate bowl, it’s time to mingle the wet ingredients. You’ll need:
- 1/2 cup vegetable oil (or melted coconut oil for a twist)
- 1/2 cup granulated sugar
- 1 large egg
- 1 tablespoon red food coloring
- 1 teaspoon vanilla extract
- 1/2 teaspoon white vinegar
Mix these ingredients until the sugar starts to dissolve and the mixture looks uniform. The vibrant red tint from the food coloring is what truly makes a red velvet cake stand out. If you’re curious about substitutes for food coloring, some bakers prefer using beet juice for a more natural alternative.
Mix and Combine the Batter
Now that we have both our dry and wet mixes prepared, it’s time to bring them together. Gradually add the dry mixture to the wet, folding it in gently. Avoid over-mixing, as this can lead to a denser texture. You’re aiming for a smooth batter that hints at a slight fluffiness.
Once combined, you’ll want to pour the batter evenly into the prepared cake pans, ensuring each has the same amount. An even bake is crucial for beautifully balanced layers. If you’re up for it, you can give your cake a gentle tap on the countertop—this helps to release any air bubbles lurking within.
Bake and Cool the Cake
With your cake ready for the oven, it’s time to bake! Place the cake pans in your preheated oven and bake for about 25-30 minutes, or until a toothpick inserted in the center comes out clean. After baking, let the cakes cool in the pans for about 10 minutes, then gently transfer them to a wire rack.
Cooling is key: Allow the layers to cool completely before frosting. If you’re impatient, I totally understand! But trust me—this step ensures the small red velvet cake won’t melt your frosting into a gooey mess.
And there you have it! With these straightforward steps, you’re on your way to creating a fantastic small red velvet cake that will impress your friends and satisfy your sweet tooth. Stay tuned for the frosting tips to complete your culinary masterpiece!
Variations on Small Red Velvet Cake
Red velvet cake is a classic favorite for many, but did you know it can be easily adapted to fit different diets and preferences? Here are some delightful variations on the small red velvet cake that you might want to try!
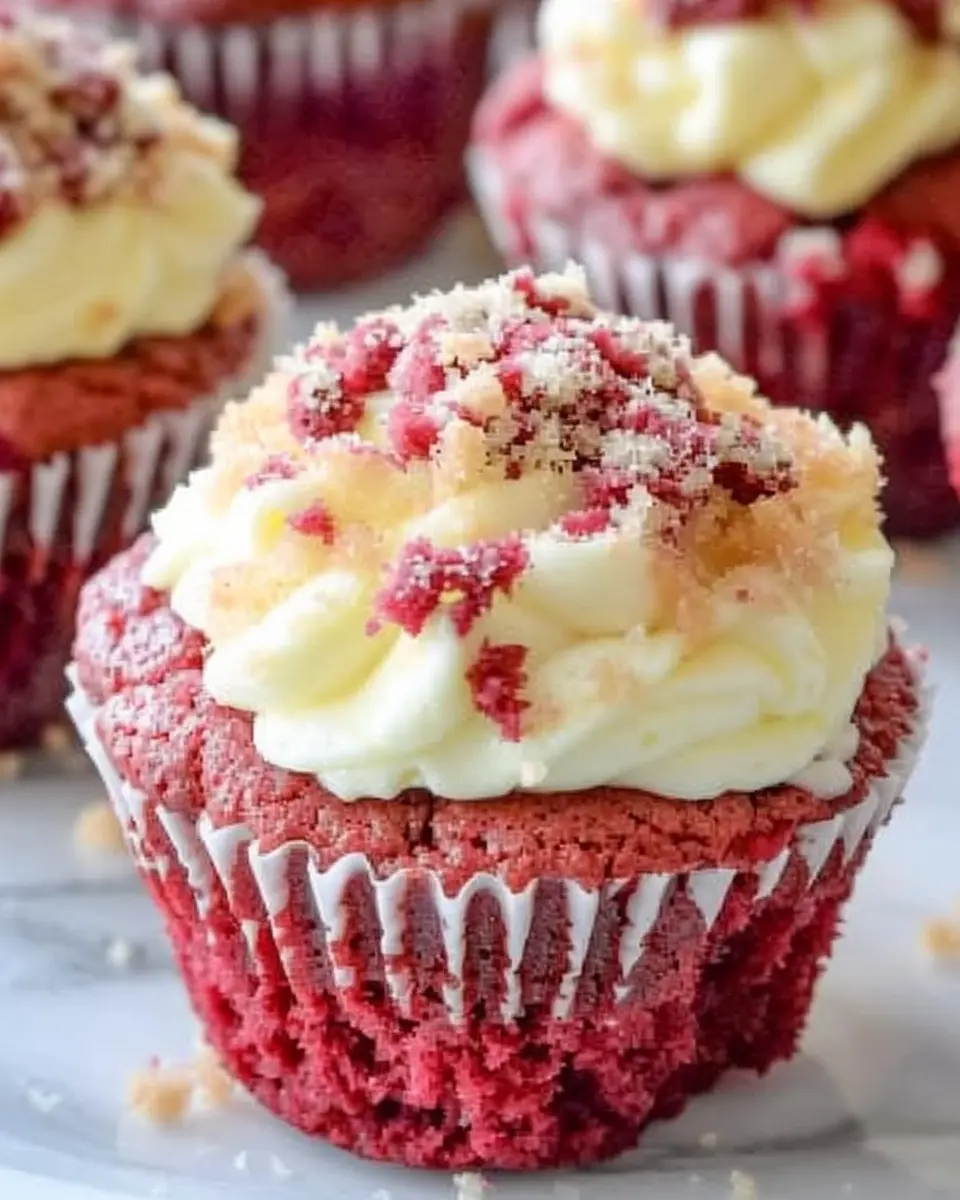
Irresistible Red Velvet Cupcakes
If you’re looking for a fun twist, consider transforming your small red velvet cake into adorable cupcakes! The baking time is shorter, allowing for a quicker treat. Simply pour your red velvet batter into a cupcake tray, filling each cup about two-thirds full. Bake for about 15-20 minutes, and you’ll have a batch of moist, fluffy red velvet cupcakes perfect for a gathering or casual dessert. Top them with classic cream cheese frosting or even a whipped vanilla icing for an extra touch!
Delicious Gluten-Free Red Velvet Cake
For those needing a gluten-free option, don’t fret! You can create a small red velvet cake using almond flour or a gluten-free blend. Simply substitute your flour while keeping the other ingredients the same. This will not only ensure your cake stays moist but also maintain that rich flavor we all love. Explore more about gluten-free baking here for tips on getting it just right.
Vegan Red Velvet Cake Alternatives
Want to indulge without animal products? Vegan alternatives are just as delicious! Substitute eggs with flaxseed meal or applesauce, and use dairy-free milk and vegetable oil in your small red velvet cake. The flavor remains just as decadent, and you’ll have a guilt-free dessert that everyone can enjoy. For great vegan baking ideas, check out resources like Plant-Based Baking.
No matter which variation you choose, each offers a unique twist on the beloved red velvet cake. What’s your favorite way to enjoy this classic treat?
Baking Tips for Small Red Velvet Cake
Key Tips for a Perfect Bake
When making a small red velvet cake, a few key tips can make all the difference! First, ensure your ingredients are at room temperature; this helps them incorporate smoothly for a lighter texture. Use high-quality cocoa powder and red food coloring for that vibrant hue and rich flavor. Be careful not to overmix your batter; gentle folding is crucial to maintaining the cake’s moistness. Also, check the doneness with a toothpick—it should come out with a few moist crumbs, not clean, to guarantee that perfect, tender bite.
Lastly, remember to let your cake cool completely before frosting. This step not only prevents the frosting from melting but also enhances the overall presentation. For more baking insights, consider checking out King Arthur Baking.
Storage Tips for Leftover Cake
Storing a small red velvet cake correctly ensures you can enjoy it for days to come! Wrap it tightly in plastic wrap or place it in an airtight container to keep it moist. If you plan to keep it longer than a few days, consider freezing slices wrapped individually. To enjoy later, simply thaw at room temperature or pop it in the microwave for a few seconds. Remember, chilled cakes can also be delightful—especially for a quick dessert fix!
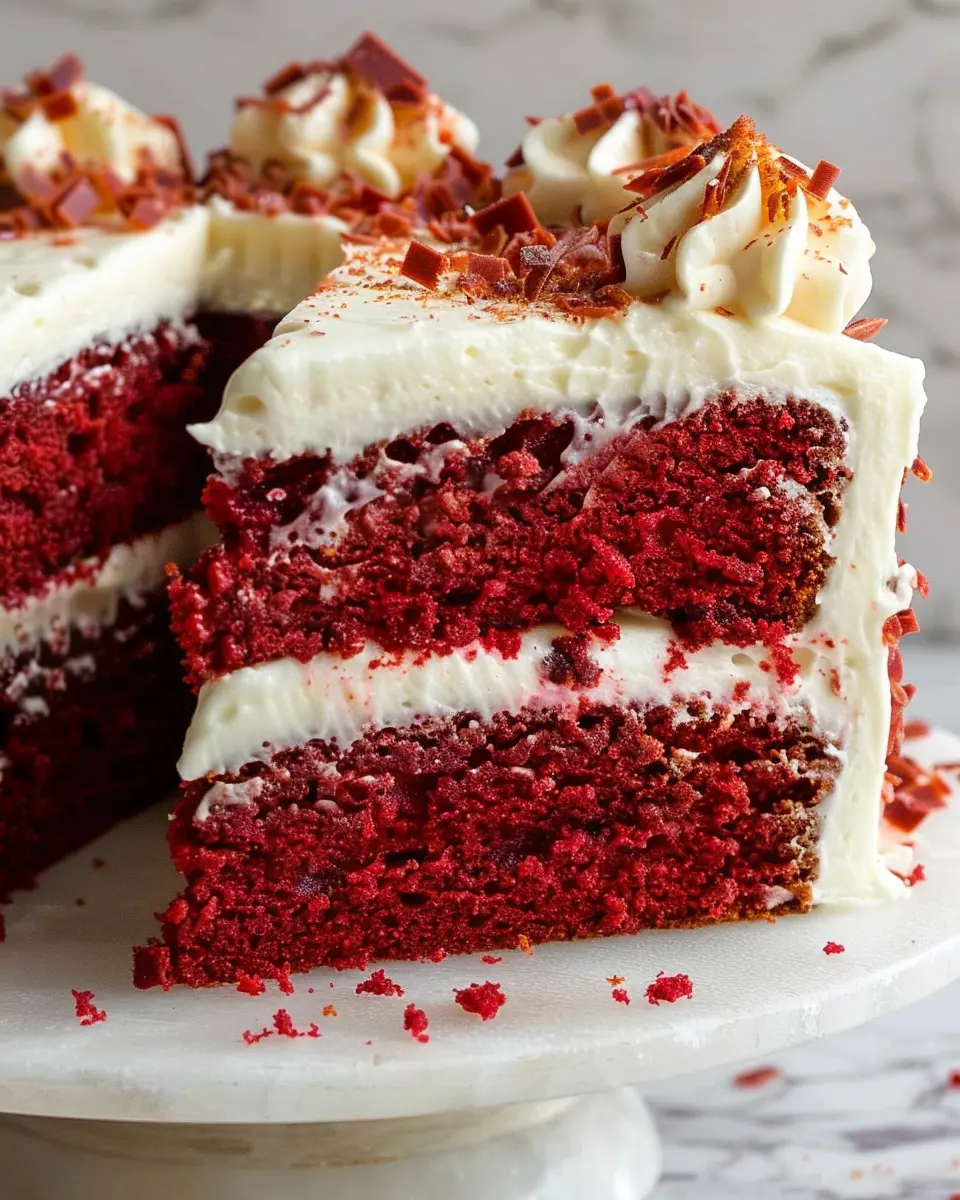
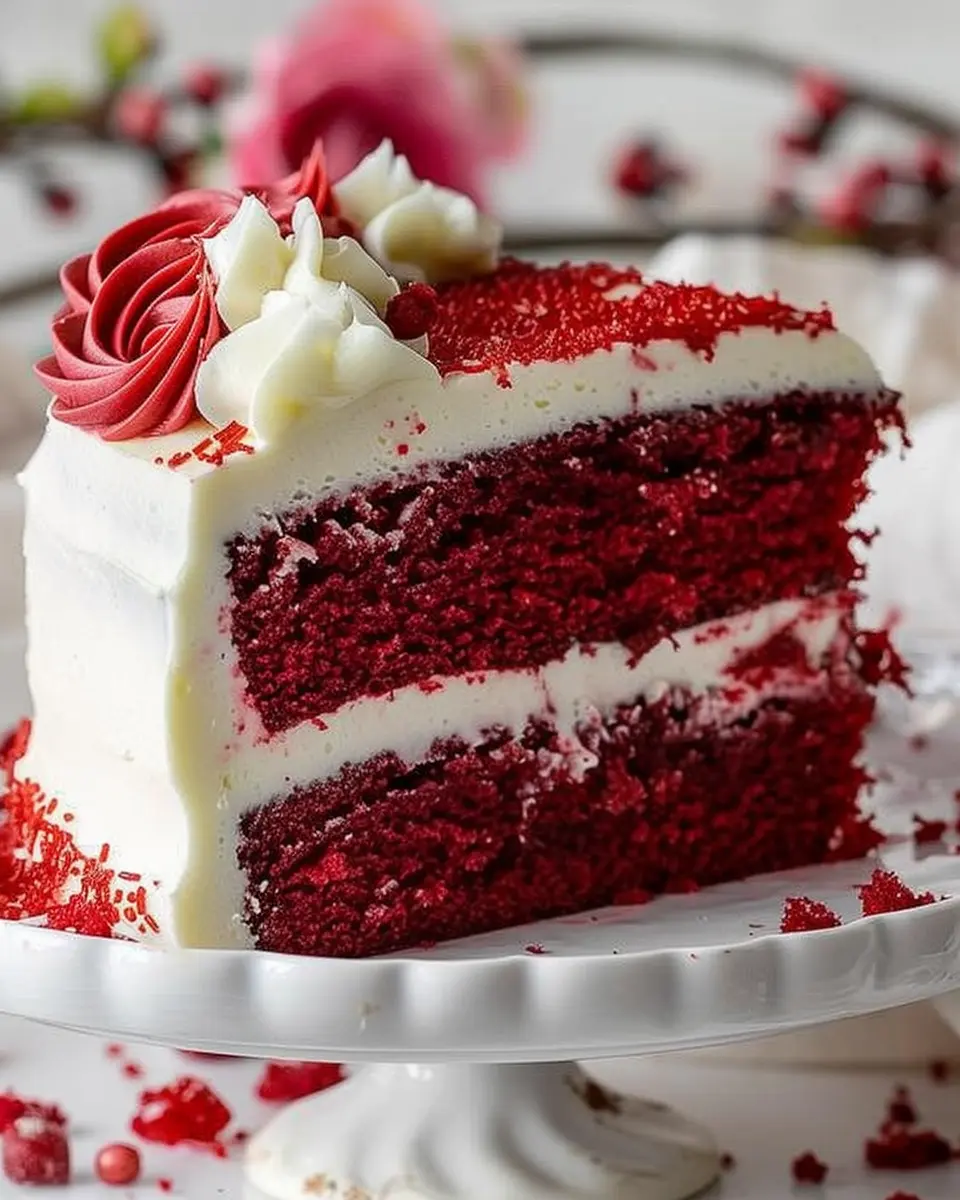
Serving Suggestions for Small Red Velvet Cake
When it comes to enjoying your small red velvet cake, there are numerous ways to elevate its presentation and flavor. Whether it’s a casual gathering or a special celebration, these suggestions will enhance the experience.
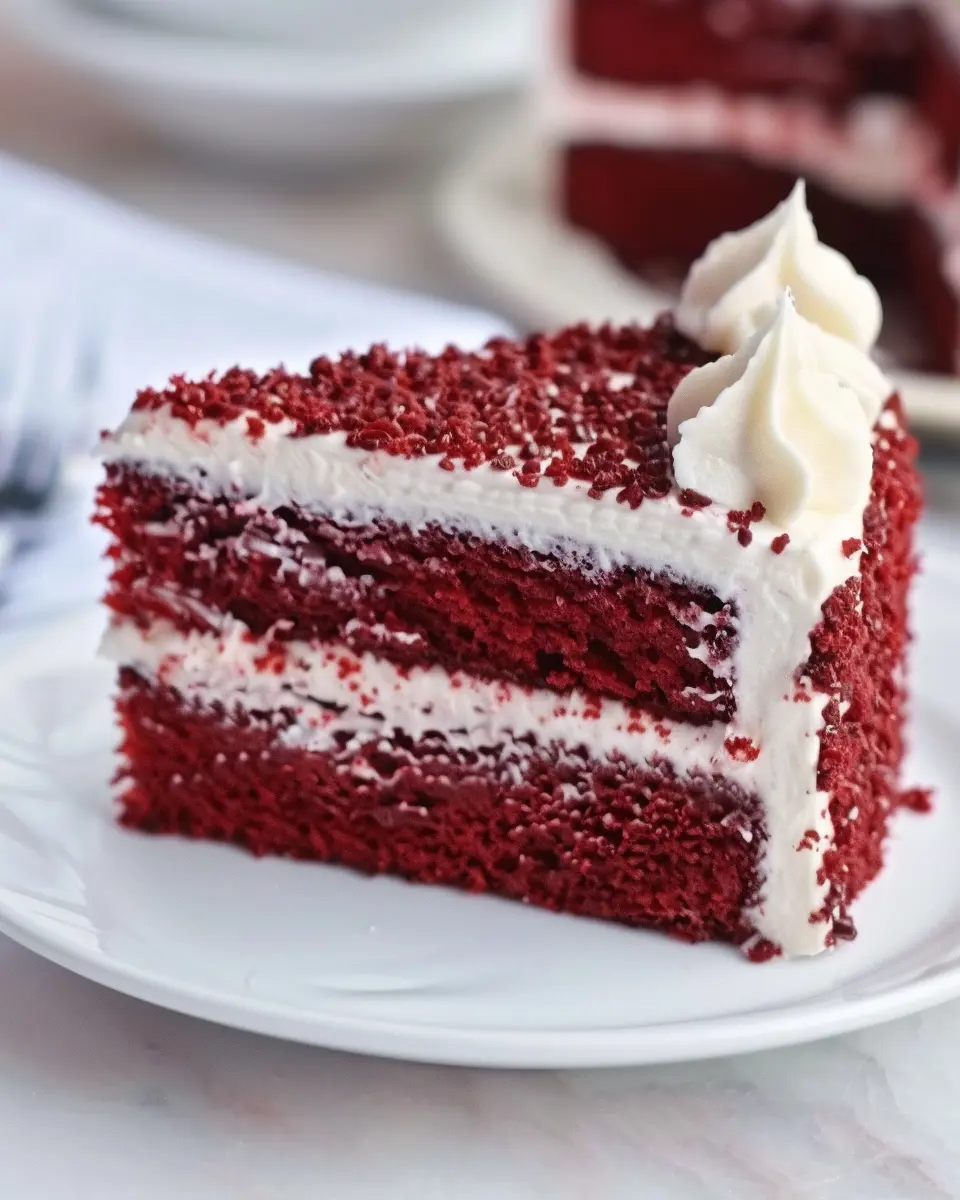
Classic Ways to Serve Red Velvet Cake
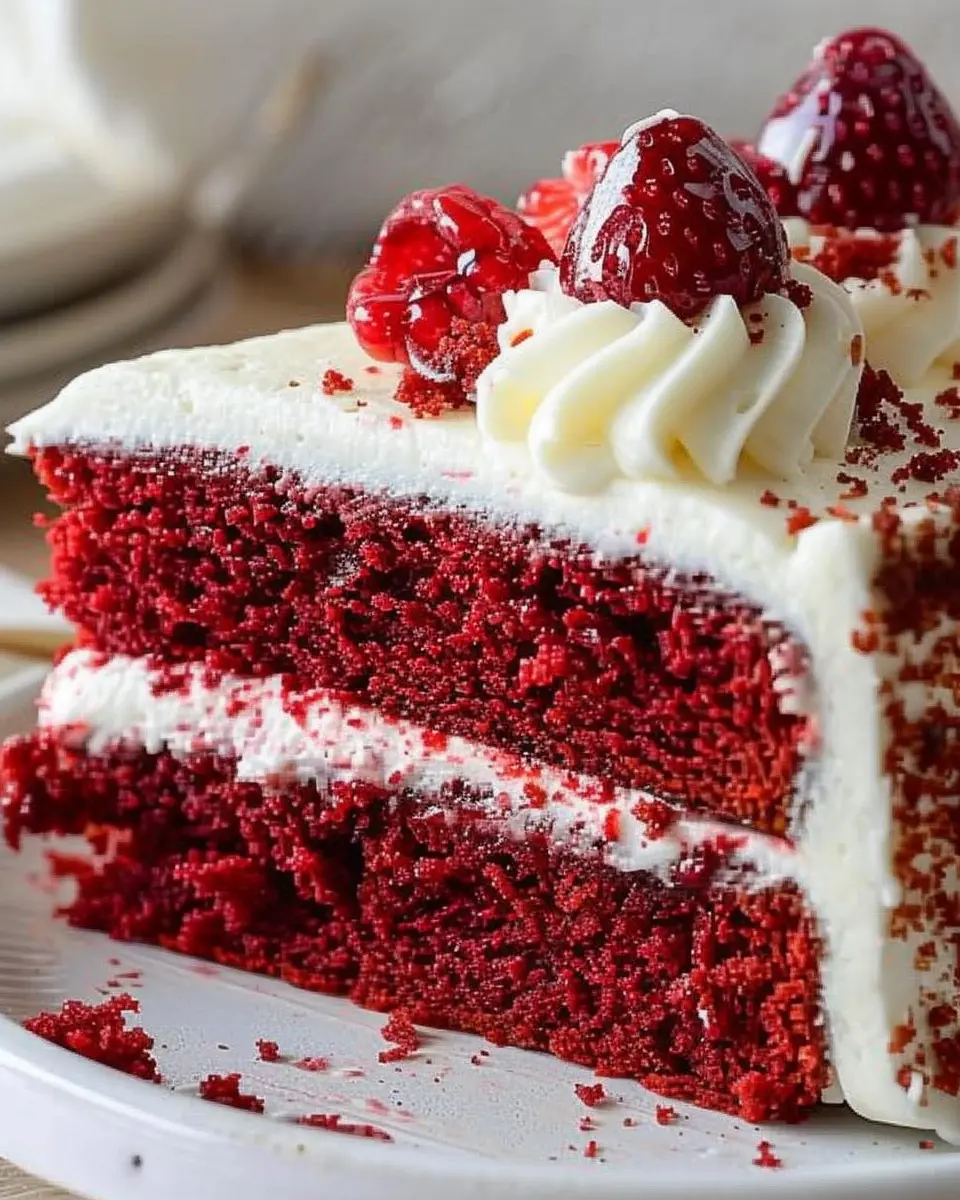
A classic choice is the traditional cream cheese frosting, which perfectly complements the cake’s rich texture and flavor. For a touch of elegance, consider:
- Garnishing with fresh berries: Strawberries and blueberries add a pop of color and a refreshing contrast.
- Drizzling chocolate sauce: This adds an extra indulgent layer that chocolate lovers can’t resist.
Creative Serving Ideas
Want to think outside the box? Try elevating your small red velvet cake in fun, unique ways:
- Mini Cake Parfaits: Layer crumbled cake with whipped cream and fruit in small jars for a delightful treat.
- Cake Pops: Shape leftover cake into balls, dip them in chocolate, and pop them onto sticks for a grab-and-go option that’s fun at parties.
Why not impress your guests with a uniquely served dessert? Check out these creative dessert ideas for more inspiration!
Time Breakdown for Small Red Velvet Cake
Preparation Time
Making a small red velvet cake is a delightful experience that requires about 15-20 minutes of preparation. This includes measuring your ingredients, mixing the wet and dry components, and prepping your cake pan. Don’t rush it! Take your time to enjoy the process—after all, baking is about creativity and fun.
Baking Time
Once you’ve prepared your batter, pop it into the oven, where it will bake for approximately 25-30 minutes. Keep an eye on it as it bakes; every oven is a bit different, and you want that perfect, moist texture.
Total Time
In total, you’re looking at about 45-50 minutes from start to finish. This time frame makes it easy to whip up this delicious treat even on a busy weeknight. If you’re curious about the science of baking, check out resources like Serious Eats for fascinating insights!
So, go ahead and treat yourself and your loved ones to a slice of your homemade small red velvet cake!
Nutritional Information for Small Red Velvet Cake
Calories per Serving
When indulging in a small red velvet cake, it’s essential to know how it fits into your daily caloric intake. Each slice typically contains around 250 calories, making it a delightful treat that won’t completely derail your healthy eating habits. Remember, moderation is key!
Other Nutritional Facts
In addition to calories, this scrumptious cake offers:
- Total Fat: 12g
- Saturated Fat: 5g
- Cholesterol: 50mg
- Sodium: 200mg
- Carbohydrates: 34g
- Dietary Fiber: 1g
- Sugars: 20g
- Protein: 3g
This small red velvet cake is also a fun way to celebrate special occasions or simply satisfy a sweet tooth without overdoing it. Always consider pairing your dessert with some fresh fruits and a dollop of Greek yogurt for added nutrients. For more nutrition insights, check out sites like the USDA FoodData Central where you can explore detailed breakdowns.
Balancing your diet doesn’t mean sacrificing enjoyment—find the sweet spot between health and indulgence!
FAQs about Small Red Velvet Cake
What Makes Red Velvet Cake Red?
The signature color of small red velvet cake comes from a combination of cocoa powder and a reaction between acidic ingredients like buttermilk or vinegar. This reaction intensifies the red hue! In some recipes, food coloring is also added for that vibrant, striking shade. If you’re aiming for a deep red, don’t hesitate to use a few drops of liquid red food coloring as a booster for that classic look.
Can I Substitute Ingredients?
Absolutely, feel free to customize your small red velvet cake! Here are a few substitution ideas:
- Flour: Whole wheat flour can replace all-purpose flour for a healthier twist. Just note that it may alter the texture slightly.
- Buttermilk: If you don’t have buttermilk, a mixture of milk and vinegar or lemon juice can work just as well.
- Butter: Vegetable oil is an excellent alternative if you prefer a moister cake.
Making substitutions allows you to play with flavors and dietary needs while still enjoying a delicious dessert. For more substitution tips, check out Serious Eats.
How Do I Store Leftover Cake?
Storing your small red velvet cake properly is key to keeping it fresh and delicious!
- Room Temperature: If you plan to eat it within a couple of days, store it in an airtight container at room temperature.
- Refrigerator: To keep it longer, place it in the fridge for up to a week. Just ensure it’s covered to maintain moisture.
- Freezer: For extended storage, wrap slices in plastic wrap and freeze. They can last up to three months. When ready to enjoy, thaw overnight in the refrigerator.
Now that you’re equipped with these FAQs, you’re even more prepared to make and enjoy your small red velvet cake! Happy baking!
Conclusion on Small Red Velvet Cake
Summarizing the Joy of Baking at Home
Baking a small red velvet cake isn’t just about following a recipe; it’s about embracing the joy of creating something delicious from scratch. There’s something uniquely satisfying about measuring flour, whipping cream, and pouring love into each layer.
As you enjoy your perfectly baked cake, consider how simple ingredients can transform into a delightful dessert that’s perfect for any occasion. Whether you’re celebrating a birthday or looking to impress friends at a gathering, this cake fits the bill. So roll up your sleeves and get baking—after all, the sweetest memories are made in your own kitchen. For more baking inspiration, check out this guide on baking fundamentals at King Arthur Baking.
PrintSmall Red Velvet Cake Recipe: Indulgent Treat for Any Occasion
This small red velvet cake is a delightful treat perfect for any celebration. Its rich texture and vibrant color make it a standout dessert.
- Prep Time: 20 minutes
- Cook Time: 30 minutes
- Total Time: 50 minutes
- Yield: 8 servings
- Category: Desserts
- Method: Baking
- Cuisine: American
- Diet: Vegetarian
Ingredients
- 1 1/2 cups all-purpose flour
- 1 cup granulated sugar
- 1/2 cup unsweetened cocoa powder
- 1 teaspoon baking soda
- 1/2 teaspoon salt
- 1 cup vegetable oil
- 1 cup buttermilk
- 2 large eggs
- 2 tablespoons red food coloring
- 1 teaspoon vanilla extract
- 1 teaspoon white vinegar
Instructions
- Preheat the oven to 350°F (175°C) and grease two 6-inch round cake pans.
- In a large bowl, sift together the flour, sugar, cocoa powder, baking soda, and salt.
- In another bowl, whisk together the oil, buttermilk, eggs, food coloring, vanilla, and vinegar.
- Combine the wet and dry ingredients and mix until smooth.
- Pour the batter evenly into the prepared pans.
- Bake for 25-30 minutes or until a toothpick inserted in the center comes out clean.
- Let the cakes cool in the pans for 10 minutes, then transfer to wire racks to cool completely.
Notes
- For an extra indulgent cake, frost with cream cheese icing.
- Ensure all ingredients are at room temperature for the best texture.
Nutrition
- Serving Size: 1 slice
- Calories: 280
- Sugar: 18g
- Sodium: 300mg
- Fat: 14g
- Saturated Fat: 2g
- Unsaturated Fat: 10g
- Trans Fat: 0g
- Carbohydrates: 36g
- Fiber: 1g
- Protein: 3g
- Cholesterol: 30mg