Introduction to Single Layer Red Velvet Cake
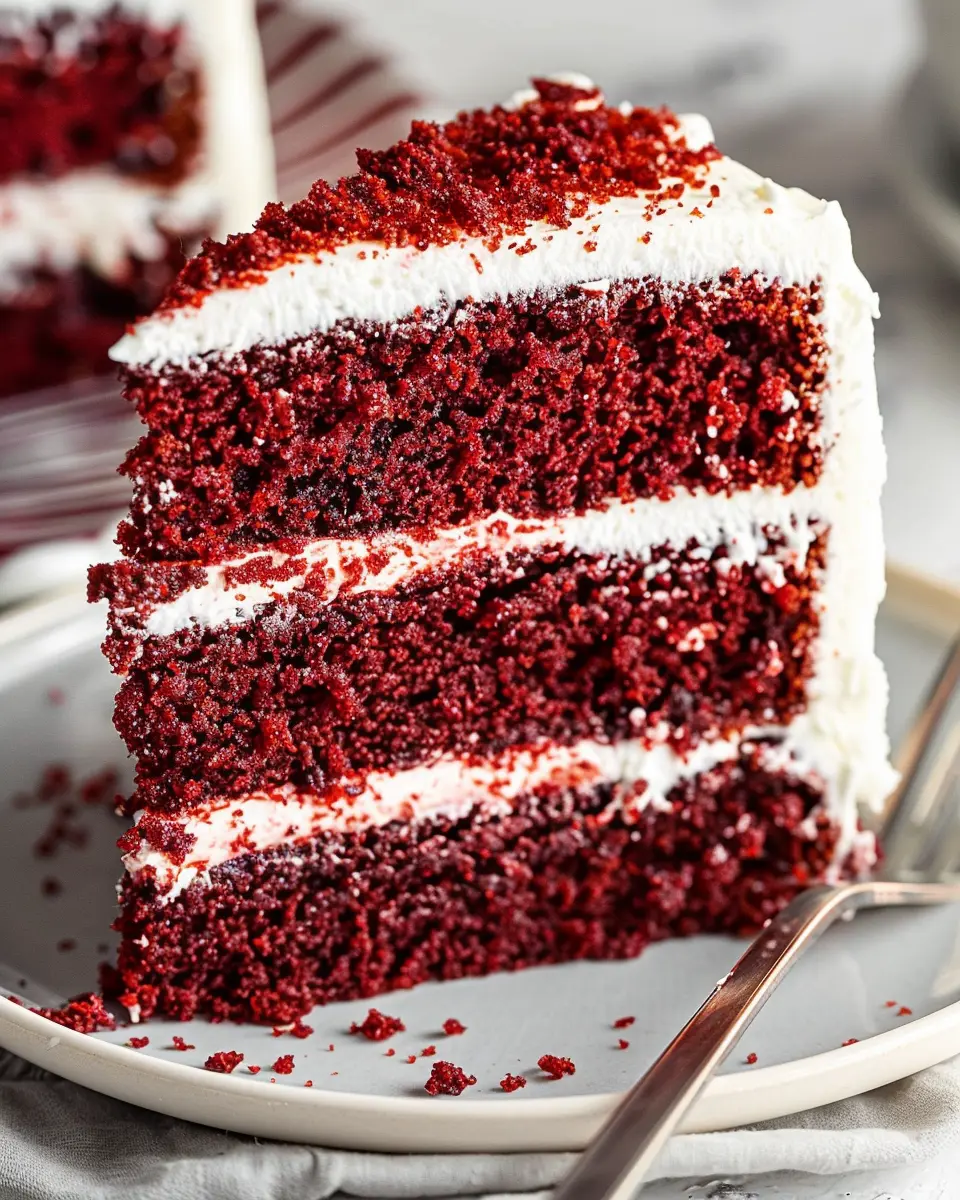
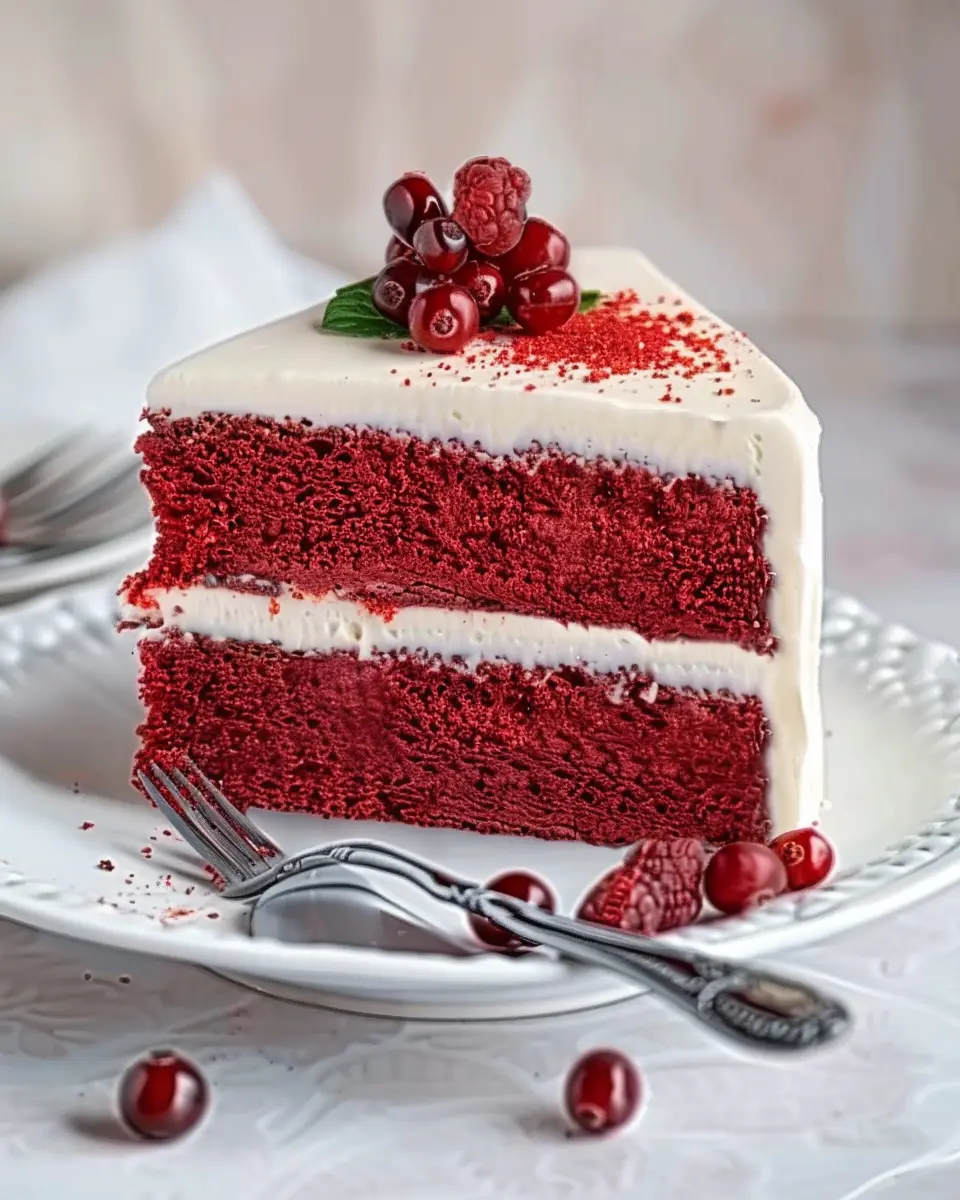
When it comes to celebrating special occasions, few desserts hold a candle to the irresistible charm of a single layer red velvet cake. This cake is not only about its eye-catching red color; it’s a delightful blend of flavors and textures that has captured the hearts of dessert lovers everywhere. From birthdays to anniversaries, this cake adds a touch of elegance to any gathering.
What makes single layer red velvet cake so special?
The magic of a single layer red velvet cake lies in its rich history and unique ingredients. Traditionally, the vibrant red hue is achieved through a chemical reaction between cocoa powder and acidic ingredients like buttermilk and vinegar. This reaction not only gives the cake its distinct color but also contributes to its moist and tender crumb. It’s no wonder the cake is often described as a true classic in American baking.
Here are a few key elements that make this cake stand out:
- Flavor Profile: Unlike standard chocolate cakes, which can be overwhelmingly sweet, a red velvet cake has a subtly chocolatey flavor, complemented by hints of vanilla and buttermilk. This combination creates a more complex and satisfying taste.
- Versatility: Whether adorned with classic cream cheese frosting or a smooth buttercream, the single-layer version of this cake remains incredibly elegant without being overwhelmingly heavy. Its simplicity appeals to both seasoned bakers and novice cooks alike.
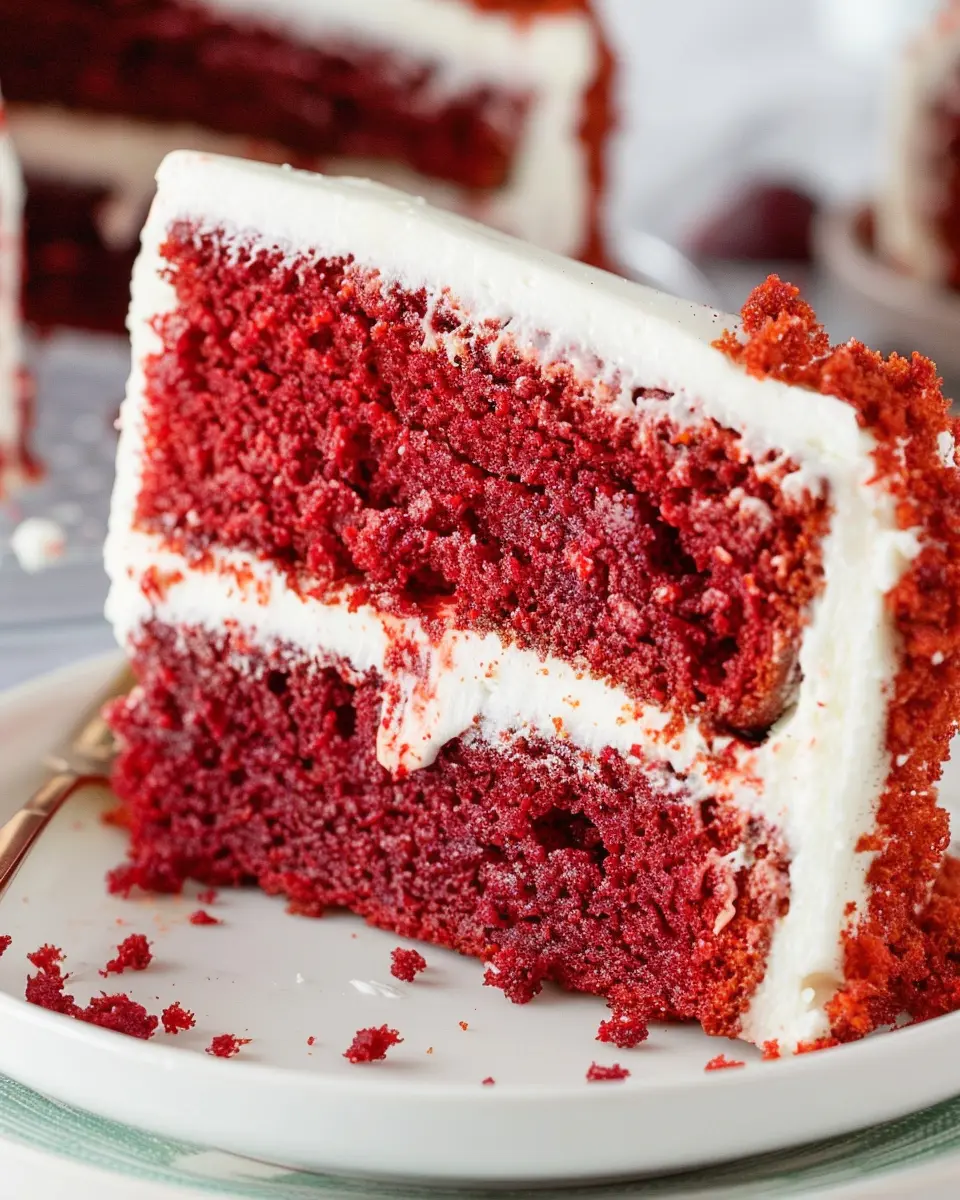
- Visual Appeal: The striking contrast of the red cake against white frosting makes for a stunning presentation. Perfect for Instagram or simply to impress guests, this cake is a showstopper.
If you’re curious about its origins, the red velvet cake has roots that stretch back to the 1920s and has evolved through the decades, with some claiming it first gained fame in the restaurant world through the Waldorf Astoria Hotel. The balance of flavor in this cake can make it a great dessert for any occasion, and a delightful way to indulge your sweet tooth.
As you embark on your baking journey, keep in mind that this recipe is not just about following steps; it’s about creating a beautiful, delicious treat that’s meant to be shared. Let’s get started on your single layer red velvet cake adventure!
Ingredients for Single Layer Red Velvet Cake
Creating a single layer red velvet cake that dazzles your friends and family starts with the right ingredients. This beautiful cake is not only a feast for the eyes but also a delight for your taste buds. Here’s what you need:
Cake Base
- 2 cups all-purpose flour: The foundation of your cake for the perfect texture.
- 1 cup granulated sugar: Sweetness is key!
- 1 teaspoon baking soda: To give your cake that lovely lift.
- 1 teaspoon salt: Enhances the flavors.
- 1 tablespoon cocoa powder: Just a hint for that classic red velvet flavor.
- 1 cup vegetable oil: This keeps your cake moist and fluffy.
- 1 cup buttermilk: Adds a rich creaminess that’s hard to resist.
- 2 large eggs: For structure and richness.
- 2 tablespoons red food coloring: The star of the show! Opt for gel for better color.
- 1 teaspoon vanilla extract: For a pleasant aroma.
Frosting Essentials
- 8 oz cream cheese, softened: This will be your frosting base.
- 1/2 cup unsalted butter, softened: Adds richness to your frosting.
- 4 cups powdered sugar: For sweetness and a smooth texture.
- 1 teaspoon vanilla extract: A must for flavor!
Don’t forget to check your pantry for these ingredients before you start! For more baking tips and ingredient insights, consider visiting resources like Baking Basics or The Kitchn. Happy baking!
Preparing Single Layer Red Velvet Cake
Baking a single layer red velvet cake can be an incredibly rewarding experience, whether you’re a novice in the kitchen or a seasoned baker. This vibrant and delicious cake is perfect for celebrations or simply as a treat to satisfy your sweet tooth. Let’s dive into the process step by step!
Gather Your Ingredients
To start, you’ll need to gather all your ingredients. Having everything ready not only streamlines the process but also ensures you won’t forget anything crucial. Here’s what you’ll need:
-
Dry Ingredients:
-
1 ½ cups all-purpose flour
-
1 cup granulated sugar
-
1 tsp baking powder
-
1 tsp baking soda
-
1 tsp cocoa powder
-
½ tsp salt
-
Wet Ingredients:
-
1 cup vegetable oil
-
1 cup buttermilk
-
2 large eggs
-
2 tbsp red food coloring
-
1 tsp vanilla extract
-
1 tsp white vinegar
-
Frosting:
-
8 oz cream cheese, softened
-
½ cup unsalted butter, softened
-
4 cups powdered sugar
-
1 tsp vanilla extract
Make sure your eggs and butter are at room temperature for easier blending. You can find more tips about ingredient preparation at King Arthur Baking.
Mix the Dry Ingredients
In a large mixing bowl, sift together the dry ingredients: flour, sugar, baking powder, baking soda, cocoa powder, and salt. Sifting helps eliminate clumps and ensures a light, fluffy texture in your single layer red velvet cake.
Stir the ingredients gently to combine them thoroughly. This step is crucial because it ensures even distribution of the leavening agents, contributing to a uniform rise during baking.
Blend the Wet Ingredients
In a separate bowl, blend your wet ingredients: vegetable oil, buttermilk, eggs, red food coloring, vanilla extract, and white vinegar. Use a whisk or electric mixer until the mixture is well combined and smooth. The vibrant red color will make you even more excited about how this cake will turn out!
The combination of vinegar and baking soda is what gives red velvet its unique texture, creating a beautifully moist cake.
Combine Wet and Dry Ingredients
Once both mixtures are ready, it’s time to combine them! Gradually add the wet mixture to the dry ingredients, stirring gently until just combined. Be careful not to overmix; it’s better to leave a few lumps than to end up with a dense cake.
Pour the batter into a greased 9-inch round cake pan. You might want to use parchment paper at the bottom for easy removal later on.
Bake the Cake
Preheat your oven to 350°F (175°C) before you start mixing. Once your batter is ready, place it in the oven and bake for about 25-30 minutes. To check for doneness, insert a toothpick into the center of the cake; it should come out clean with a few crumbs.
While it’s baking, you can take some time to clean up your workspace or prepare for the frosting. Think about what fun decorations you might want to add!
Cool and Frost the Cake
After baking, remove the cake from the oven and place it on a wire rack to cool in the pan for about 10 minutes. Then, carefully turn it out onto the rack to cool completely.
Once your cake has cooled, it’s time to whip up the frosting. In a bowl, beat together the cream cheese and butter until smooth. Gradually add the powdered sugar and vanilla, mixing until fluffy.
Frost the top of your single layer red velvet cake, allowing some icing to flow down the sides for a beautiful finish. If you’re feeling creative, you can top it with sprinkles or toasted nuts.
With these steps completed, you’re ready to slice into your delicious cake. Enjoy the compliments that are sure to come your way!
Variations on Single Layer Red Velvet Cake
Exploring variations on your classic single layer red velvet cake can turn a simple dessert into something truly special. Let’s dive into two delightful twists that will elevate your cake game!
Tropical twist: Adding coconut
Imagine sinking your fork into a slice of single layer red velvet cake that’s infused with the bright, tropical flavors of coconut. To achieve this, simply incorporate shredded coconut into the batter. About one cup should do the trick — it not only adds texture but also brings a subtle sweetness that complements the cake’s rich flavors. When it comes to frosting, consider whipping up a coconut cream cheese frosting. Just mix coconut cream into your usual cream cheese frosting for an extra tropical punch. Trust me; your taste buds will be doing a happy dance!
For inspiration on flavor combinations, check out sources like Epicurious and Food Network.
Chocolate lovers: Swapping in rich chocolate frosting
If you’re a chocolate aficionado, you can easily transform your single layer red velvet cake into a delectable chocolatey dream. Instead of the traditional cream cheese frosting, opt for a rich, velvety chocolate frosting. To make it, melt high-quality chocolate and blend it with butter and powdered sugar for an indulgent topping. If you want to level up, consider adding a sprinkle of cocoa powder to the cake mix itself. This will give your cake an added depth that perfectly balances the red velvet’s tanginess.
With these variations, your single layer red velvet cake will never be boring. Whether you go tropical or chocolate, you’ll impress anyone lucky enough to share a slice with you! Happy baking!
Baking notes for Single Layer Red Velvet Cake
Tips for achieving the perfect texture
To create an irresistible single layer red velvet cake, start with room temperature ingredients. This step helps to incorporate air into your batter for a light and fluffy texture. Also, consider using buttermilk instead of regular milk; it adds that distinct tang and moisture. Measuring your flour correctly is essential—too much can lead to a dense cake. Always spoon your flour into the measuring cup and level it off gently.
Another tip: avoid overmixing the batter. Folding in the dry ingredients just until combined will ensure a tender crumb. For a beautiful finish, let the cake cool completely before frosting. This prevents the cream cheese frosting from melting and maintains that gorgeous look.
Common mistakes to avoid
One common mishap is not checking your baking powder’s freshness. An expired leavening agent affects the rise of your single layer red velvet cake. Ensure your oven is preheated fully before baking—this guarantees even cooking. Additionally, don’t forget to use a dark pan if you want those edges to bake just right; light pans can result in underbaked sides.
Finally, don’t skip the vinegar and baking soda reaction. This unique combination provides that signature fluffy texture and delectable taste, so be sure to add it as directed! For more tips, consider checking out resources like BBC Good Food for baking insights.
Serving Suggestions for Single Layer Red Velvet Cake
Pairing with Ice Cream
A slice of single layer red velvet cake deserves a delightful pairing, and what better companion than a scoop of creamy ice cream? The rich flavor of vanilla or a tangy cream cheese ice cream beautifully complements the cake’s moist texture and subtle cocoa notes. You could even try a scoop of toasted marshmallow if you’re feeling adventurous!
- Flavor Combos: Consider pairing your cake with:
- Vanilla bean
- Cream cheese
- Chocolate fudge
This combination not only elevates your dessert experience but also brings a delightful contrast of temperatures.
Creative Presentation Ideas
When it comes to presenting your single layer red velvet cake, creativity can go a long way. Here are some fun ideas to impress your friends and family:
- Layered Decor: Add dollops of whipped cream and fresh berries on top for a pop of color and freshness.
- Plate it Up: Serve slices on vintage floral plates to give it a homey, rustic vibe.
- Fun Toppers: Use edible flowers or chocolate shavings for an elegant touch.
For more tips on dessert presentation, check out resources from Martha Stewart.
These simple ideas can make your dessert not just tasty but also a real showstopper at any gathering!
Time breakdown for Single Layer Red Velvet Cake
When you’re ready to whip up a delightful single layer red velvet cake, knowing the timeline can really help.
Preparation time
Getting started takes about 20 to 25 minutes. This includes gathering all your ingredients, mixing your batter, and preparing your baking pan. Handy tip: mise en place, or setting up your workspace with everything in reach, can speed up this process!
Baking time
Once your batter is ready, pop it into the oven for about 25 to 30 minutes. Keep an eye on your cake as it bakes, too! The aroma of chocolate and vanilla will have you counting down the seconds.
Total time
All said and done, you’ll need about an hour to an hour and a half from preparation to the time your gorgeous single layer red velvet cake is ready to be frosted and savored. For detailed frosting tips, check out our frosting guide.
Whether you’re making this cake for a birthday, an anniversary, or just because it’s Tuesday, being mindful of your time can make the experience all the more enjoyable!
Nutritional Facts for Single Layer Red Velvet Cake
When indulging in a slice of single layer red velvet cake, it’s helpful to know what you’re treating yourself to. Here’s a brief look at the nutritional content that can keep you aware while you enjoy every bite.
Calories per Serving
On average, one slice of single layer red velvet cake contains about 300-350 calories. This can vary based on specific ingredients and portion sizes, but it’s a good ballpark figure as you plan your dessert.
Key Nutrients
Beyond the delightful flavor, here are some essential nutrients you might find in your slice:
- Carbohydrates: Around 40g, providing a quick energy boost.
- Fat: Approximately 15g, which gives the cake a rich, moist texture.
- Protein: Roughly 3g, essential for tissue repair and muscle growth.
- Calcium: A nice source for strong bones and teeth.
For more detailed nutritional insights, consider checking sources like the USDA FoodData Central, which can provide a wealth of information on various ingredients used in cakes.
Understanding these facts allows you to enjoy your single layer red velvet cake guilt-free, making it even sweeter!
FAQs about Single Layer Red Velvet Cake
How can I store leftover cake?
Storing leftover single layer red velvet cake is easy! Keep your cake in an airtight container at room temperature for up to 2 days. If you want to keep it fresh longer, place it in the fridge, where it can last about a week. Just be sure to wrap it well with plastic wrap to prevent it from drying out. When you’re ready to enjoy it again, let it come to room temperature for the best flavor and texture.
Can I make this cake ahead of time?
Absolutely! You can bake your single layer red velvet cake one day in advance. Just be sure to let it cool completely before wrapping it and storing it in the fridge. If you want to frost it later, you can also store the cake layers separately. For an extra boost of flavor, consider adding the frosting the day you plan to serve it. This way, you can impress your guests with that just-frosted look (and taste)!
What’s the best way to achieve a vibrant red color?
The key to a vibrant red color in your single layer red velvet cake is using high-quality red food coloring. Many bakers recommend using gel food coloring instead of liquid for a more intense hue, as it doesn’t alter the batter’s consistency. (You can find more tips on achieving that perfect color in this Thrifty Fun article!) Mixing your food coloring into the wet ingredients before incorporating them into the flour can also help achieve a uniform color.
With these tips, you’ll be well on your way to creating not just any cake, but a stunning single layer red velvet cake that is sure to impress!
Conclusion on Single Layer Red Velvet Cake
In summary, a single layer red velvet cake is a charming dessert that marries deep flavors with a stunning appearance. Perfect for those who want a delectable treat without the fuss of a multi-layered cake, this recipe shines in its simplicity and elegance. The vibrant color and the velvety texture not only make it attractive but also incredibly satisfying to eat.
Whether you’re celebrating a birthday or simply indulging on a cozy weekend, this cake is bound to impress. Don’t hesitate to try different frosting options or toppings to make it uniquely yours! For more ideas, check out Baker’s Union for expert tips, or visit The Cake Blog for creative variations. Enjoy every bite!
PrintSingle Layer Red Velvet Cake: The Best Easy Recipe Ever
A rich and moist single layer red velvet cake that’s perfect for any occasion.
- Prep Time: 15 minutes
- Cook Time: 30 minutes
- Total Time: 45 minutes
- Yield: 8 servings
- Category: Dessert
- Method: Baking
- Cuisine: American
- Diet: Vegetarian
Ingredients
- 1 ½ cups all-purpose flour
- 1 cup vegetable oil
- 1 cup granulated sugar
- 1 large egg
- 1 tablespoon cocoa powder
- 1 cup buttermilk
- 1 tablespoon red food coloring
- 1 teaspoon vanilla extract
- 1 teaspoon baking soda
- ½ teaspoon salt
- 1 teaspoon white vinegar
Instructions
- Preheat your oven to 350°F (175°C) and grease an 8-inch round cake pan.
- In a mixing bowl, combine the flour, sugar, cocoa powder, baking soda, and salt.
- In another bowl, whisk together the oil, buttermilk, egg, food coloring, and vanilla extract.
- Gradually add the wet ingredients to the dry ingredients until smooth.
- Stir in the vinegar and mix well.
- Pour the batter into the prepared cake pan.
- Bake for 25-30 minutes or until a toothpick comes out clean.
- Allow the cake to cool before frosting it with cream cheese icing.
Notes
- For an extra moist cake, wrap it in plastic wrap while cooling.
- Serve with fresh berries for added flavor.
Nutrition
- Serving Size: 1 slice
- Calories: 350
- Sugar: 20g
- Sodium: 200mg
- Fat: 15g
- Saturated Fat: 3g
- Unsaturated Fat: 10g
- Trans Fat: 0g
- Carbohydrates: 45g
- Fiber: 1g
- Protein: 3g
- Cholesterol: 30mg