Introduction to Red Velvet Cake
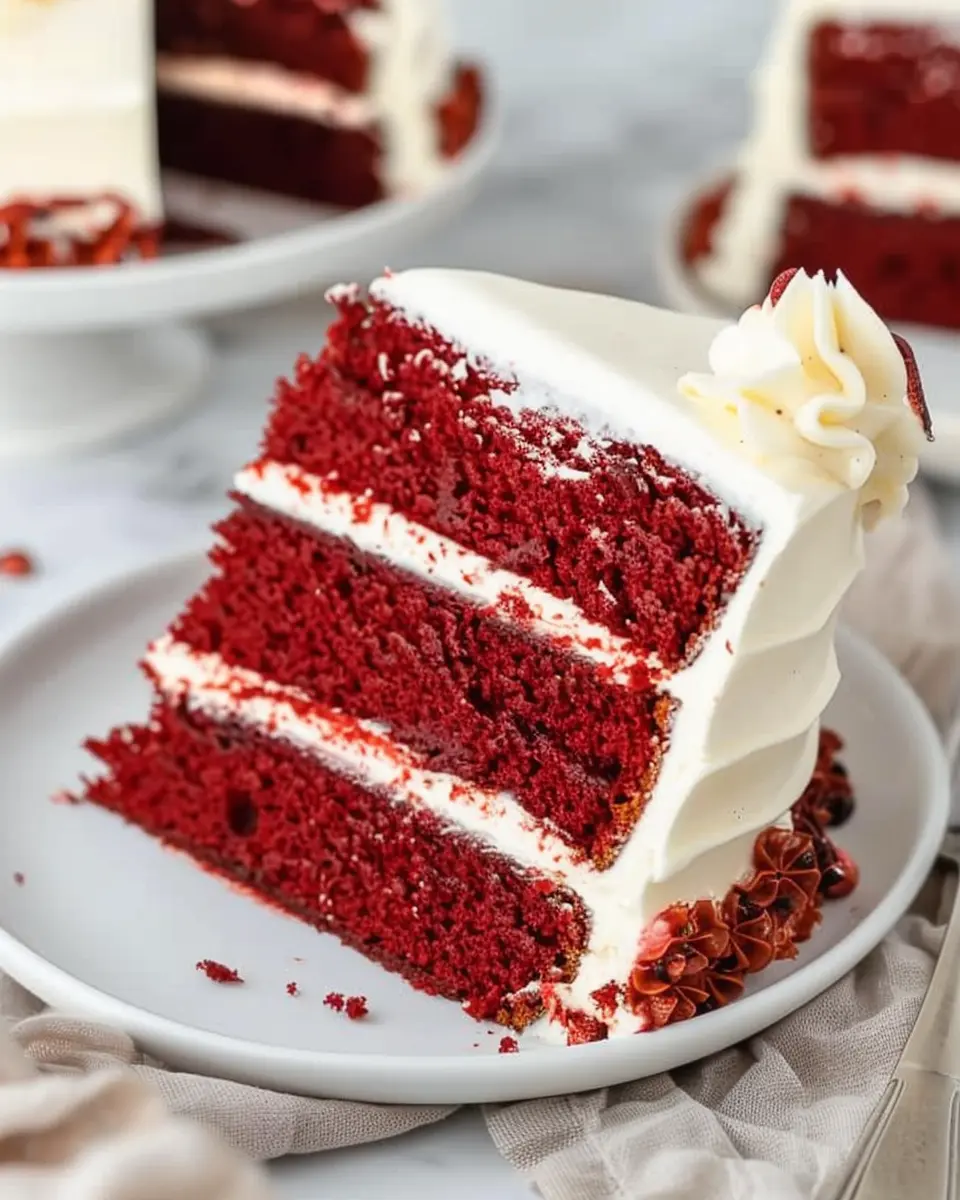
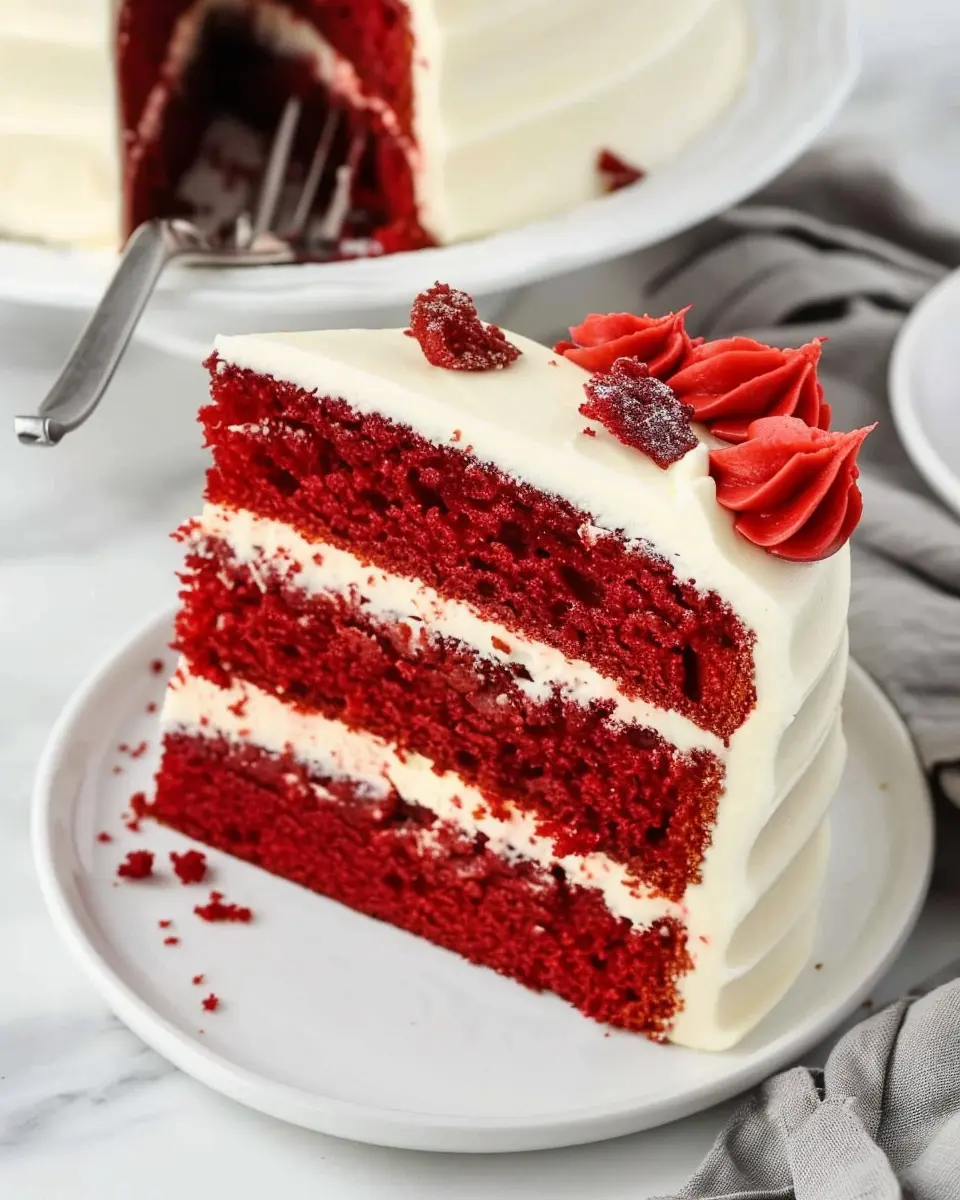
Red velvet cake is more than just a dessert; it’s an experience that has captured the hearts of many. The striking deep red hue contrasts beautifully with its rich cream cheese frosting, offering visual and taste appeal in every bite. But what makes this cake so special and beloved?
Why is red velvet cake so beloved?
The love for red velvet cake stems from its unique flavor profile, which is a delightful balance of cocoa, buttermilk, and a hint of vanilla. Unlike other chocolate cakes, the subtle cocoa flavor allows the smooth, rich cream cheese frosting to shine through, creating a taste sensation that’s both sophisticated and comforting. Many people cherish it not just for its taste but also for the memories attached to it. It’s often seen at weddings, birthdays, and special gatherings—each slice evoking fond moments and celebrations.
The history of red velvet cake is equally intriguing. With roots tracing back to the 1800s, some suggest that its origin is tied to various Southern recipes. Commonly found in diner menus, this cake underwent a resurgence in popularity in the 2000s, thanks in part to social media and pop culture, making it a favorite among younger generations. This cake has become a symbol of indulgence, representing not just a dessert but a slice of nostalgia.
But it’s not just about the looks and flavor; there’s also a scientific angle that might surprise you. The vibrant red color comes from the reaction between cocoa powder and acidic ingredients like buttermilk and vinegar, which also enhance its moistness and tenderness. This chemistry not only creates an eye-catching dessert but also contributes to its unforgettable texture.
If you’re looking to add an irresistible touch to your next gathering, consider making your own red velvet cake. With its rich history and exquisite flavor, it’s sure to make any occasion feel special. Plus, the process of baking can be quite therapeutic, offering you a chance to unwind while creating something delicious. Ready to dive in? Let’s get baking! For more tips and the full recipe, check out this guide on baking essentials.
Ingredients for Red Velvet Cake
Creating the perfect red velvet cake starts with the right ingredients. Here’s a friendly rundown of what you’ll need to whip up this delightful dessert.
Essential Dry Ingredients
- All-purpose flour: 2 ½ cups
- Granulated sugar: 1 ½ cups
- Cocoa powder: 1 tablespoon, for that hint of chocolate
- Salt: 1 teaspoon
- Baking soda: 1 teaspoon
Key Wet Ingredients
- Vegetable oil: 1 cup (provides moistness)
- Buttermilk: 1 cup (crucial for that tender crumb)
- Eggs: 2 large, at room temperature
- Red food coloring: 1 tablespoon (the star of our cake)
- Vanilla extract: 1 teaspoon
- White vinegar: 1 teaspoon (to react with the baking soda and achieve fluffy texture)
Baking Essentials
- Cream cheese: For luscious frosting
- Unsalted butter: ½ cup (to make that frosting creamy)
By using these ingredients, you’ll create a red velvet cake that’s not only visually stunning but also delectable. If you’re curious about variations or more tips, check out this informative guide on cake baking techniques here. Ready to dive into the delicious world of baking? Let’s get started!
Preparing Red Velvet Cake
Baking a rich and decadent red velvet cake can be both a rewarding and enjoyable experience. This beloved dessert boasts a striking red color, traditionally complemented by a creamy frosting that elevates its already alluring taste. Here’s a step-by-step guide to help you prepare the cake, ensuring you’re well-equipped to impress your friends and family. Let’s dive into the delightful world of red velvet cake!
Gather and prepare your ingredients
Before you embark on this baking adventure, it’s crucial to gather all your ingredients. Having everything on hand not only streamlines the process but also prevents any last-minute dashes to the grocery store.
Here’s what you’ll need:
- 2 ½ cups all-purpose flour
- 1 ½ cups granulated sugar
- 1 teaspoon baking soda
- 1 teaspoon salt
- 1 teaspoon cocoa powder
- 1 ½ cups vegetable oil
- 1 cup buttermilk (or you can make a quick substitute with milk and vinegar)
- 2 large eggs
- 2 tablespoons red food coloring
- 1 teaspoon vanilla extract
- 1 teaspoon white vinegar
And don’t forget your baking spray or parchment paper for easy removal later! This list will set you up for success, so take a moment to ensure you have everything prepared.
Create the dry ingredient mix
Now that you have your ingredients ready, it’s time to create the dry ingredient mix. In a large bowl, combine the following:
- All-purpose flour
- Baking soda
- Salt
- Cocoa powder
Whisk them together until well-blended to prevent any lumps in your cake, which can be a real disaster when you want a smooth texture. The combination of these ingredients not only forms the structure of your red velvet cake but also helps it rise beautifully in the oven.
Combine wet ingredients for the cake
Next, let’s mix the wet ingredients. In another bowl, combine:
- Vegetable oil
- Granulated sugar
- Buttermilk
- Eggs
- Red food coloring
- Vanilla extract
- White vinegar
Out of these, buttermilk plays a vital role in giving your cake that luscious texture while adding a slight tang. The red food coloring is, of course, the star here—mix it in gently until you get a uniformly vibrant color. Take a moment to appreciate that electric hue; it’s the essence of red velvet cake!
Mix everything together for the perfect batter
With the dry and wet components ready, it’s time to bring them together. Gradually pour the wet mixture into the dry ingredients. Using a spatula or hand mixer, gently combine the mixtures until a smooth batter forms. Be careful not to overmix; a few lumps are okay.
Patience is key here! This is where the excitement builds. The vibrant red color combined with the creamy texture is truly something to behold, and you’re almost ready to bake.
Bake the layers to moist perfection
The last step in our preparation is to bake the cake layers. Preheat your oven to 350°F (175°C) and prepare your cake pans by coating them with baking spray or lining with parchment paper.
Divide the batter evenly between the two pans and smooth the tops. Bake for 25 to 30 minutes, or until a toothpick inserted in the center comes out clean. The aroma wafting through your kitchen will be heavenly—it’s almost as if the cake knows it’s on its way to becoming a crowd-pleaser. Once baked, allow the layers to cool in the pans for 10 minutes before transferring them to a wire rack.
By following these steps closely, you’re setting the stage for an irresistible red velvet cake that’s sure to steal the show. So, gather your loved ones, and get ready to indulge in something truly special!
For more cake recipes and baking tips, check out sources like Serious Eats or America’s Test Kitchen for expert insights and additional inspiration. Your baking journey has only just begun!
Variations on Red Velvet Cake
If you’re a fan of the classic red velvet cake, you might be excited to learn that this beloved dessert has plenty of variations to suit different dietary needs and preferences. Whether you’re vegan or need a gluten-free option, we’ve got the scoop on how to keep the rich flavor while adapting this timeless favorite.
Vegan Red Velvet Cake
Who says you can’t enjoy a decadent red velvet cake without eggs or dairy? With a few easy substitutions, you can create a moist vegan version that’s just as delicious.
- Flour: Opt for all-purpose flour or a gluten-free blend if needed.
- Egg Substitute: Use flaxseed meal mixed with water or applesauce for a plant-based binding agent.
- Buttermilk Alternative: Combine non-dairy milk with vinegar or lemon juice for that classic tang.
When veganizing your cake, be sure to explore vegan frosting options like coconut cream or cashew-based creams to elevate your dessert further!
Gluten-Free Red Velvet Cake
Craving that vibrant red goodness but need a gluten-free option? You’re in luck! Creating a red velvet cake that’s gluten-free doesn’t sacrifice tenderness or flavor.
- Flours: A blend of almond flour and coconut flour can give you the desired texture. Alternatively, consider gluten-free all-purpose flour for more convenience.
- Binders: Since gluten acts as a binder, adding extras like xanthan gum or chia seeds can help maintain the structure.
For a thorough guide on gluten-free baking tips, check out this article from King Arthur Baking.
Experimenting with these variations not only accommodates various diets but also sparks creativity in the kitchen. So gather your ingredients and satisfy your cravings in whichever way fits your lifestyle!
Baking notes for Red Velvet Cake
Baking a stunning red velvet cake might seem daunting, but with a few tips, you’ll impress everyone at your next gathering. First, always use fresh ingredients; it makes a noticeable difference, especially with the baking soda and buttermilk. Did you know that the interplay of these ingredients is what gives your cake that iconic texture?
Mixing Techniques Matter
When it comes to mixing, don’t overdo it! Aim for a fluffy consistency without having to worry about gluten formation. Curious about how to limit that? Consider using a hand mixer instead of a stand mixer for more control.
Dar lin’ Color Choices
For that perfect red hue, I recommend using gel food coloring instead of liquid. It’s more concentrated and won’t mess with your cake’s batter consistency.
And remember, baking is a science. Never skip the cream cheese frosting, which perfectly balances the cake’s sweetness.
Looking for more tips? Check out Baker’s Journal for expert advice on cake baking techniques. Happy baking!
Serving suggestions for Red Velvet Cake
When it comes to enjoying red velvet cake, serving it the right way can elevate your experience. Here are a few delightful suggestions to consider:
Classic Cream Cheese Frosting
You can’t go wrong with the traditional cream cheese frosting. Its tanginess perfectly balances the cake’s sweetness. Get some tips on making the best frosting here.
Fresh Berries on the Side
Serve slices of red velvet cake alongside a medley of fresh berries—strawberries, raspberries, and blueberries work wonders. This not only adds a pop of color but also enhances the flavor profile.
Pair with a Sweet Beverage
Enhance your dessert experience by pairing your cake with a glass of refreshing lemonade or homemade iced tea. These drinks can cut through the richness of the cake, offering a delightful contrast.
Creative Plating
For a touch of elegance, consider plating your cake in layers on a dessert stand either in a rustic setting or a sophisticated presentation. You might even add some mint leaves for garnish!
With these serving ideas, your red velvet cake will be a showstopper at any gathering!
Tips for Making the Best Red Velvet Cake
Creating a perfectly moist and delicious red velvet cake is an art that you can master with a few key techniques. Here are my top tips to ensure your cake stands out!
Choose Quality Ingredients
The ingredients you use significantly influence the cake’s flavor and texture. Opt for high-quality cocoa powder and a good vanilla extract—these flavors build the foundation of your cake. Don’t skimp on the buttermilk either; it keeps the cake moist and tender.
Mix It Right
When combining your ingredients, be careful not to overmix the batter. Mix until just combined to prevent your cake from becoming too dense. A light touch goes a long way! Also, remember to sift your dry ingredients, as this helps to aerate the batter.
Color Counts
To achieve that vibrant red hue, using red gel food coloring is preferable to liquid coloring. Gel gives a deeper, more consistent color without adding too much liquid to your batter. You might want to experiment with the amount for the perfect shade.
Don’t Forget the Toppings
Cream cheese frosting is a classic for a reason—it complements the richness of the red velvet beautifully. Consider adding a touch of lemon juice to your frosting for a delightful tang.
For more tips on baking the best cakes, you can check resources like Joy of Baking or King Arthur Baking for expert advice. Happy baking!
Time details for Red Velvet Cake
Preparation time
Getting everything ready for your red velvet cake is a breeze! You’ll need approximately 20-30 minutes to gather your ingredients, grease your pans, and whip up that vibrant, velvety batter.
Baking time
Now for the magic: the baking! Your cake layers will take around 25-30 minutes in the oven. Keep an eye on them to ensure they rise beautifully without overcooking.
Total time
In total, you’re looking at a time investment of about 1 hour from start to finish. This includes prep and baking, so you can plan when to serve your delicious red velvet cake while enjoying some downtime!
Feel free to check out tips on proper baking methods from trusted culinary sources like Serious Eats as you get started!
Nutritional information for Red Velvet Cake
When it comes to enjoying a slice of red velvet cake, understanding its nutritional profile can help you make informed choices without sacrificing flavor. Let’s break it down!
Calories
A standard slice of red velvet cake contains approximately 350-400 calories. This can vary based on ingredients and portion sizes, so keep that in mind while indulging.
Protein
You’ll find about 4-6 grams of protein in each slice of this decadent treat. While it’s not a major protein source, every little bit counts—especially if you’re pairing it with a protein-rich side like a classic turkey bacon dish or some whipped Greek yogurt!
Sodium
Typically, a slice of red velvet cake packs around 250-300 milligrams of sodium. If you’re watching your sodium intake, this is an important factor, but don’t let it deter you from enjoying an occasional slice of this delightful dessert.
For more detailed insights into calories and nutrition, check out resources from the USDA here or learn about protein contents from the Harvard T.H. Chan School of Public Health. Making informed choices is part of the experience, and enjoying treats is all about balance!
FAQs about Red Velvet Cake
How can I prevent my cake from being too dry?
Nothing is worse than a dry red velvet cake, right? To avoid this pitfall, consider a few key tips:
- Do not overmix the batter. This can lead to a tougher cake.
- Use fresh ingredients, especially your baking powder and baking soda. If they’re past their prime, you might end up with a dense texture.
- Measure your flour correctly by spooning it into your measuring cup and leveling it off. Too much flour can suck the moisture right out of your cake!
What can I use instead of red food coloring?
If you’re looking for a more natural alternative to traditional red food coloring for your red velvet cake, you might try beet juice or even pomegranate juice. These options can give a beautiful hue without the artificial additives. Just be aware that the shade might be slightly different than what you’d get with classic food coloring. For those curious about more options, you might find some great alternatives on this site.
How do I store leftover red velvet cake?
Storing your leftover red velvet cake properly can help maintain its deliciousness. Here’s what you should do:
- Wrap the cake in plastic wrap or aluminum foil. This prevents it from drying out.
- Store it in an airtight container at room temperature for up to 2-3 days. If you need to keep it longer, a refrigerator can extend its life for about a week.
- For long-term storage, consider freezing individual slices wrapped securely. They can last for up to three months! Just let them thaw in the fridge overnight.
By following these tips, you can ensure that your delicious red velvet cake remains scrumptious for days!
Conclusion on Red Velvet Cake
Making a red velvet cake can be a delightful experience. It’s more than just a dessert; it’s a celebration of flavors, colors, and textures that bring joy to any occasion. The rich, velvety texture paired with that creamy blend of cream cheese frosting elevates this cake from ordinary to extraordinary. If you’re looking to impress your friends or family, this cake is a surefire hit.
Remember, the key to a perfect red velvet cake lies in choosing high-quality ingredients and following the recipe closely. Don’t hesitate to experiment a little, too! For some extra inspiration or variations, you can check out resources like Cake Decor for creative ideas. Enjoy baking, and savor every bite of your beautiful creation!
PrintRed Velvet Cake: The Indulgent Homemade Recipe You’ll Love
Learn how to make a luscious and moist red velvet cake with this easy homemade recipe.
- Prep Time: 20 minutes
- Cook Time: 30 minutes
- Total Time: 50 minutes
- Yield: 12 servings
- Category: Dessert
- Method: Baking
- Cuisine: American
- Diet: Vegetarian
Ingredients
- 2 ½ cups all-purpose flour
- 1 ½ cups granulated sugar
- 1 teaspoon baking soda
- 1 teaspoon salt
- 1 teaspoon cocoa powder
- 1 cup vegetable oil
- 1 cup buttermilk
- 2 large eggs
- 2 tablespoons red food coloring
- 1 teaspoon vanilla extract
- 1 teaspoon white vinegar
Instructions
- Preheat your oven to 350°F (175°C).
- In a large bowl, mix together flour, sugar, baking soda, salt, and cocoa powder.
- In another bowl, combine vegetable oil, buttermilk, eggs, food coloring, vanilla, and vinegar.
- Gradually add the wet ingredients to the dry ingredients and mix until smooth.
- Divide the batter evenly between prepared cake pans.
- Bake for 25-30 minutes or until a toothpick comes out clean.
- Let the cakes cool in the pans for 10 minutes before transferring to a wire rack.
Notes
- Use high-quality cocoa powder for the best flavor.
- Red food coloring can be adjusted for deeper color.
Nutrition
- Serving Size: 1 slice
- Calories: 300
- Sugar: 15g
- Sodium: 220mg
- Fat: 14g
- Saturated Fat: 2g
- Unsaturated Fat: 10g
- Trans Fat: 0g
- Carbohydrates: 42g
- Fiber: 1g
- Protein: 4g
- Cholesterol: 30mg