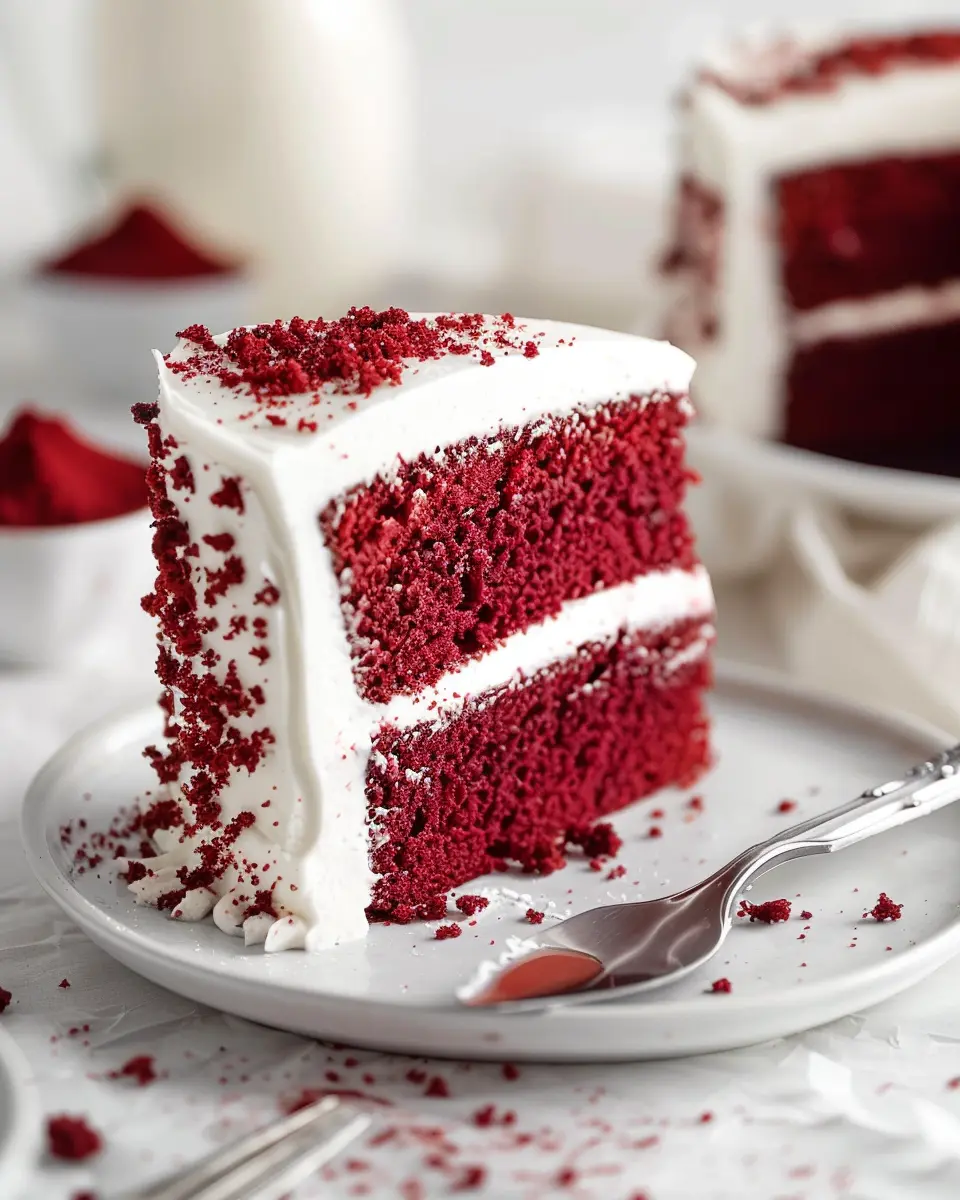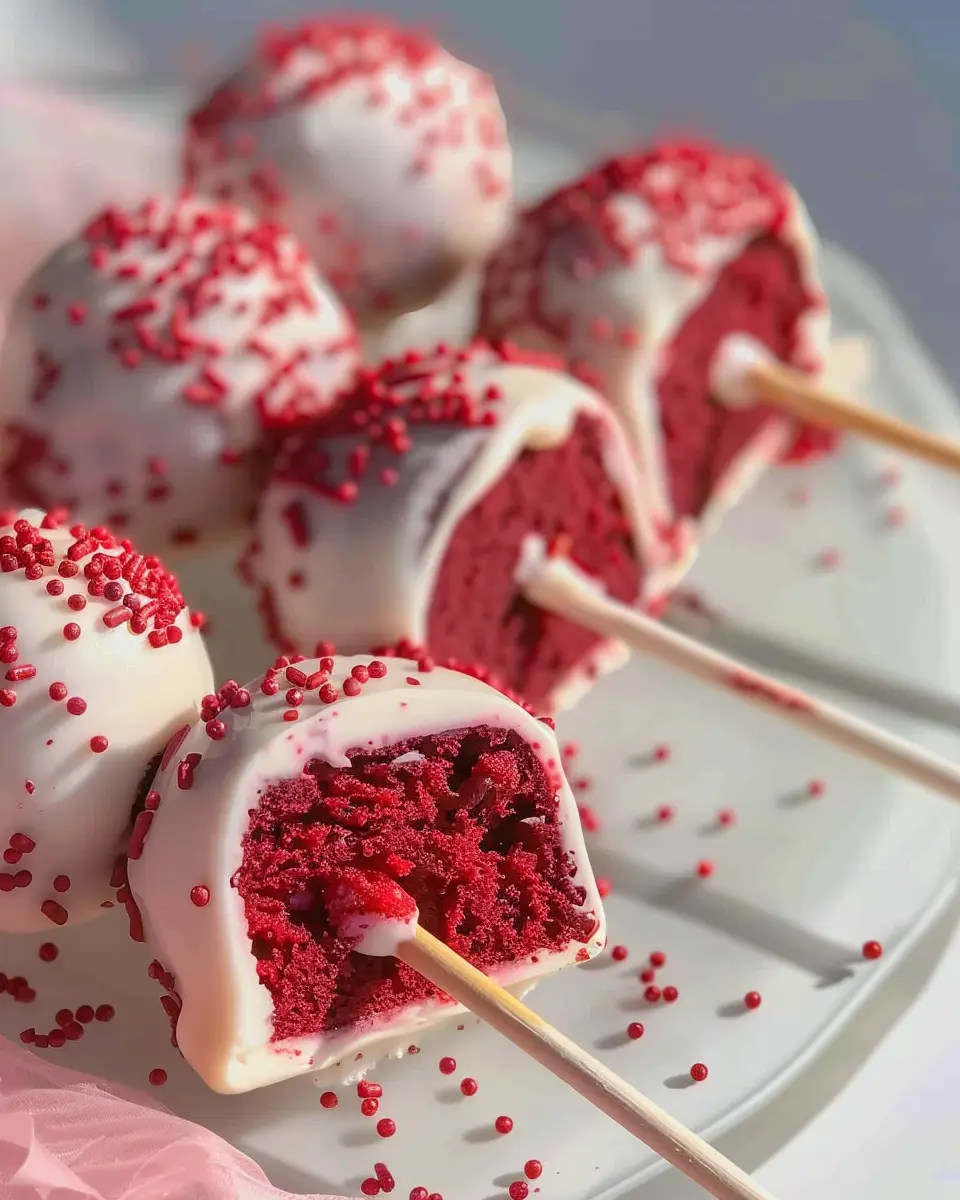
Introduction to Red Velvet Cake Pops
When you think about delightful desserts, red velvet cake pops often bring a smile to your face. They’re not just visually alluring with their deep crimson color; they’re also a delicious blend of flavors that appeal to a wide audience. These little treats are perfect for any occasion, whether you’re planning a birthday party, looking to impress at a gathering, or simply indulging in some self-care with a sweet treat after a long day.
Why are red velvet cake pops a great treat?
Red velvet cake pops combine the rich, velvety taste of traditional red velvet cake with the fun and portability of a pop. Not only do they capture the classic blend of chocolate, vanilla, and cream cheese flavors, but they also provide a playful way to enjoy cake without the mess. Here are a few reasons why they stand out:
- Versatility: They can be dressed up or down for different occasions. Decorate them for holidays, parties, or just because you want a flavorful treat.
- Portability: Perfect for on-the-go snacking, these pops are easy to share, making them a hit at social gatherings.
- Customization: You can play around with coatings, sprinkles, or drizzles to suit your personal preferences or dietary needs.
An interesting fact: according to The Spruce Eats, desserts like cake pops are increasingly popular because they cater to both the “sharing” and “individual serving” trends in today’s bustling culinary scene.
The appeal of homemade sweets
There’s something truly special about creating your own red velvet cake pops. When you make them at home, you have complete control over the ingredients – meaning you can choose high-quality elements that enhance flavor while making it a healthier treat. Plus, preparing these cake pops can be a great way to bond with friends or family. Imagine gathering around the kitchen, mixing ingredients, dipping cake balls in chocolate, and exchanging laughs.
Not only do homemade sweets taste better, but they also carry an emotional value that store-bought varieties simply can’t match. As a culinary enthusiast, I often find that the time spent baking and decorating can be just as rewarding as enjoying the final product. So, why not treat yourself to the joy of making your very own red velvet cake pops?
Ingredients for Red Velvet Cake Pops
Essential ingredients for the cake
Creating red velvet cake pops starts with your cake foundation. Here’s what you’ll need:
- Cake flour: Using cake flour gives you that soft, moist texture.
- Cocoa powder: Just a hint for that subtle chocolate flavor.
- Granulated sugar: Sweetens the deal.
- Buttermilk: This adds moisture and that distinct tang.
- Eggs: They bind everything together.
- Vegetable oil: Keeps your cake lovely and moist.
- Red food coloring: The star of the show that gives those pops their signature color.
- Vanilla extract: For added depth of flavor.
Frosting essentials for the perfect blend
To create that creamy filling inside your cake pops, you’ll need a luscious frosting. Grab:
- Cream cheese: The classic choice for red velvet.
- Powdered sugar: Sweetness that’s easy to mix in.
- Butter: Adds richness.
- Vanilla extract: Enhances the flavor profile.
Coating options for extra sweetness
Now, let’s not forget the outer layer! Your red velvet cake pops deserve a delicious coating. You can choose:
- Chocolate candy melts: Get creative with colors!
- White chocolate: A classic choice that contrasts beautifully with red.
- Sprinkles: A fun way to add textures and flavors.
With these ingredients, your “red velvet cake pops” will be a hit at any gathering! For more cooking tips and tricks, check out The Pioneer Woman for additional insights on baking techniques and ingredient substitutions.
Step-by-step preparation of Red Velvet Cake Pops
Creating red velvet cake pops is a delightful endeavor that combines the moistness of classic red velvet cake with a fun, portable dessert option. Whether you’re planning for a gathering or just want a sweet treat, these poppable delights are sure to impress. Let’s walk through the preparation process step by step.
Prepping the kitchen and equipment
Before diving into baking, it’s crucial to prep your kitchen and gather the necessary equipment. Here’s what you’ll need:
- Baking pan (9×13 inches is ideal)
- Mixing bowls
- Whisk or electric mixer
- Cooling rack
- Cookie sheet
- Lollipop sticks
- Microwave-safe bowl for melting chocolate
- Parchment paper or wax paper
Make sure your workspace is clean and organized. Nothing derails the baking flow like searching for supplies mid-recipe! Turning on your oven to preheat at 350°F (175°C) sets the stage for a smooth baking process.
Baking the red velvet cake
Now it’s time for the fun part—baking! Start by combining your dry ingredients, which include flour, cocoa powder, baking soda, and salt. In a separate bowl, mix together the wet ingredients—sugar, eggs, buttermilk, vegetable oil, and vanilla extract—until well combined, and then add the vibrant red food coloring. This is the magic of red velvet.
Once both mixtures are ready, gently fold the dry into the wet until incorporated. Pour the batter into your greased pan and bake for 25–30 minutes, or until a toothpick comes out clean. Cool completely on a rack.
Crumbling the cake for the pops
Once your cake has cooled, it’s time to crumble it into a fine texture. Break the cake into large pieces and place them in a large bowl. You can use your hands or a food processor for this step. The finer the crumbs, the better your cake pops will hold together after mixing.
Do you remember the first time you ever made cake pops? That moment of crumbling cake felt almost therapeutic, didn’t it?
Mixing the frosting into the cake
The next step is to mix in the frosting. You can use store-bought cream cheese frosting for convenience or whip up your own at home. Add about 1 cup of frosting to the crumbled cake and mix thoroughly. The result should be a moist, moldable mixture.
Shaping the cake pops
With your cake mixture ready, it’s time to shape your red velvet cake pops. Scoop out about a tablespoon of the mixture and roll it into a ball between your palms. Repeat this process until you’ve shaped all the mixture into balls.
Here’s a pro tip: If the mixture is too crumbly, you can add a touch more frosting to help it hold together better.
Freezing to set the shape
After shaping, place your cake balls on a cookie sheet lined with parchment paper and pop them into the freezer for about 30 minutes. Freezing helps the cake pops maintain their shape, making the next steps much easier.
Coating with melted chocolate
Now comes the most exciting part: coating your cake pops! Melt chocolate or candy melts in a microwave-safe bowl, stirring every 30 seconds until smooth. Remove the cake pops from the freezer and dip each one into the melted chocolate, tapping off any excess.
To ensure a seamless coating, insert a lollipop stick into each cake ball before dipping it into the chocolate.
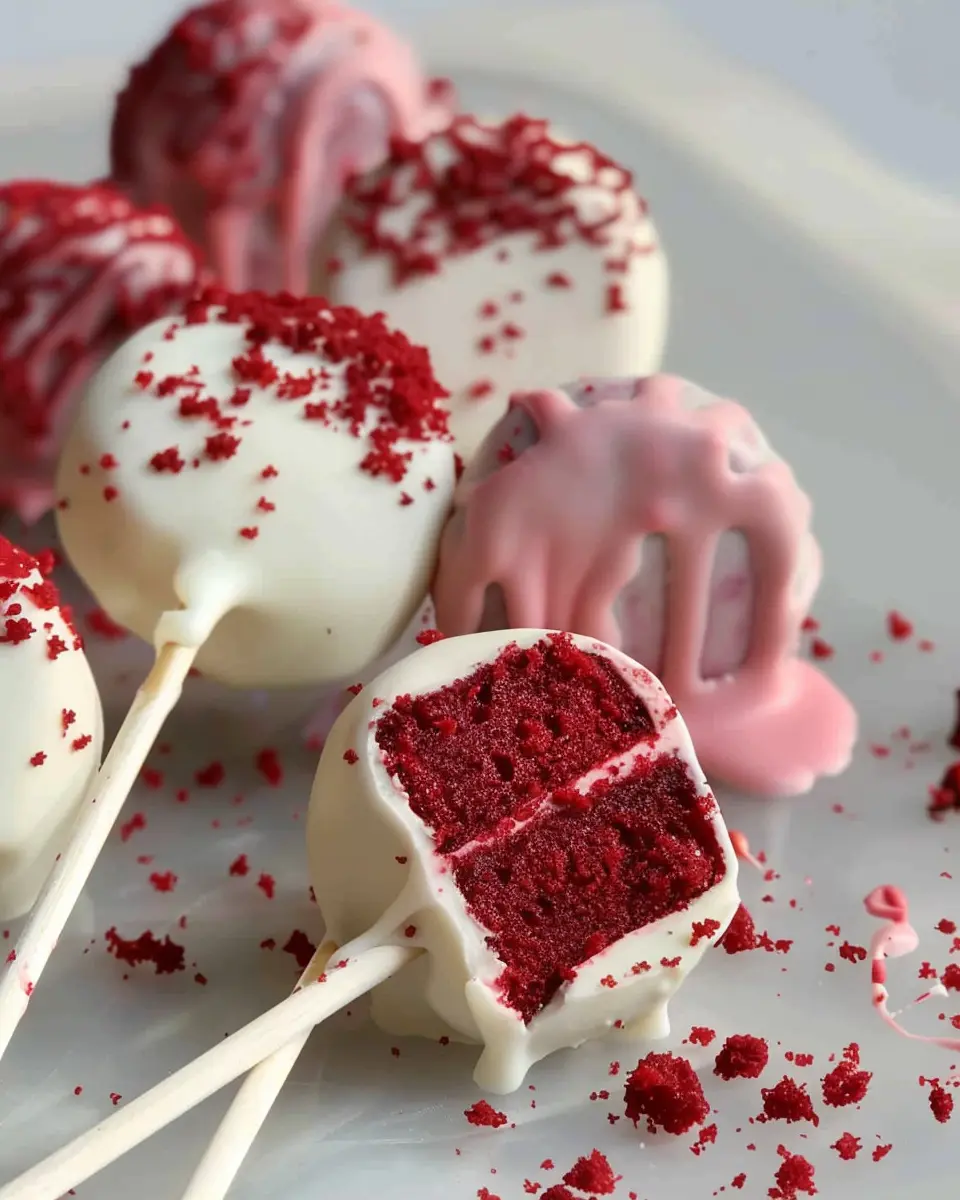
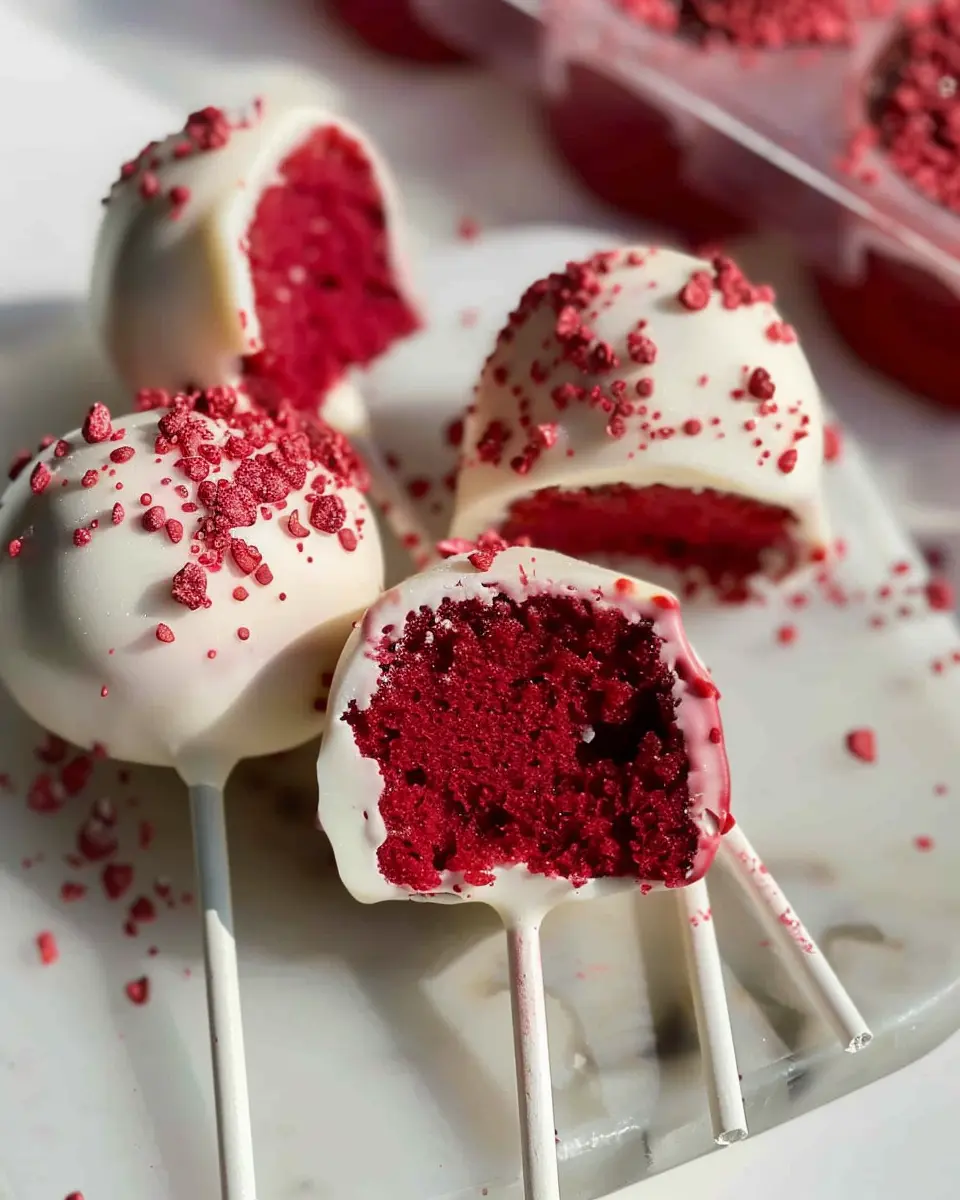
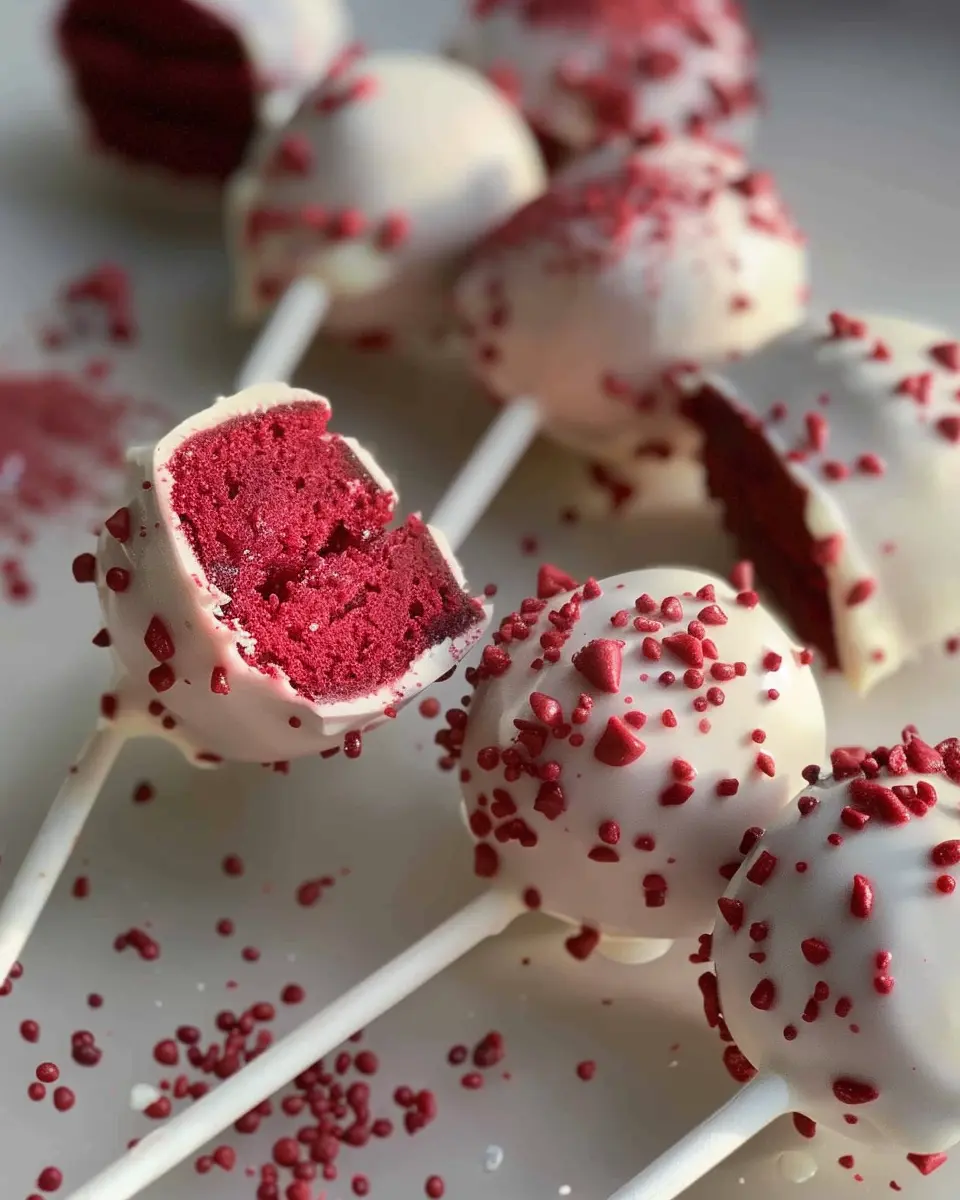
Decorating your cake pops
Once coated, the final touch is decorating your red velvet cake pops. You can roll them in crushed nuts, sprinkles, or drizzle with contrasting chocolate for a polished look. This is where you can let your creativity shine!
Don’t forget to display them on a cake pop stand or in a decorative container for an eye-catching presentation.
Making red velvet cake pops is not just baking; it’s about creating a delicious experience you can share with others. So gather your friends, enjoy the process, and indulge in your beautiful creations! For more tips on baking techniques, check out resources from King Arthur Baking or The Kitchn.
Variations on Red Velvet Cake Pops
Red velvet cake pops are not only a delightful treat but also a canvas for your creativity. Let’s explore some fun variations you can try!
Customize with Different Shapes
Why stick to the traditional round shape when you can get creative? Use cookie cutters to fashion your red velvet cake pops into hearts, stars, or even seasonal themes like Christmas trees or pumpkins. It’s a simple way to elevate your presentation. Plus, these unique shapes can make your cake pops the centerpiece of any gathering. If you’re looking for inspiration, platforms like Pinterest are bursting with innovative ideas.
Flavor Swaps and Additions
Feeling adventurous? Jazz up your red velvet cake pops with different flavors. Here are a few suggestions:
- Cream Cheese Swirl: Add a swirl of cream cheese frosting in the mixture for an extra burst of flavor.
- Chocolate Ganache: Instead of the classic coating, dip your pops in rich chocolate ganache for a decadent twist.
- Spices: Sprinkle in some cinnamon or nutmeg for a warm, spiced flavor that complements the velvety smoothness of the red velvet.
If you want to make them more festive, consider using crushed candy canes for a holiday treat or a hint of orange zest for a fresh twist. It’s all about experimenting and finding what you love!
Trying these variations not only enhances the taste but can also appeal to different palates, ensuring everyone at your next event is catered for. So grab your supplies and let your imagination run wild with these delicious cake pops!
Cooking tips and notes for Red Velvet Cake Pops
Tips for achieving the right texture
Getting the texture just right for your red velvet cake pops can be a game changer. Aim for a moist and crumbly cake, ideally by using fresh ingredients and ensuring you don’t overbake your cake. Check out this baking resource for tips on perfecting your cake.
Once your cake is baked and cooled, crumble it finely and mix in just the right amount of frosting; it should hold together well without being overly sticky. Experiment with different ratios to find your sweet spot!
Avoiding common mistakes
One of the most common mistakes is melting your chocolate too quickly. Opt for a microwave in short intervals, stirring in between, to prevent scorching. And remember, if the coating is too thick, the red velvet cake pops could fall off the sticks. Aim for a smooth, even layer by dipping and giving a gentle shake to remove excess.
For additional insights on cake pops, you might enjoy this tutorial on cake pop techniques. Happy baking!
Serving suggestions for Red Velvet Cake Pops
Perfect occasions for serving
Red velvet cake pops are incredibly versatile and can elevate any gathering. Here are some occasions that are perfect for serving these delightful treats:
- Birthdays: Their vibrant color and rich flavor make them a hit at birthday parties.
- Bridal showers: These cake pops add a touch of elegance to any bridal celebration.
- Holiday gatherings: Red velvet is vividly festive, perfect for Christmas and Valentine’s Day.
- Networking events: Delight colleagues and clients with a unique treat that sparks conversation.
Imagine the smiles as guests indulge in these sweet bites, making your event memorable!
Pairing ideas with beverages and other desserts
To maximize enjoyment, consider pairing your red velvet cake pops with complementary beverages and desserts.
- Beverages: They go incredibly well with a luscious cup of hot cocoa or creamy vanilla latte. Even sparkling lemonade or herbal teas can create a refreshing contrast.
- Desserts: Serve them alongside a rich cream cheese frosting dip or a selection of cookies for a dessert platter that’s sure to impress.
By creating a delightful pairing, you not only enhance the flavor experience but also create a beautiful presentation for your guests. For more ideas on creative dessert platters, check out this guide for inspiration!
Whether it’s a festive gathering or a simple get-together, red velvet cake pops will always steal the spotlight.
Time Breakdown for Red Velvet Cake Pops
When it comes to creating red velvet cake pops, it’s all about timing. Here’s how it breaks down:
Preparation Time
Set aside about 20 minutes to gather your ingredients and prepare the cake batter. This includes measuring flour, mixing, and prepping your baking tools.
Baking Time
Pop your cake into the oven and let it bake for around 30 minutes. You’ll want to keep an eye on it, though! A toothpick test will help determine if it’s done perfectly.
Cooling Time
Once baked, allow your cake to cool for about 1 hour. This step is crucial to getting that delightful texture for your pops.
Total Time
In total, plan for around 2 hours and 50 minutes from start to finish. This includes prep, baking, cooling, and decorating your delicious red velvet cake pops. For extra tips on perfecting your pops, check out the Culinary Institute of America for some pro advice!
Nutritional Facts for Red Velvet Cake Pops
Calories Per Serving
When it comes to enjoying red velvet cake pops, moderation is key. Each cake pop typically contains around 150 calories, making them a delightful treat without overindulging. Perfect for satisfying your sweet tooth during a busy workday or as a fun dessert for gatherings.
Sugar Content
Now, let’s talk sugar! These adorable bites usually pack in about 10-12 grams of sugar per serving. While that’s less than some other desserts, it’s always a good idea to balance your indulgence with healthier options throughout the day.
Alternative Nutritional Options
Looking to lighten up your red velvet cake pops? Consider these alternatives:
- Use whole wheat flour for added fiber.
- Opt for natural sweeteners like honey or maple syrup instead of granulated sugar.
- Swap in yogurt for cream cheese in the frosting for a tart, lower-calorie option.
These small tweaks can help create a dessert that aligns better with your health goals. For more insights on healthy baking, check out resources like the American Heart Association.
FAQs about Red Velvet Cake Pops
How do I store leftover cake pops?
If you find yourself with extra red velvet cake pops, don’t worry! Simply place them in an airtight container and store them in the refrigerator for up to a week. To maintain their deliciousness, try to layer them with parchment paper to prevent sticking.
Can I make these cake pops ahead of time?
Absolutely! One of the great things about red velvet cake pops is their convenience. You can prepare and dip them a few days in advance. Just keep them chilled in the fridge until you’re ready to serve. If you plan to store them longer, consider freezing them. Just make sure to wrap each pop in plastic wrap, then place them in a freezer-safe bag. They’ll stay fresh for up to three months.
What’s the best way to transport cake pops?
Transporting red velvet cake pops can be a bit tricky, but with a few tips, you’ll be set for success! Consider using a cake pop stand or a cardboard box lined with foam or a soft cloth. This not only protects your pops from damage but also keeps them upright. If you’re taking them to a party or an event, make sure to pack them securely, especially on bumpy rides.
By keeping these storage and transport tips in mind, you can enjoy delicious red velvet cake pops wherever you go! For more tips on cake pops, check out this helpful guide to elevate your baking adventures!
Conclusion on Red Velvet Cake Pops
Recap of the Joy of Homemade Treats
There’s something incredibly fulfilling about creating your own desserts, like these delightful red velvet cake pops. The vibrant color and rich flavor make them a standout treat, perfect for parties or cozy nights in. Plus, working with your hands can be therapeutic, providing a respite from the hustle of daily life.
Encouragement to Try the Recipe and Share
I encourage you to roll up your sleeves and give this recipe a shot! Whether you’re a baking novice or a seasoned pro, you’ll find joy in making these cake pops. Don’t forget to share your creations with friends or on social media—your delicious endeavor could inspire someone else to explore the world of homemade sweets! Check out resources like King Arthur Baking for baking tips and techniques that can help elevate your cake pop game.
PrintRed Velvet Cake Pops: An Indulgent Treat Made Easy at Home
Red Velvet Cake Pops are a decadent delight that combine the rich flavors of red velvet cake with the fun of cake pops. Perfect for parties or a sweet treat at home, these cake pops are easy to make and even more enjoyable to eat.
- Prep Time: 30 minutes
- Cook Time: 30 minutes
- Total Time: 1 hour
- Yield: 24 cake pops
- Category: Dessert
- Method: Baking
- Cuisine: American
- Diet: Vegetarian
Ingredients
- 1 box red velvet cake mix
- 3 large eggs
- 1 cup vegetable oil
- 1 cup water
- 8 oz cream cheese, softened
- 1 cup powdered sugar
- 16 oz white chocolate, melted
- lollipop sticks as needed
Instructions
- Preheat your oven to 350°F (175°C). Prepare cake mix according to package instructions.
- Bake the red velvet cake for 25-30 minutes until a toothpick comes out clean. Let it cool completely.
- Crumble the cake into a large bowl, then mix in the cream cheese and powdered sugar until well combined.
- Form the mixture into small balls and insert lollipop sticks into each ball.
- Chill the cake pops in the refrigerator for about 30 minutes.
- Dip each cake pop into the melted white chocolate, ensuring they are fully coated.
- Allow excess chocolate to drip off before placing them upright in a styrofoam block to set.
Notes
- Ensure the cake is completely cooled before crumbling to avoid a soggy mixture.
- Feel free to add red sprinkles on top for decoration.
Nutrition
- Serving Size: 1 cake pop
- Calories: 150
- Sugar: 10g
- Sodium: 100mg
- Fat: 7g
- Saturated Fat: 3g
- Unsaturated Fat: 4g
- Trans Fat: 0g
- Carbohydrates: 20g
- Fiber: 1g
- Protein: 2g
- Cholesterol: 30mg