Introduction to Classic Layered Strawberry Shortcake
The irresistible charm of strawberry shortcake
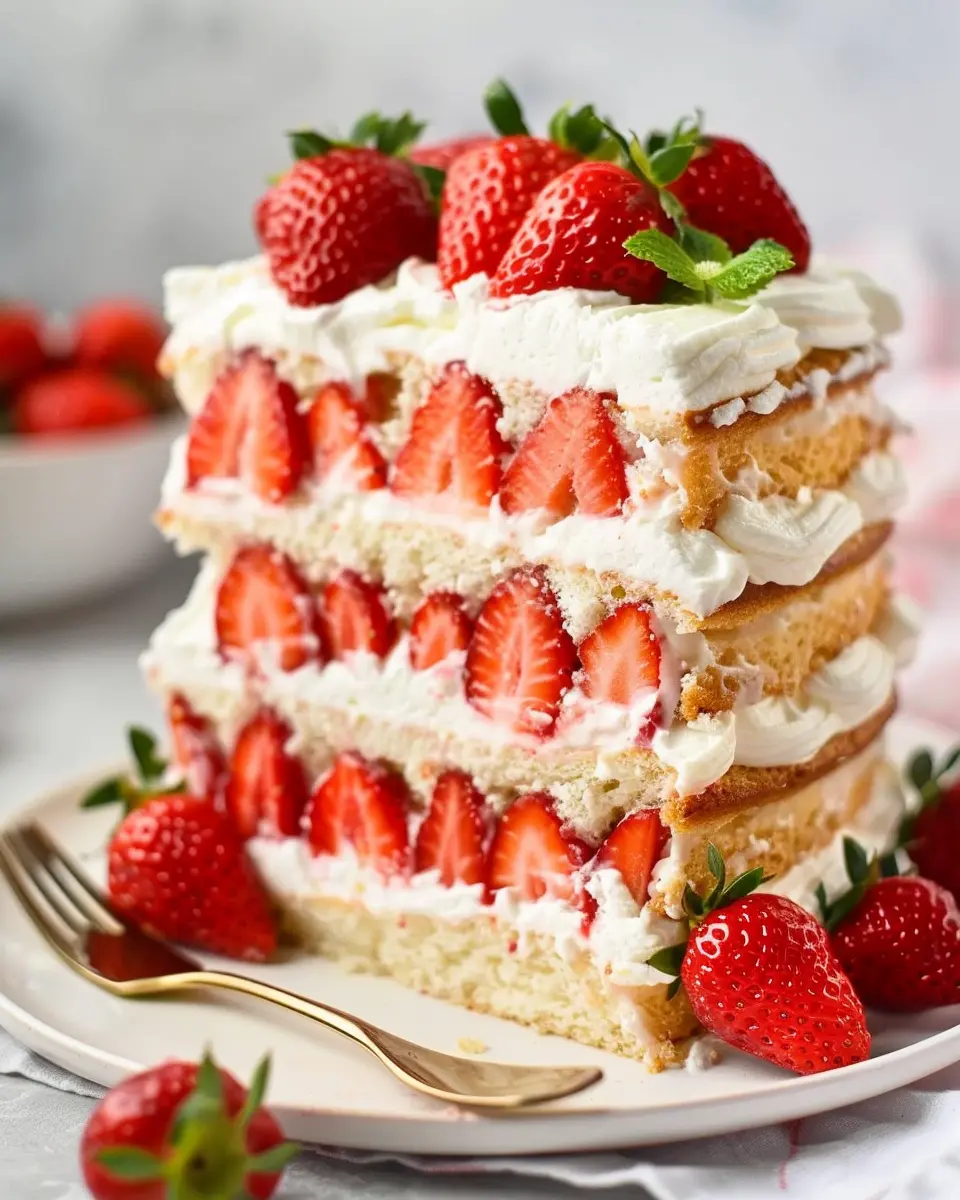
When the sun starts to peak through the clouds and strawberries begin to ripen, it’s hard not to think about the allure of a classic layered strawberry shortcake. This delightful dessert is a charming tribute to the joys of summer, with its light, fluffy layers of cake, fresh strawberries, and fluffy whipped cream. Each bite transports you to picnics in the park, lazy backyard barbecues, and sharing sweet moments with friends and family.
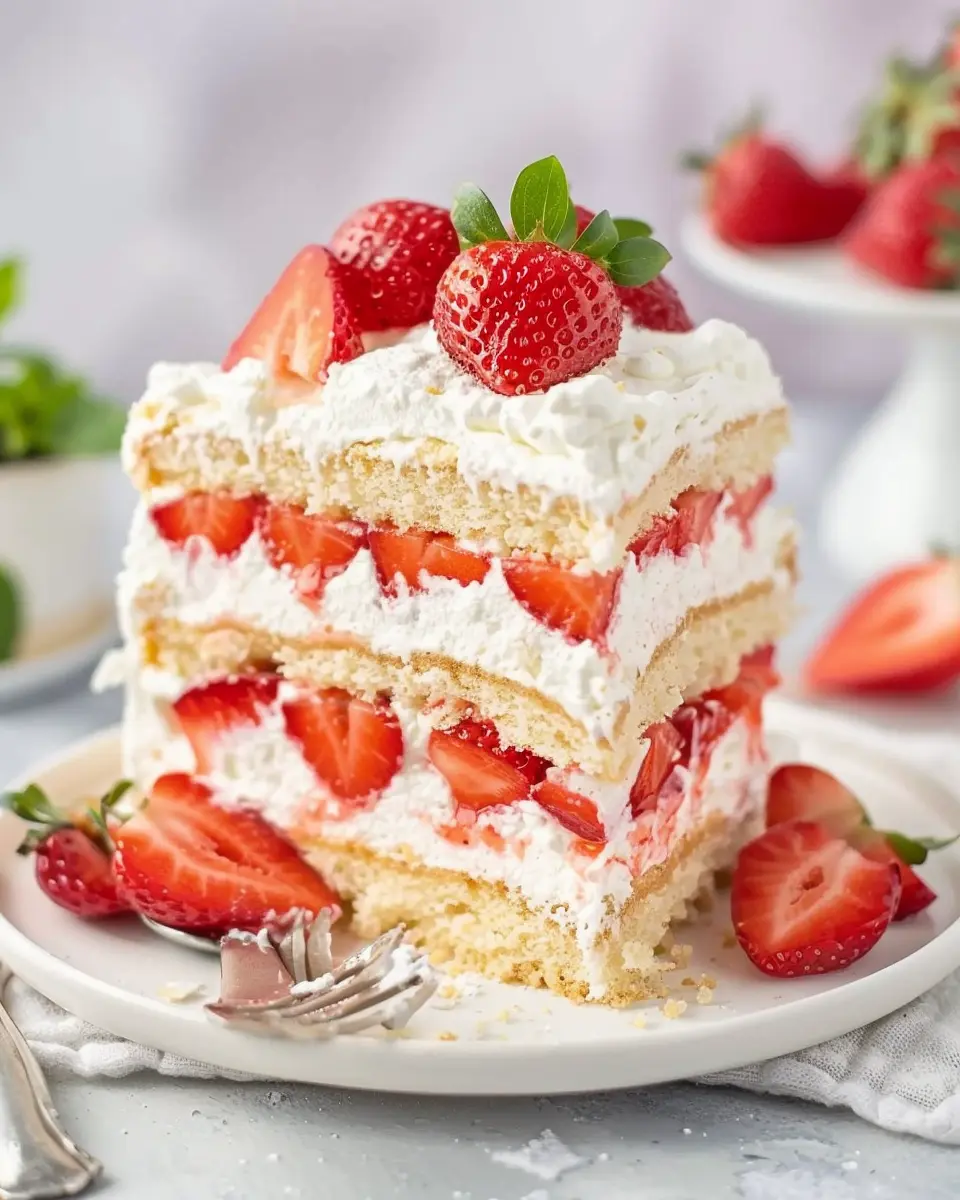
Imagine slicing into that cake and seeing the vibrant red strawberries nestled between those tender layers. It’s a visual treat that promises as much enjoyment as it delivers in taste. Whether you’re planning a celebratory gathering or simply indulging in a sweet moment of self-care, a classic strawberry shortcake stands out as a crowd-pleaser every time.
Why homemade is better than store-bought
While it might be tempting to grab a ready-made version from the store, nothing compares to the joy of baking a classic layered strawberry shortcake from scratch. Here are a few reasons why homemade is the way to go:
-
Freshness Guaranteed: When you make your own, you can choose the ripest strawberries, ensuring every bite bursts with flavor.
-
Customize It: Want to swap in some vanilla bean or add a hint of lemon zest? When you’re in the kitchen, the options are limitless!
-
Healthier Choices: Store-bought cakes often have preservatives and artificial ingredients. Making your own allows you to control what goes into your dessert.
-
The Experience: Baking can be a stress-reliever and a way to express creativity. Plus, the incredible aroma of a homemade shortcake wafting through your home is simply unparalleled.
So, why not roll up your sleeves and get whisking? You’ll find that the satisfaction of crafting your own dessert, paired with the delicious payoff, is well worth the effort. For more inspiration on baking and fresh ingredients, check out resources like BBC Good Food for expert tips and seasonal recipes!
As we dive into this recipe, remember that cooking is all about enjoying the process as much as the end result. Let’s get started on creating your delightful classic layered strawberry shortcake!
Ingredients for Classic Layered Strawberry Shortcake
When it comes to making a delicious classic layered strawberry shortcake, you’ll want to gather a few essential ingredients that come together for a delightful dessert experience. Let’s break it down!
Essential ingredients for the cake base
The foundation of your shortcake is crucial for flavor and texture. You will need:
- All-purpose flour: About 2 cups to give structure.
- Granulated sugar: ¾ cup to add sweetness.
- Baking powder: 1 tablespoon for a light and fluffy texture.
- Salt: Just a pinch enhances the other flavors.
- Unsalted butter: ½ cup, softened for richness.
- Milk: ¾ cup to keep everything moist.
- Eggs: 2 large to bind the ingredients.
Fresh strawberries and cream essentials
Next up, the star of the show—fresh strawberries and creamy goodness:
- Fresh strawberries: Around 4 cups, hulled and sliced. Opt for ripe, juicy berries for the best flavor.
- Heavy whipping cream: 2 cups, chilled for the fluffiest whipped topping.
- Powdered sugar: 2 tablespoons, for sweetness in your cream.
For a touch of elegance, consider adding some vanilla extract to the cream! The combination of ripe strawberries with the rich, airy cream will transport you to dessert heaven. If you’re curious about the best ways to choose strawberries, check out resources from USDA’s Agricultural Research.
Now that you have the ingredients ready, you’re one step closer to baking a memorable classic layered strawberry shortcake that will impress your friends and family!
Step-by-Step Preparation for Classic Layered Strawberry Shortcake
If you’re looking to create the perfect dessert for a summer gathering or simply want to impress your friends with your baking skills, making a classic layered strawberry shortcake is a delightful choice! With juicy strawberries, fluffy cream, and light, fluffy layers of cake, it’s a feast for both the eyes and the palate. Let’s dive into the step-by-step preparation to ensure your shortcake turns out beautifully.
Preparation and Baking Setup
Before you start mixing, it’s essential to set the stage. Gather all your ingredients and tools to create a seamless baking experience. You’ll need:
- Fresh strawberries, halved
- All-purpose flour
- Baking powder
- Granulated sugar
- Butter
- Eggs
- Vanilla extract
- Heavy cream
- A mixing bowl, measuring cups, and spatula
- An electric mixer (or a whisk if you’re feeling ambitious!)
Preheat your oven to 350°F (175°C) and grease two 9-inch round cake pans to ensure the layers slide out easily after baking. This initial setup saves you time and makes the process feel less chaotic!
Mixing the Cake Batter
Now for the fun part! In a large mixing bowl, start by creaming together the butter and sugar until light and fluffy. This makes for a well-aerated cake that’s delightful to eat. Add in your eggs one at a time, mixing well after each addition, then stir in the vanilla extract, following it up with a delicate folding of the dry ingredients: flour and baking powder.
- Tips for a great batter:
- Make sure your butter is at room temperature to facilitate easy mixing.
- Sift the flour and baking powder to avoid lumps.
Once everything is combined to a smooth batter, pour it evenly into your prepared pans.
Baking the Layers to Perfection
Pop those pans into your preheated oven and let the magic happen! Bake for about 25-30 minutes or until a toothpick inserted into the center comes out clean. Keep an ear open for the gentle hum of the oven — it’s always a good time to catch up on your favorite podcast while waiting.
To ensure a moist cake, avoid opening the oven door too early. Check for doneness at the 25-minute mark. When they’re done, let the layers cool in the pans for 10 minutes before transferring them to a wire rack to cool completely.
Preparing the Strawberries for Layering
While those delightful cakes are cooling, prepare your strawberries. Wash them thoroughly, remove the stems, and slice them in half or quarters, depending on your preference. To enhance their natural sweetness, sprinkle with a bit of sugar and let them sit for 15-20 minutes. This will draw out their juices, creating a beautiful syrup that will complement the classic layered strawberry shortcake.
Whipping Up the Cream
Ah, the finishing touch! Using your mixer, whip the heavy cream on medium-high speed until soft peaks form. Gradually add sugar to taste while continuing to whip until you reach stiff peaks. It’s a delicate balance; you want the cream to hold its shape but not turn into butter!
- Serve it fresh: For the best flavor, serve the whipped cream immediately. If you need to prepare it in advance, store it in the fridge covered up to a couple of hours ahead.
Assembling Your Layered Shortcake
Finally, it’s time for assembly! Start by layering one of the cooled cakes on a serving platter. Spread a layer of whipped cream over it and add half of the prepared strawberries. Place the second cake layer on top, repeating the process with more whipped cream and the remaining strawberries.
For a beautiful finish, drizzle any collected strawberry juices on top. Feel free to get creative with some mint leaves for garnish or an extra sprinkle of sugar!
And there you have it! Your classic layered strawberry shortcake is ready to be devoured. This dessert celebrates the vibrant flavors of summer and is perfect for any occasion. So grab a slice, invite some friends over, and savor the satisfaction of serving a sweet homemade treat!
For more tips on baking cakes, check out this baking resource for expert advice. Happy baking!
Variations on Classic Layered Strawberry Shortcake
When it comes to classic layered strawberry shortcake, the limits are truly only defined by your creativity! Here are three delicious variations that put a fun spin on the traditional recipe, making them perfect for any gathering or a cozy night in.
Chocolate Strawberry Shortcake
If you’re a chocolate lover, consider adding a decadent twist by incorporating cocoa into your shortcake. Simply replace a portion of the flour with unsweetened cocoa powder to create rich, chocolatey layers. Pair this with whipped cream and sliced strawberries, and you’ve got yourself a dreamy dessert that’ll leave everyone craving more. To enhance the flavors, try drizzling a bit of chocolate sauce on top for an extra indulgent touch.
Gluten-Free Strawberry Shortcake
For those with dietary restrictions, crafting a gluten-free version of your classic layered strawberry shortcake is easier than you might think! Substituting traditional flour with almond or coconut flour adds a unique flavor and keeps the cake moist. Make sure to use gluten-free baking powder and check labels on any store-bought components. This allows everyone at the table to enjoy a slice without worry!
Additions and Toppings: Trying Out Flavor Twists
Don’t hesitate to mix in some creativity with your toppings! Consider:
- Zest from citrus fruits like lemon or orange to brighten flavors
- Nuts for added crunch—think toasted almonds or walnuts
- A hint of mint for freshness and color
- Savory elements, such as a dollop of Greek yogurt mixed with honey, for added richness
These little tweaks can elevate your dessert and impress your guests. Ready to try it? Check out this guide for more inspiration on shortcake variations!
Cooking Tips and Notes for Classic Layered Strawberry Shortcake
Tips for perfecting your cake’s texture
Achieving the perfect texture for your classic layered strawberry shortcake is crucial for that delightful bite. Here are some handy tips:
- Use room temperature ingredients: Eggs and butter blend more seamlessly, creating a fluffier cake.
- Don’t overmix: When incorporating dry ingredients, mix just until combined. Overmixing can lead to a dense cake.
- Sift your flour: This simple step can aerate the flour, helping your cake rise beautifully.
For more on baking techniques, check out resources from King Arthur Baking.
Notes on macerating strawberries
Macerating strawberries is essential to enhance their flavor. Here’s how you can do it:
- Slice strawberries: Cut them into quarters or halves for better flavor absorption.
- Use sugar: Sprinkle sugar generously over the berries and let them sit for at least 30 minutes. This draws out their juices and creates a delicious syrup.
- Add a splash of lemon or balsamic vinegar: This can elevate the taste, adding a tangy kick that complements the sweetness beautifully.
These tips will help you create a stunning classic layered strawberry shortcake that’s sure to impress your friends and family!

Serving Suggestions for Classic Layered Strawberry Shortcake
When it comes to enjoying your classic layered strawberry shortcake, presentation can elevate this delightful dessert from ordinary to extraordinary. Here are some creative serving ideas that will impress your guests and enhance your culinary experience.
Creative ways to serve strawberry shortcake
- Individual Jars: Layer the shortcake in mason jars for a fun and portable dessert. This is perfect for picnics or casual gatherings.
- Plate It Up: For a more formal presentation, serve the classic layered strawberry shortcake on a beautiful dinner plate, garnished with mint leaves or a dusting of powdered sugar.
- Family Style: Place the entire cake on a rustic wooden board, allowing guests to serve themselves. This creates a welcoming, communal atmosphere.
Pairing ideas with beverages
To complement your delicious dessert, consider pairing it with some refreshing beverages. Here are a few ideas:
- Iced Tea: A refreshing glass of iced tea, whether sweetened or unsweetened, can balance the sweetness of your cake.
- Lemonade: Bright and zesty lemonade brings a nice contrast to the rich creaminess of the shortcake.
- Sparkling Water: Enhance your meal with a splash of citrus in sparkling water for a refreshing touch.
For a detailed guide on beverage pairing, check out Epicurious for some expert recommendations. Enjoy your classic layered strawberry shortcake and happy hosting!
Time Breakdown for Classic Layered Strawberry Shortcake
Creating a delightful classic layered strawberry shortcake doesn’t have to be a race against the clock. Here’s a handy breakdown to help you plan your baking adventure.
Prep time
You’ll want to set aside about 20 to 30 minutes for preparation. This includes washing and slicing those luscious strawberries, mixing your cake batter, and getting everything ready for the oven.
Baking time
Once prepped, your cake will need about 25 to 30 minutes in the oven. Keep an eye on it, as oven times can vary! The goal is that perfect golden-brown top — just irresistible.
Total time
In total, you’re looking at around 1 to 1.5 hours from prep to finish. Perfect for a weekend treat or a joyful gathering! Planning ahead makes it even easier to savor every delicious moment of this delightful dessert. For more tips on creating the perfect shortcake, check out this resource on baking techniques. Happy baking!
Nutritional Facts for Classic Layered Strawberry Shortcake
When indulging in a slice of classic layered strawberry shortcake, it’s good to know what you’re treating yourself to.
Calories
A typical serving contains about 300 calories. While that’s not too excessive for a dessert, it’s essential to keep portion sizes in mind—especially during gatherings when the cake is hard to resist!
Sugar Content
The sugar content can vary, but on average, you’ll find roughly 20 grams of sugar per serving. Opting for fresh strawberries instead of added sugars can help reduce this a bit. Fresh fruit is loaded with vitamins and is a healthier alternative.
Dairy and Fat Information
This delightful treat usually contains cream and butter, contributing to approximately 15 grams of fat per serving. If you’re looking for lighter options, consider substituting some of the cream with Greek yogurt for a delicious twist!
For more on balancing indulgent desserts with healthy choices, check out Healthline. Remember, it’s all about enjoying life’s sweet moments in moderation!
FAQs about Classic Layered Strawberry Shortcake
When it comes to making the classic layered strawberry shortcake, it’s normal to have a few questions. Let’s dive into some common queries that can help ensure your dessert turns out just right!
How can I store leftover shortcake?
Leftover classic layered strawberry shortcake can be stored in the refrigerator for up to three days. To keep the cake fresh, cover it with plastic wrap or place it in an airtight container. You might want to store the whipped cream separately if you anticipate enjoying leftovers, as this helps maintain that delightful fluffiness. Just remember to give it a good stir before serving again!
Can I make this cake ahead of time?
Absolutely! In fact, making the classic layered strawberry shortcake a day in advance can enhance its flavor. You can prepare the cake layers and strawberries the day before; just assemble it with whipped cream shortly before serving. This way, the flavors will meld beautifully, giving you a more delectable dessert. For tips on prepping, consider checking out more on Baking Science.
What are the best strawberries to use?
Fresh, ripe strawberries are key to making a delicious classic layered strawberry shortcake. Look for berries that are bright red, plump, and fragrant. If possible, choose locally grown strawberries as they tend to be sweeter and more flavorful. You can also try varieties like Chandler or Seascape for an added burst of taste. Seasonal, fresh strawberries are simply the best option, as you’ll find them at local farmers’ markets or grocery stores.
By keeping these tips in mind, you’re all set to enjoy a delightful strawberry shortcake experience. Happy baking!
Conclusion on Classic Layered Strawberry Shortcake
Recap of the joys of homemade shortcake
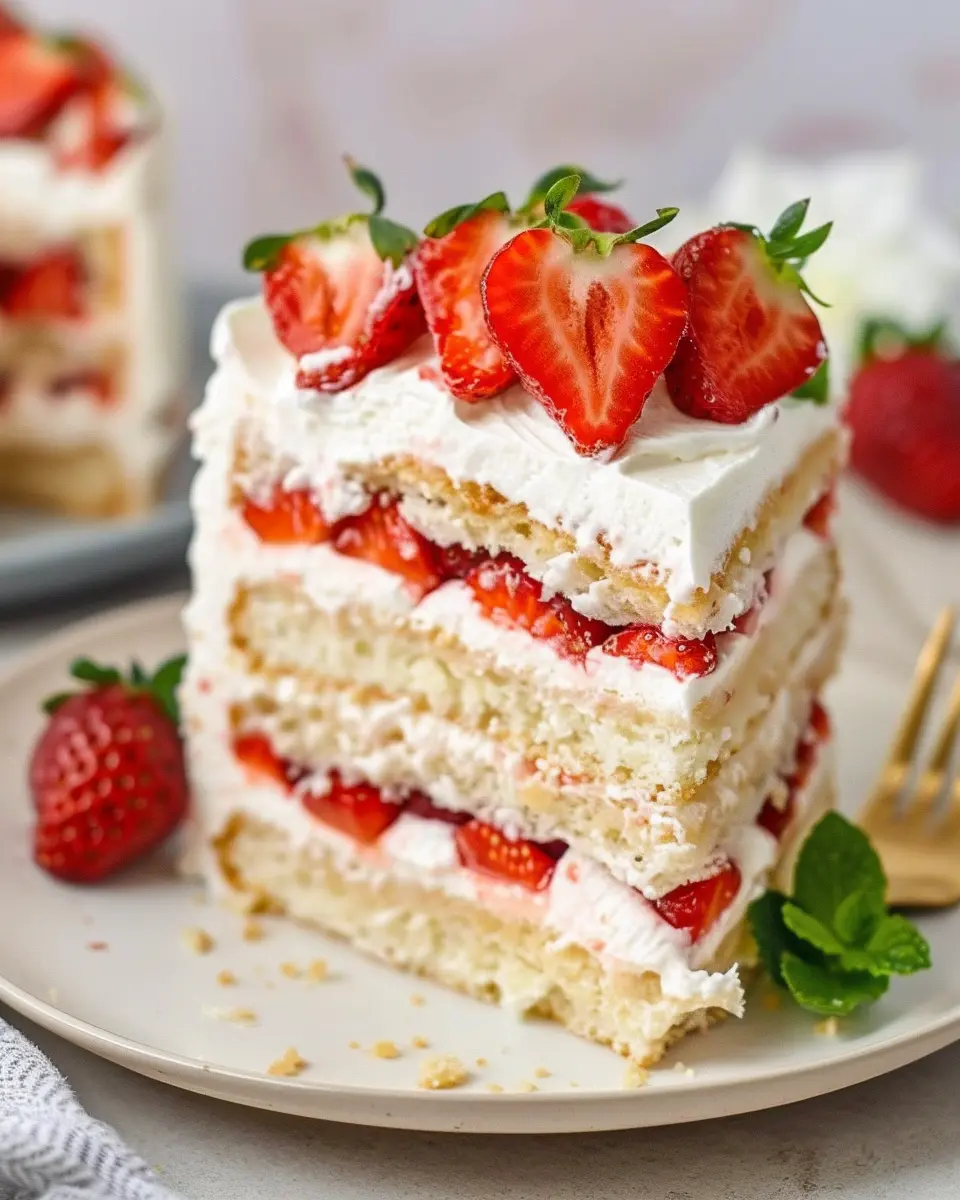
There’s something truly special about a classic layered strawberry shortcake. The anticipation of peeling back the layers to reveal fresh berries and creamy goodness is a joy in itself. Homemade shortcake not only allows you to customize flavors but also ensures you’re crafting a dessert that embodies love and care. Plus, who can resist that buttery biscuit texture?
Encouragement to bake and enjoy!
So, grab your mixing bowl and start baking! Share the joy of your creation with friends or enjoy it as a delightful treat for yourself. Each bite is a reminder of the simple pleasures in life. If you want even more inspiration, check out sites like Food Network or Bon Appétit for tips and variations. Enjoy the journey of baking your classic layered strawberry shortcake!
PrintClassic Layered Strawberry Shortcake: The Best Homemade Treat

The classic layered strawberry shortcake is a delightful homemade dessert that combines fresh strawberries, whipped cream, and fluffy cake.
- Prep Time: 20 minutes
- Cook Time: 30 minutes
- Total Time: 50 minutes
- Yield: 8 servings
- Category: Dessert
- Method: Baking
- Cuisine: American
- Diet: Vegetarian
Ingredients
- 2 cups all-purpose flour
- 1 tablespoon baking powder
- 1/2 teaspoon salt
- 1/2 cup unsalted butter, softened
- 1 cup granulated sugar
- 2 large eggs
- 1 teaspoon vanilla extract
- 1 cup whole milk
- 4 cups fresh strawberries, sliced
- 1 cup heavy whipping cream
- 2 tablespoons powdered sugar
Instructions
- Preheat the oven to 350°F (175°C).
- In a bowl, whisk together the flour, baking powder, and salt.
- In another large bowl, cream the butter and granulated sugar until light and fluffy.
- Add the eggs one at a time, mixing well after each addition.
- Stir in the vanilla extract.
- Gradually add the dry ingredients to the wet mixture, alternating with milk.
- Pour the batter into a greased cake pan and bake for 25-30 minutes.
- Once baked, let the cake cool completely on a wire rack.
- Meanwhile, whip the cream with powdered sugar until soft peaks form.
- Assemble the cake by layering sliced strawberries and whipped cream between cake layers.
Notes
- For a richer flavor, let the whipped cream sit in the fridge for 30 minutes before using.
- Use fresh strawberries for the best taste.
Nutrition
- Serving Size: 1 slice
- Calories: 310
- Sugar: 18g
- Sodium: 200mg
- Fat: 15g
- Saturated Fat: 9g
- Unsaturated Fat: 4g
- Trans Fat: 0g
- Carbohydrates: 36g
- Fiber: 1g
- Protein: 4g
- Cholesterol: 70mg