Introduction to Cheesy Garlic Rolls
The irresistible appeal of homemade cheesy garlic rolls
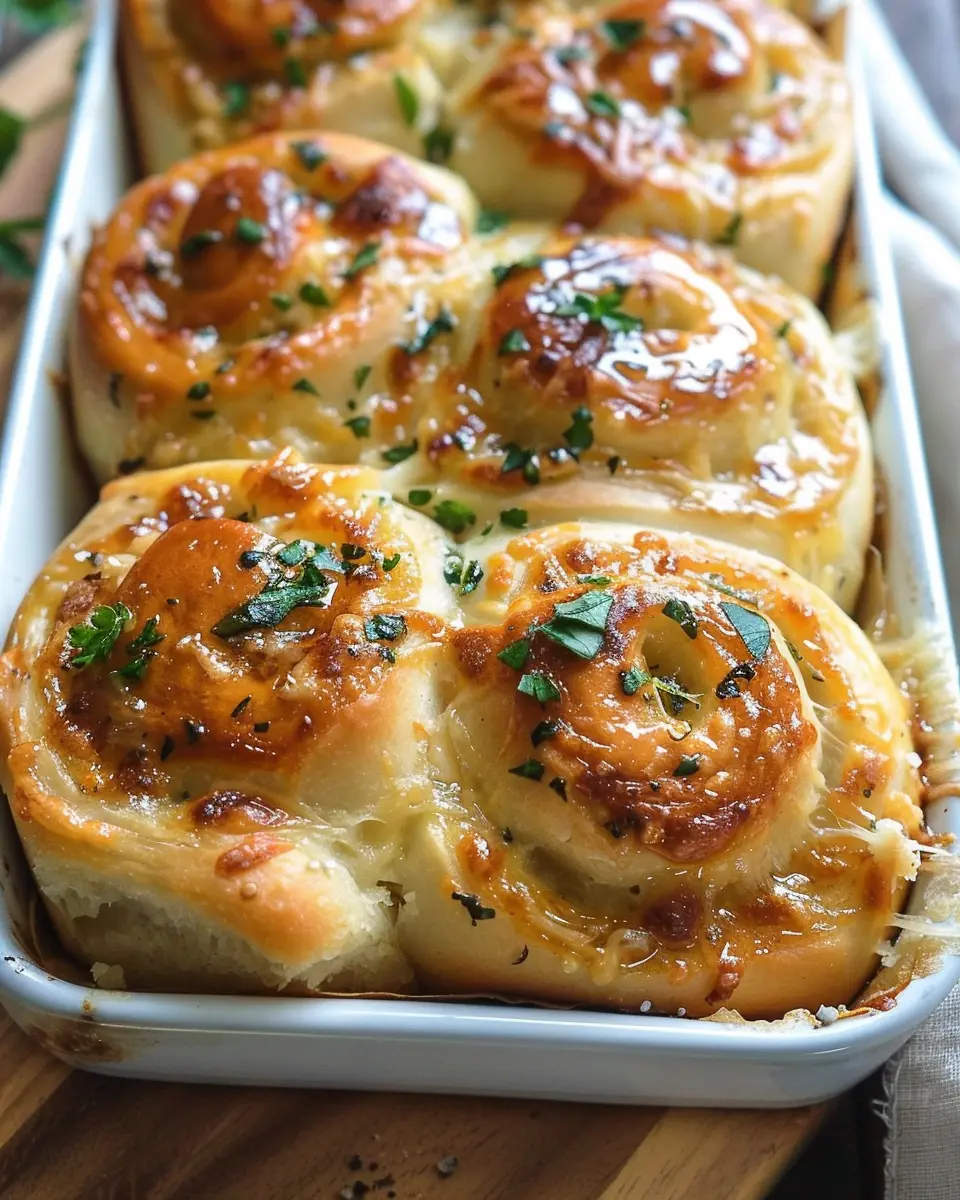
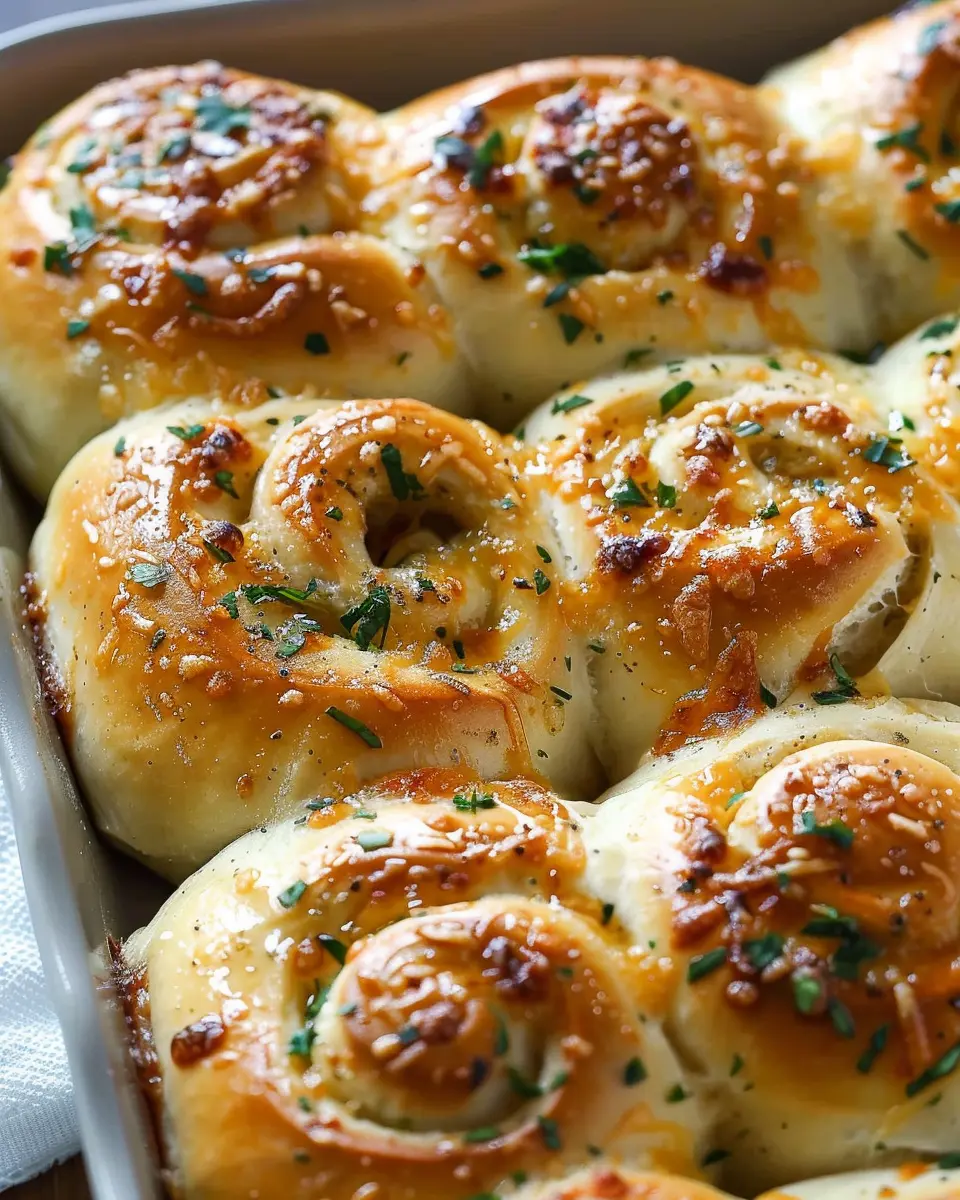
When you think of cheesy garlic rolls, what comes to mind? Perhaps warm, pillowy dough infused with rich garlic flavor and oozing with melted cheese? These rolls are an embodiment of comfort food, perfectly suited for cozy nights in or as the ideal complement to your favorite pasta dish. The best part? Making cheesy garlic rolls at home elevates this treat from ordinary to extraordinary. You’re in control of the ingredients, meaning you can tailor the flavors to your liking—extra garlic, more cheese, or even a sprinkle of herbs for that gourmet touch. Plus, there’s a unique satisfaction that comes from pulling fresh, aromatic rolls out of your own oven, filling your kitchen with a delightful scent that store-bought alternatives just can’t replicate.
Why you should ditch fast food for homemade goodness
Let’s face it—while fast food offers convenience, it often lacks the freshness and flavor of homemade meals. Studies show that home-cooked meals tend to be more nutritious, allowing you to dodge excessive preservatives (source: Harvard Health). Not only can you control what goes into your cheesy garlic rolls, but you can also avoid the pitfalls of unhealthy additives, sugar, and unhealthy fats often found in fast-food options. Imagine swapping out those greasy, bland rolls for something you whipped up using wholesome ingredients!
Moreover, cooking at home is a delightful endeavor. Picture this: you gather your friends or family around, each of you getting your hands into the dough while sharing laughs and stories. Cooking is often more than just a task; it creates connections and fosters community.
Making your own cheesy garlic rolls might seem daunting at first, but once you discover the joy of creating something delicious from scratch, you’ll be hooked. So, why not trade those drive-thru nights for a bit of culinary creativity? Your taste buds—and your body—will thank you. Let’s dive into the details and make some magic happen in your kitchen!
Ingredients for Cheesy Garlic Rolls
When craving a delicious comfort food, nothing quite beats the allure of cheesy garlic rolls. These mouthwatering treats come together beautifully with just a few essential ingredients.
Essential Ingredients for the Dough
To create the perfect, fluffy dough, you’ll need:
- All-purpose flour: This forms the backbone of your rolls, providing structure.
- Active dry yeast: This helps the dough rise and keeps your rolls light and airy.
- Warm water: Not too hot or too cold; this nourishes the yeast for proper activation.
- Milk: A touch of milk adds richness to your dough.
- Sugar: This gives your rolls a slight sweetness and feeds the yeast.
- Salt: Balances flavors and strengthens the gluten in the flour.
Flavorful Components for the Garlic Butter
The magical flavor of these rolls comes from the garlic butter. For a delightful mix, gather:
- Unsalted butter: Softened to a creamy consistency.
- Fresh garlic: Minced for that robust flavor.
- Parsley: Chopped for a fresh touch and a pop of color.
- Italian seasoning: A dash to elevate this savory blend.
The Cheesy Filling That Takes It Over the Top
Let’s be honest—no one can resist a generous filling of gooey cheese! For the best results, choose:
- Mozzarella cheese: For melty bliss.
- Parmesan cheese: A hint of nuttiness elevates the flavor.
- Turkey bacon or chicken ham: For a savory kick, diced finely.
These ingredients harmonize to create cheesy garlic rolls that are utterly irresistible! You can even refer to baking resources to fine-tune your dough-making skills! Happy baking!
Preparing Cheesy Garlic Rolls
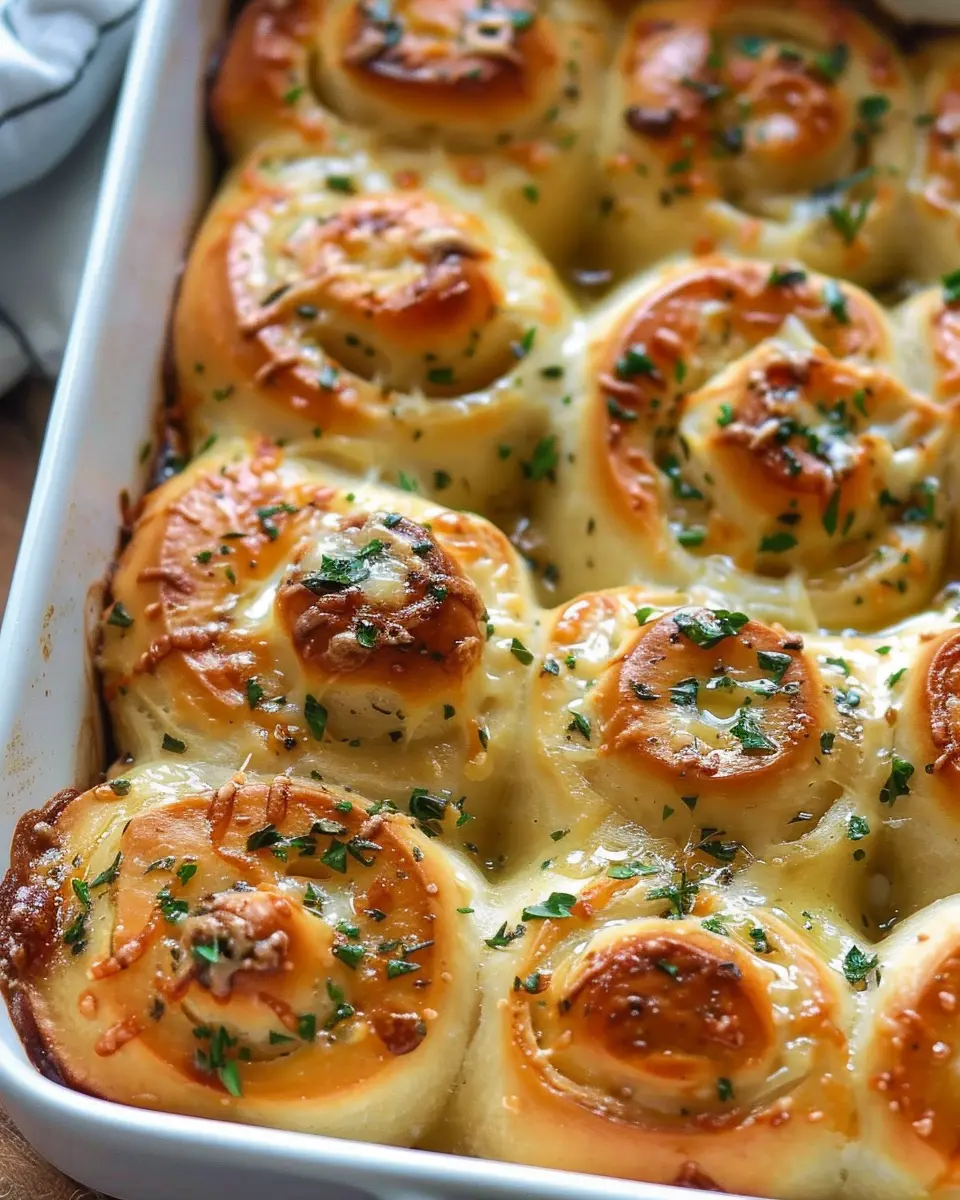
Cheesy garlic rolls are a delight that can elevate any meal or be enjoyed on their own as a savory snack. The combination of soft, gooey cheese with the rich aroma of garlic is hard to resist. Let’s dive into the step-by-step process, ensuring you create the perfect cheesy garlic rolls for yourself and your loved ones.
Activating the yeast
The first step in this rewarding adventure is to activate the yeast, which is critical for creating that airy, fluffy texture in your rolls.
- Gather your ingredients: You’ll need warm water (around 110°F), sugar, and active dry yeast. The sugar helps to jumpstart the yeast, so don’t skip it!
- Mix: In a bowl, combine about 1 cup of warm water, a tablespoon of sugar, and 2 teaspoons of active dry yeast. Stir gently and let it sit for about 5-10 minutes. Once it’s frothy, you know your yeast is ready and raring to go!
Did you know that yeast can actually tell you when it’s ready? If it bubbles up and produces a frothy top, that’s your cue that you’re all set to proceed!
Making the dough
With your yeast alive and kicking, it’s time to whip up the dough that will cradle your cheesy goodness.
- Blend dry ingredients: In a separate bowl, mix 4 cups of all-purpose flour and a teaspoon of salt. This blend will provide the perfect base.
- Combine: After your yeast mixture is ready, add it to the flour, along with 1/4 cup of melted butter. Mix until a dough forms. It should be slightly sticky but still manageable.
- Knead: Flour your work surface and knead the dough for about 8-10 minutes until it’s smooth and elastic. You can also use a stand mixer with a dough hook attachment for this step.
Remember, kneading is not just a workout for your arms—it’s vital for developing the gluten that gives your rolls their structure!
Preparing the garlic butter
No cheesy garlic rolls would be complete without the mouthwatering garlic butter. It enhances the flavor profile and makes them irresistible.
- Ingredients: Combine 1/2 cup of softened butter with 4-5 minced garlic cloves, and a pinch of salt in a small bowl. For extra flavor, consider adding chopped parsley or Italian seasoning.
- Mix well: Blend until it’s smooth and aromatic. This buttery concoction is your secret weapon!
Trust me, this garlic butter can brighten up any dish from breadsticks to pastas.
Rolling and filling the dough
Now comes the fun part—rolling and filling your dough to create those delicious cheesy garlic rolls.
- Shape the dough: Take your kneaded dough and roll it out on a floured surface into a rectangle, about 1/2-inch thick.
- Spread that garlic butter: Slather the prepared garlic butter generously across the dough.
- Add cheese: Sprinkle a generous amount of shredded cheese—Mozzarella is classic, but feel free to mix in your favorites!
- Roll: Starting from one end, carefully roll the dough into a log. Slice it into equal pieces (about 2 inches thick) and arrange them in a greased baking dish.
This step is where you can really get creative! Consider adding other fillings like cooked turkey bacon or chicken ham for a heartier touch.
Letting the rolls rise
After forming your delicious rolls, they need some time to rise and become fluffy.
- Cover the dish: Use a clean kitchen towel or plastic wrap to cover your rolls.
- Rest time: Let them rise in a warm place for about 30-40 minutes, until they double in size.
While you wait, you might want to start preheating your oven to 375°F!
Baking to perfection
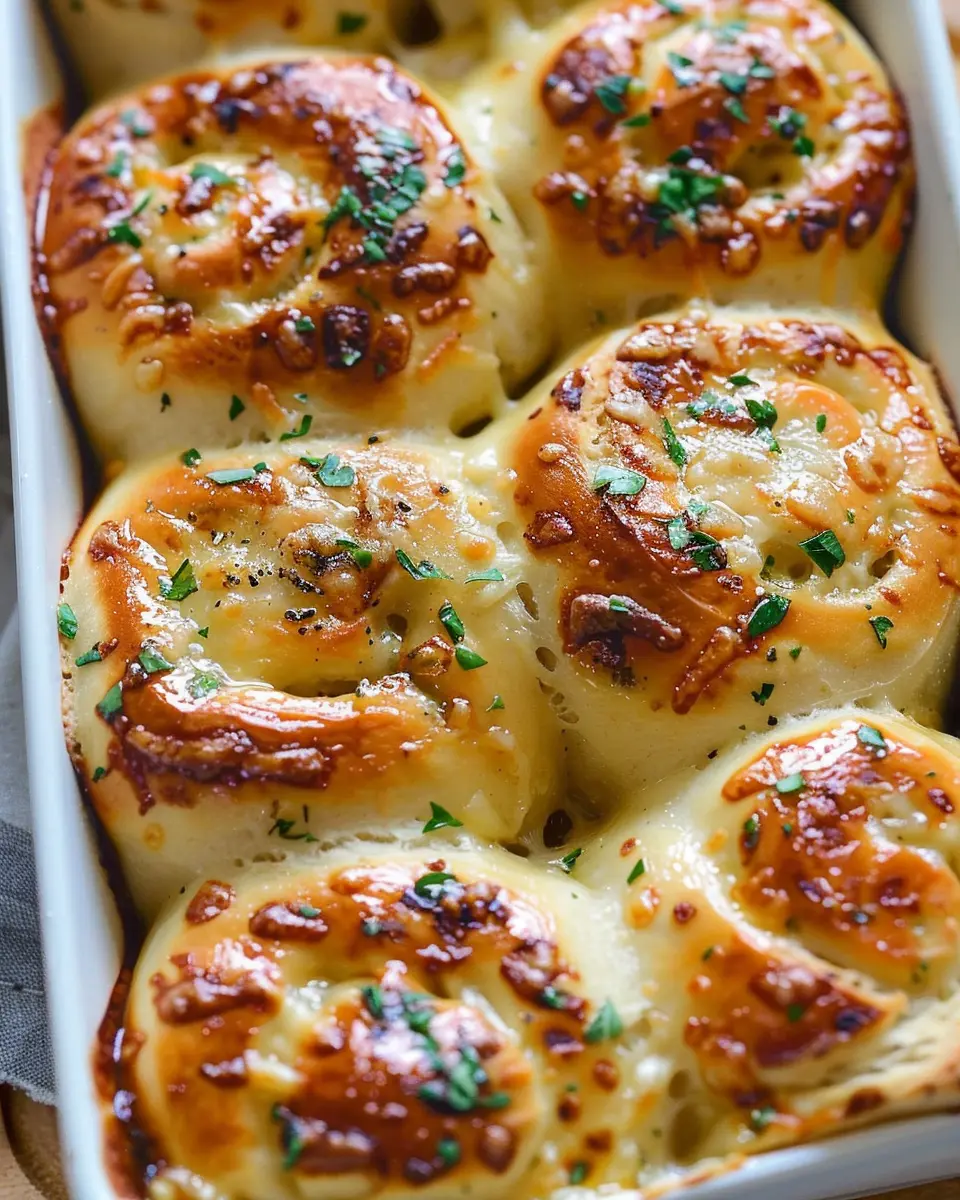
This is the moment you’ve been waiting for—baking your cheesy garlic rolls to a golden brown perfection!
- Bake: Place your rolls in the preheated oven and bake for about 20-25 minutes, or until they’re golden and bubbling.
- Finishing touch: If you want an extra infusion of flavor, brush more garlic butter on top right as they come out of the oven.
And there you have it—deliciously warm cheesy garlic rolls, perfect for sharing (or not!). Pair them with a simple salad and some pasta for a complete meal, or just enjoy them fresh out of the oven on their own.
Are you ready to invite these cheesy garlic rolls into your kitchen? Enjoy the baking adventure!
Variations on Cheesy Garlic Rolls
Creating the ultimate cheesy garlic rolls isn’t just about the creamy, gooey cheese and savory garlic; it’s also about getting adventurous! Here are some fun variations to elevate your cheesy rolls and impress your friends at your next gathering.
Adding herbs for extra flavor
Enhancing your cheesy garlic rolls with fresh herbs can make a big difference in flavor profile. Consider adding:
- Basil: This sweet herb brings a refreshing taste.
- Parsley: A classic choice that adds a vibrant color.
- Oregano: For an Italian twist, it’s a must-have.
Mixing these herbs into your garlic butter can elevate your rolls from ordinary to extraordinary!
Incorporating different types of cheese
Why stop at just one type of cheese when you can create a melty masterpiece? Try combining:
- Mozzarella: For that classic stretchiness.
- Parmesan: Adds a nutty flavor that blends perfectly.
- Cheddar: For a sharp twist, mix in some aged cheddar.
Experimenting with cheese blends not only enhances the taste but also plays with texture, making your cheesy garlic rolls irresistibly gooey.
Making it a meal with protein
Want to turn your cheesy garlic rolls into a complete meal? Consider adding some protein! Here are some ideas:
- Turkey Bacon: Crispy and flavorful, it complements the garlic perfectly.
- Chicken Ham: Adds a delightful meatiness and pairs well with the cheese.
- Beef: Cooked and seasoned, shredded beef can give your rolls a hearty touch.
These ingredients can help create a balanced meal while keeping your rolls delicious. Don’t hesitate to get creative!
For more delightful pairing ideas and cheesy inspirations, check out Food Network or Serious Eats for endless culinary adventures!
Cooking tips and notes for Cheesy Garlic Rolls
How to Achieve Perfectly Fluffy Rolls
To get those cheesy garlic rolls just right, start by using fresh yeast. If you’re using instant yeast, remember to mix it into your dry ingredients first for an effortless rise. Allow your dough to rest in a warm place—ideally around 75°F to 80°F—until it doubles in size. This process usually takes about 1 to 2 hours. Don’t rush this step; patience is key!
Also, knead the dough until it’s smooth and elastic—a good test is to stretch a piece without tearing it. This helps develop gluten, creating that delightful chewiness.
Storing and Reheating Your Rolls
To keep your cheesy garlic rolls fresh, store them in an airtight container at room temperature. They should last about 2 to 3 days. For longer storage, consider freezing them. Wrap each roll tightly in plastic wrap and then place them in a freezer bag. When you’re ready to enjoy them again, simply thaw at room temperature.
Reheating is easy too: pop them in the oven at 350°F for around 10 minutes. You’ll get that warm, gooey cheesiness back—just like the first bite! For more on storing baked goods, check out this source from Food Network.
Serving suggestions for Cheesy Garlic Rolls
Pairing with meals or as a standalone snack
Cheesy garlic rolls are incredibly versatile—perfect for enhancing your dinner or serving as a delicious snack on their own. Pair these rolls with a hearty bowl of creamy tomato soup for a comforting meal, or enjoy them alongside a fresh garden salad for a lighter option. They also make a fantastic accompaniment to grilled chicken or beef dishes, adding a savory touch that complements any main course. Whether you’re hosting a casual dinner or simply indulging after a long day, these rolls are sure to impress.
Creative dipping sauces to enhance the flavor
Elevate your cheesy garlic rolls by exploring a variety of dipping sauces. Consider pairing them with:
- Classic marinara for a rich, tangy experience
- Creamy ranch or garlic aioli for that extra flavor kick
- Sweet chili sauce for a delightful contrast
Each dip brings its unique flair, making every bite even more enjoyable. Why not mix and match? Try serving a trio of sauces for a fun, interactive meal experience. Explore more sauce options from Serious Eats to inspire your taste buds!
By experimenting with pairings and dips, you’ll take your cheesy garlic rolls to the next level, ensuring they’ll be the star of the show every time.
Time breakdown for Cheesy Garlic Rolls
When you’re gearing up to make these delicious cheesy garlic rolls, knowing how to manage your time can make the process so much smoother. Here’s a quick overview to help you plan!
Preparation time
You’ll need about 15-20 minutes to gather your ingredients, prepare the dough, and fill those rolls with cheesy goodness. It’s a great time to play some music and get the vibe just right!
Rising time
Patience is key here—allow your dough to rise for about 1 hour. This is the perfect moment to catch up on a favorite podcast or dive into a good book.
Baking time
Once your rolls are stuffed and shaped, bake them for 20-25 minutes until they’re golden brown and irresistible.
Total time
In total, you’re looking at roughly 1 hour and 45 minutes from start to finish. So, gather your friends and get ready to enjoy these fantastic cheesy garlic rolls!
For tips on perfecting your dough, check out King Arthur Baking for expert advice. Happy baking!
Nutritional facts for Cheesy Garlic Rolls
Calories per roll
When diving into the delicious world of cheesy garlic rolls, it’s essential to know that each roll typically contains around 200 calories. This makes them a satisfying treat or side dish without completely derailing your healthy eating habits. Enjoying them in moderation will allow you to savor their cheesy goodness guilt-free!
Key nutrients to consider
These delightful rolls are not just flavorful; they also pack some key nutrients that can be beneficial to your diet:
- Protein: Essential for muscle repair and growth, particularly if you opt for toppings like Turkey Bacon or Chicken Ham.
- Calcium: Thanks to the cheese, these rolls help meet your daily calcium needs, promoting strong bones.
- Fiber: If you choose whole wheat flour for the dough, you’ll boost your fiber intake, aiding digestion.
For more about the importance of these nutrients, you can check out resources like Healthline. Whether paired with a fresh salad or enjoyed alone, these cheesy garlic rolls are a tasty way to add nutrition to your meal!
FAQs about Cheesy Garlic Rolls
Can I make these rolls ahead of time?
Absolutely! Cheesy garlic rolls are perfect for prepping in advance. You can prepare the dough and shape the rolls, then cover them tightly and refrigerate for up to 24 hours. When you’re ready to enjoy them, simply let them come to room temperature and rise for about 30 minutes before baking. This way, you can save time on those busy days while still enjoying a delicious homemade treat.
What can I do if my dough doesn’t rise?
It can be frustrating when dough doesn’t rise, but don’t fret! Here are a few tips:
- Check your yeast: Make sure it’s active. Yeast that’s expired or improperly stored may not perform well.
- Warm environment: Dough rises best in a warm, draft-free area. Try placing it in an oven that’s turned off with the light on for warmth.
- Humidity: If your kitchen is super dry, consider adding a little additional moisture to the environment. A bowl of hot water nearby can help create that perfect humidity.
If the dough still fails to rise, you can make garlic rolls using the dough as flatbreads, topping them with garlic butter and cheese!
How can I customize my garlic butter?
The garlic butter for your cheesy garlic rolls is an easy canvas for creativity! Here are some ideas:
- Herbs: Mix in some fresh or dried herbs like parsley, oregano, or basil for added flavor.
- Spices: A sprinkle of chili flakes gives your butter a spicy kick, while smoked paprika can add depth.
- Cheese: Feel free to mix in different cheeses, like Parmesan or mozzarella, to enhance the flavor even more.
For more tips on garlic butter variations, check out this great article. Customize your rolls to suit your taste and impress your friends!
Conclusion on Cheesy Garlic Rolls
Emphasizing the joy of homemade goodness
There’s something undeniably satisfying about creating cheesy garlic rolls from scratch. The aroma of garlic wafting through your kitchen can elevate any day, making it feel special. Each bite is a delightful union of cheesy goodness and rich flavors, reminding you why homemade is always better. Beyond just a recipe, it’s a chance to share warmth and comfort with those you love.
Encouraging readers to share their baking adventures
Have you tried your hand at these delicious rolls? I’d love to hear about your baking journeys! Maybe you added your own twist with Turkey Bacon or extra herbs. Sharing your experiences not only inspires others but can also build a community of fellow baking enthusiasts. So, snap a pic and tell the world about your delicious adventure!
PrintCheesy Garlic Rolls: The Irresistible Comfort You’ve Been Craving

These Cheesy Garlic Rolls are the perfect blend of buttery, garlicky goodness encased in a soft roll, making them the ultimate comfort food.
- Prep Time: 15 minutes
- Cook Time: 25 minutes
- Total Time: 1 hour 40 minutes
- Yield: 12 rolls
- Category: Bread
- Method: Baking
- Cuisine: Italian
- Diet: Vegetarian
Ingredients
- 3 cups all-purpose flour
- 1 packet active dry yeast
- 1 cup warm water
- 2 tablespoons sugar
- 1 teaspoon salt
- 1/4 cup unsalted butter, melted
- 4 cloves garlic, minced
- 1 cup shredded mozzarella cheese
- 1/4 cup parsley, chopped
Instructions
- In a bowl, combine warm water, sugar, and yeast. Let it sit for 10 minutes until foamy.
- Add melted butter, flour, and salt to the yeast mixture. Knead the dough until smooth.
- Let the dough rise in a warm place for 1 hour or until doubled in size.
- Preheat the oven to 375°F (190°C).
- Roll out the dough and spread minced garlic and mozzarella cheese evenly. Roll tightly.
- Cut the roll into slices and place them on a baking sheet.
- Bake for 20-25 minutes until golden brown.
- Garnish with parsley before serving.
Notes
- For an extra flavor, add Italian herbs to the garlic butter.
- Serve warm for the best taste.
Nutrition
- Serving Size: 1 roll
- Calories: 150
- Sugar: 1g
- Sodium: 200mg
- Fat: 7g
- Saturated Fat: 4g
- Unsaturated Fat: 2g
- Trans Fat: 0g
- Carbohydrates: 18g
- Fiber: 1g
- Protein: 4g
- Cholesterol: 20mg