Introduction to Cheese Danish
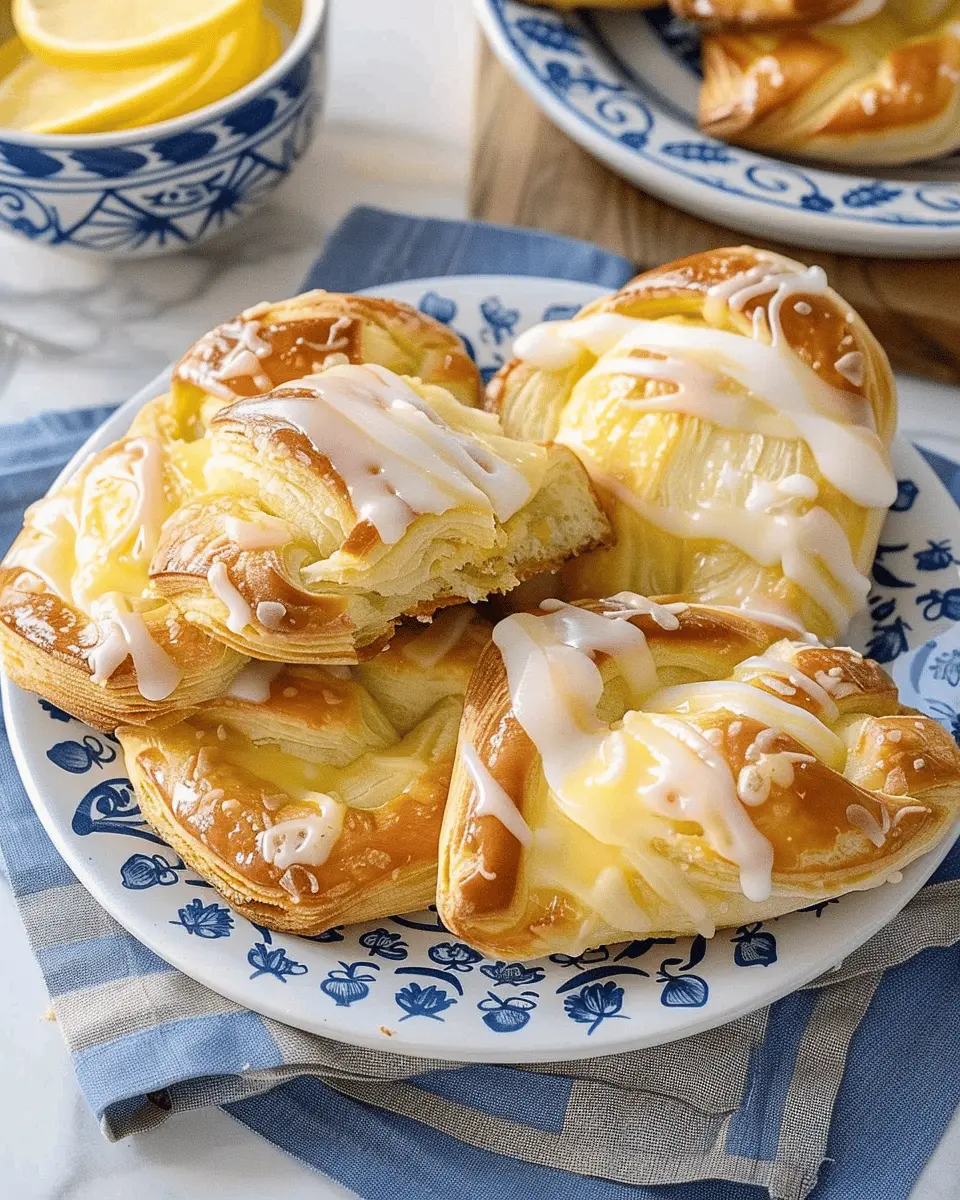
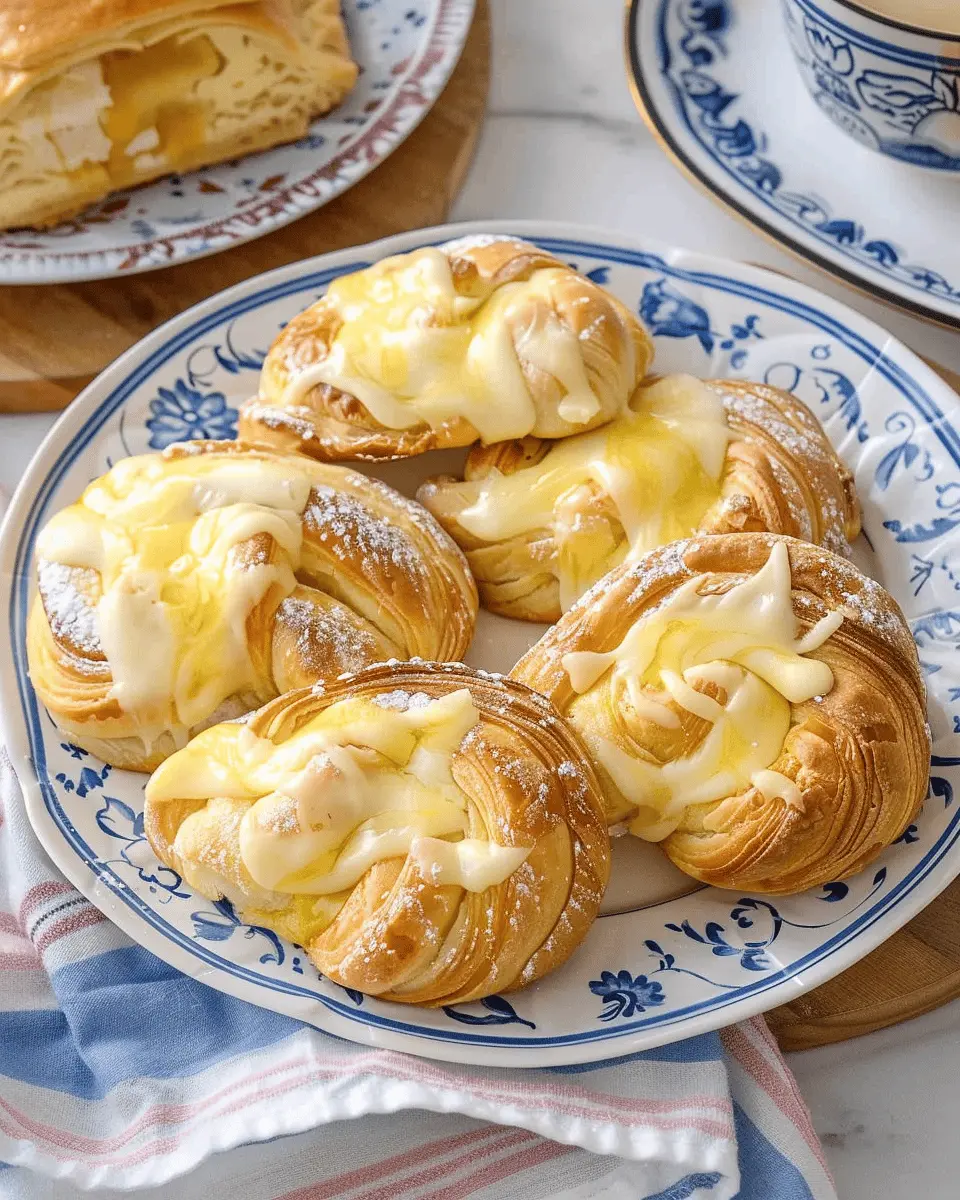
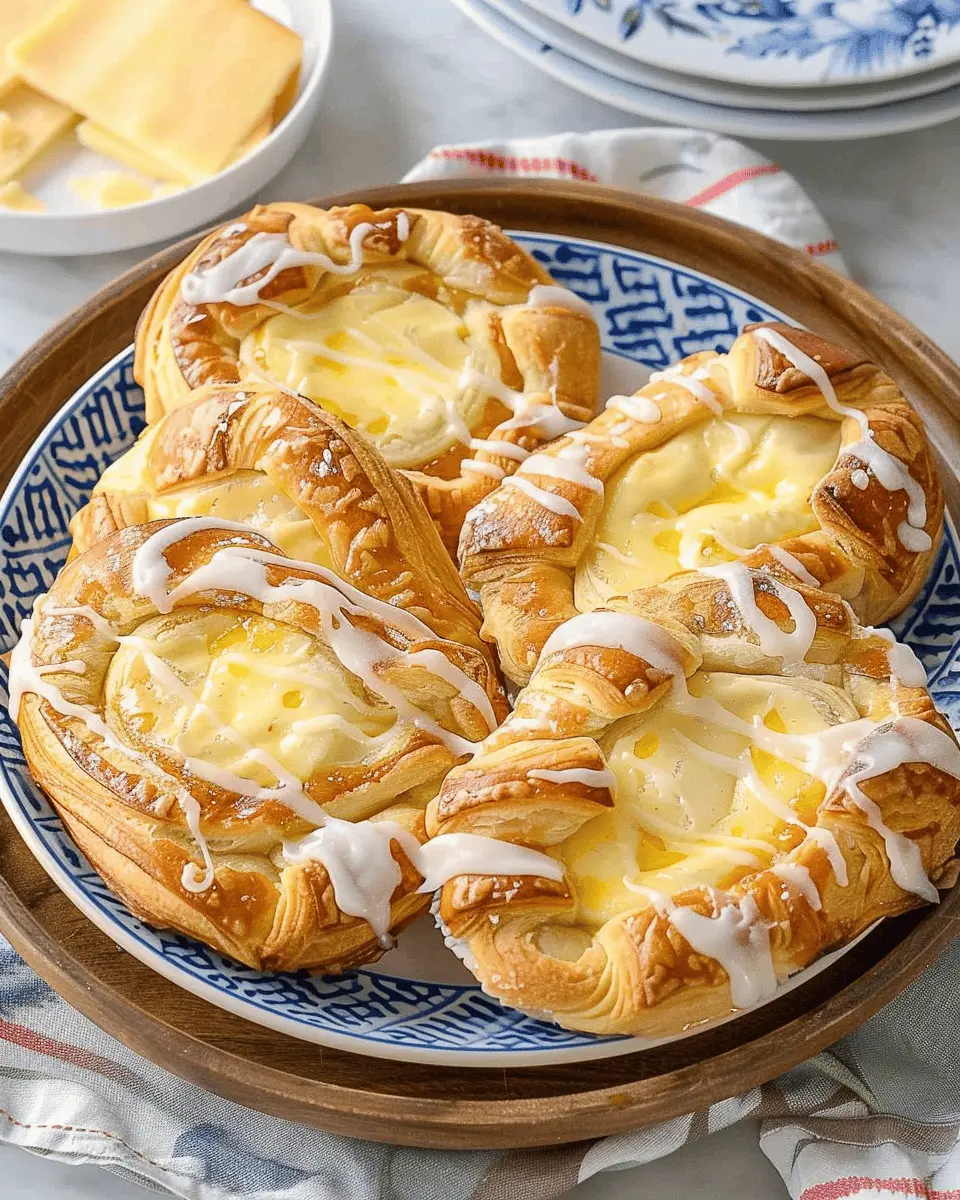
You might be wondering, what exactly is a cheese danish? Imagine a blissful pastry that’s crispy on the outside and creamy on the inside—a delightful blend that draws you in with every bite. Traditionally filled with sweetened cream cheese and a hint of vanilla, this pastry is perfect for breakfast or a fancy brunch treat.
Why Homemade Cheese Danish is a Game Changer
Let’s face it: store-bought pastries often leave us underwhelmed. When you make a cheese danish at home, you’re in control of the ingredients, the flavors, and, most importantly, the quality. Homemade pastries can elevate a simple morning into something truly special.
Here are some reasons why whipping up your own cheese danish can change your culinary game:
- Freshness You Can Taste: Nothing beats the aroma of fresh pastries wafting through your kitchen. By baking at home, you’re guaranteed peak freshness.
- Customization Galore: Want to swap in some fresh berries or a splash of lemon zest? Go ahead! You can easily tailor your cheese danish to your taste preferences, making it unique every time you bake.
- Healthier Choices: You can control sugar levels and opt for organic ingredients. This means you can enjoy a decadently creamy filling without the unnecessary additives often found in commercial brands.
- A Fun Activity: Baking together can be a great way to bond with friends or distract from a busy week. Plus, you’ll surely impress guests with your culinary prowess.
According to culinary experts, homemade pastries boast a higher satisfaction factor, enhancing not only your taste buds but also your cooking skills. If you’re interested in culinary techniques, check out Serious Eats for tips on perfecting your dough.
Whether you’re an aspiring baker or just looking for an easy recipe to bring some cheer to a weekday morning, making your own cheese danish is a rewarding experience. Trust me, once you indulge in that buttery, flaky goodness, there’s no going back!
So, ready to embark on this delicious journey? Let’s get baking!
Ingredients for Cheese Danish
Essential ingredients for a classic Cheese Danish
Making a delightful cheese danish starts with the right ingredients. Here’s what you’ll need for that perfect blend of flavors and textures:
- Danish pastry dough: You can make it from scratch or purchase frozen dough for convenience.
- Cream cheese: This is the star ingredient that gives your cheesecake filling its rich, creamy texture.
- Powdered sugar: Adds sweetness to the filling, balancing the tanginess of the cream cheese.
- Vanilla extract: Just a splash amplifies the flavor of the filling beautifully.
- Egg yolk: This helps bind the filling and gives it a luscious texture.
Optional ingredients for customization
Now that you’ve got the essentials, why not get creative? Consider these optional ingredients to personalize your cheese danish:
- Fruit preserves or fresh fruit: Adding a dollop of raspberry or cherry preserves can bring a fruity twist.
- Zest: Lemon or orange zest can elevate the flavor profile with a bright note.
- Chopped nuts: Almonds or walnuts can add a pleasing crunch and texture.
For more tips on customizing pastries, check out this cooking inspiration for ideas. Who knows? You might just stumble upon your new favorite version!
Preparing Cheese Danish
Creating a homemade cheese danish might seem intimidating at first, but it’s a delightful process filled with simple steps and rewarding results. Not only do they make for a perfect breakfast treat or brunch centerpiece, but they also carry a sense of accomplishment when made from scratch. So, let’s dive in!
Gather Your Ingredients
Before embarking on your cheese danish adventure, it’s crucial to gather all the necessary ingredients. Here’s what you’ll need:
-
Dough:
-
1 package of frozen puff pastry (or make your own if you’re feeling adventurous)
-
1 egg, beaten (for egg wash)
-
Cheese Filling:
-
8 oz cream cheese, softened
-
1/2 cup powdered sugar
-
1 teaspoon vanilla extract
-
1 egg yolk
-
A dash of salt
-
To Top It Off:
-
Optional: Fresh fruit, lemon zest, or a light glaze made from powdered sugar and milk.
Having everything prepped helps streamline the process and ensures you don’t find yourself halfway through and missing that essential ingredient. Plus, it’s also a good idea to have your oven preheating at this point to 400°F (200°C) for crispy perfection at the end.
Prepare the Dough
Using frozen puff pastry makes this step a breeze! Simply take it out of the freezer and let it thaw as per the package instructions, usually about 40 minutes. Once thawed, roll it out on a lightly floured surface to ensure it doesn’t stick. Aim for a rectangle about 1/8 inch thick.
If you want extra flakiness, try folding the dough a couple of times before rolling. This extra effort can give your cheese danish that sought-after layered look. Don’t forget to cut the dough into squares or rectangles—about 4 inches each will do just fine!
For those brave enough to dive into homemade pastry dough, find an excellent recipe on sites like King Arthur Baking or Taste of Home.
Make the Cheese Filling
In a mixing bowl, combine the following to create your filling:
- Softened cream cheese
- Powdered sugar
- Vanilla extract
- Egg yolk
- A pinch of salt
Mix using a hand mixer or simply whisk until smooth and creamy. This filling is where you can infuse your personality—think about adding lemon zest for a fresh twist or even a hint of almond extract for something a tad unconventional. The filling should be rich but not overly sweet, embodying that perfect balance.
Shape the Cheese Danish
Now comes the fun part: shaping! Take one piece of your dough, and using your fingers, press down in the center to create a little well. This is where your delicious filling will sit. Next, add a spoonful of the cream cheese mixture into the well.
If you want to get fancy, you can fold over the corners of the pastry to create a charming little pocket. Or for a more classic form, leave them untouched; the choice is yours!
Bake to Perfection
Once your cheese danish are shaped and ready, place them on a lined baking sheet. Brush the tops with the beaten egg for that golden, glossy finish. Bake in your preheated oven for about 15-20 minutes or until they look perfectly puffy and golden brown.
Be sure to let them cool a moment before biting in—unless you enjoy that delightful burnt tongue feeling! While they’re cooling, consider drizzling a simple glaze made with powdered sugar and milk on top for some extra sweetness.
Baking can be a beautiful blend of science and art, so feel free to experiment with spices or different cheeses in your filling. After all, each batch is a new opportunity for creativity!
Enjoy your homemade cheese danish with a hot cup of coffee or tea, and don’t hesitate to share your own tips or improvise based on what you have at home. Happy baking!
Variations on Cheese Danish
Cheese Danish is a delightful treat that can be customized in countless ways! If you want to step outside the classic flavor profile, here are some delicious variations to help you impress your friends or simply add some zest to your breakfast or snack time.
Fruit-Filled Cheese Danish
One of the most popular variations is the fruit-filled cheese danish. You can incorporate a variety of fruits, ranging from strawberries and blueberries to fresh peaches or cherries. Simply add a fruity filling along with the sweet cheese mixture before baking. The warmth of the pastries blends beautifully with the fresh fruit, creating a delightful balance of flavors. More ideas for fruit fillings can be found on FoodNetwork.com.
Chocolate Cheese Danish
If you’re a chocolate lover, why not whip up a chocolate cheese danish? Incorporate cocoa powder into your cheese filling or add chocolate chips for an extra indulgent treat. For those moments when you need an afternoon pick-me-up, this option is sure to satisfy your sweet tooth. Remember, chocolate always elevates the experience—your friends will be begging for the recipe!
Savory Cheese Danish with Herbs
For a twist on this classic, try making a savory cheese danish with herbs. Mixing in fresh herbs like rosemary, thyme, or chives with your cheese filling adds a savory richness. You can also fold in ingredients like turkey bacon or chicken ham for a heartier version. These are excellent for brunches or as appetizers at your next gathering.
Experimenting with these variations of cheese danish can make your baking adventures even tastier and more enjoyable! Don’t be afraid to let your creativity shine in the kitchen. What’s your favorite flavor combination?
Cooking Tips and Notes for Cheese Danish
Creating the perfect cheese danish is an art form, but a few tips can elevate it from good to extraordinary.
Use Fresh Ingredients
Always opt for fresh cream cheese and butter; they significantly enhance flavor and texture. Don’t forget to let your cream cheese sit at room temperature before using it; this helps achieve a smooth filling.
Keep the Dough Cold
When working with puff pastry, keeping it chilled is key. If the dough becomes too warm, it won’t puff up properly while baking. A quick 10-minute chill in the fridge can work wonders!
Sweetness Balance
If you prefer a less sweet filling, feel free to adjust the sugar in the cheese mixture. A touch of lemon zest can enhance flavor without overpowering it, bringing freshness to the cheese danish.
Experiment with Toppings
While a simple icing glaze is delightful, consider adding sliced almonds or fresh berries for added crunch and flavor. You can even pair your danish with a cup of herbal tea or a refreshing green smoothie for a wholesome breakfast or snack.
For additional tips, check out The Kitchn’s guide on baking with puff pastry or Serious Eats for flavor pairing ideas! Happy baking!
Serving suggestions for Cheese Danish
Perfect pairings for your Cheese Danish
When it comes to enjoying your Cheese Danish, think beyond just the pastry. Pair it with a delectable cup of coffee or a refreshing herbal tea; the slight bitterness of the coffee complements the sweetness of the cheese filling beautifully. Looking for something heartier? A side of fresh seasonal fruit like berries or sliced apples can elevate your experience, providing a nice contrast in texture and flavor. If you’re in the mood for something savory, try serving it with Turkey Bacon or Chicken Ham for a fulfilling brunch option.
Creative serving styles
Serving your Cheese Danish can be just as fun as making it! Consider presenting it on a rustic wooden board, surrounded by small bowls of assorted jams and spreads for guests to customize their bites. Alternatively, stack a few on a tiered serving stand for a stylish tea party vibe. You might even drizzle a bit of icing on top before serving; it adds an extra flair and sweetness. For those who love to bake, why not bake mini versions of this delightful treat? They’re perfect for brunch gatherings or casual get-togethers with friends.
By incorporating these serving suggestions, you’ll transform your Cheese Danish from a simple pastry to a standout centerpiece. Want more ideas? Check out Bon Appétit, a great source for inspiration and additional recipes!
Time breakdown for Cheese Danish
Preparation time
Getting your Cheese Danish ready is a breeze and typically takes about 20 minutes. During this time, you’ll want to gather your ingredients—cream cheese, sugar, and puff pastry—so everything is ready to go. Preparing the fillings and assembling each danish is a satisfying part of the process.
Baking time
Once your Cheese Danish are filled and shaped, pop them into a preheated oven. The baking time is usually around 25-30 minutes. Keep an eye on them as they turn golden and puff up, filling your kitchen with delightful aromas that will make your mouth water!
Total time
In total, you’re looking at about 55-60 minutes from start to finish. This includes both preparation and baking, meaning you’ll enjoy your delicious, homemade Cheese Danish in no time! If you want more tips on perfecting pastry, check out resources like King Arthur Baking for expert advice.
Nutritional facts for Cheese Danish
Calories per serving
A single Cheese Danish typically contains around 300-400 calories. This comes from the rich combination of flaky pastry and creamy filling, making it a delightful yet indulgent treat. Enjoying one in moderation can fit nicely into a balanced diet.
Protein content
When it comes to protein, a Cheese Danish offers approximately 8-10 grams per serving, thanks to the cheese filling. This protein boost can be a wonderful addition to your breakfast or afternoon snack, keeping you energized.
Other nutritional details
Beyond calories and protein, a Cheese Danish provides:
- Fat: About 15-20 grams, primarily from butter and cheese.
- Carbohydrates: Roughly 30-35 grams, which can fuel your day.
- Calcium: A good source, supporting bone health.
For those looking for alternatives, consider checking out the USDA FoodData Central for detailed nutritional profiles and serving sizes. Always remember to savor your Cheese Danish in moderation to enjoy its delicious flavors without overindulging!
FAQ about Cheese Danish
Can I make Cheese Danish ahead of time?
Absolutely! One of the best things about cheese danishes is their versatility. You can prepare the filling and dough separately a day in advance. Store the filling in an airtight container in the fridge and wrap the dough tightly in plastic wrap. When you’re ready to bake, just assemble and pop them in the oven. It’s such a time-saver for busy mornings or brunches!
What’s the best way to store leftover Cheese Danish?
If you happen to have any leftover cheese danishes, fear not! To keep them fresh, place them in an airtight container at room temperature for up to two days. If you think you won’t finish them within that time, consider freezing them. Wrap each danish in plastic wrap and then in aluminum foil before placing them in the freezer. They can be reheated in the oven directly from frozen for a quick treat later.
Can I use store-bought dough for Cheese Danish?
Definitely! Using store-bought dough can be a great way to save time without sacrificing taste. Puff pastry or pre-made crescent roll dough work well and can give you that flaky, buttery texture that pairs beautifully with the rich cheese filling. Just follow your package’s instructions for baking to ensure your cheese danish comes out perfectly.
For more tips and recipe ideas, check out Food Network or King Arthur Baking. Happy baking!
Conclusion on Cheese Danish
The joy of enjoying homemade Cheese Danish
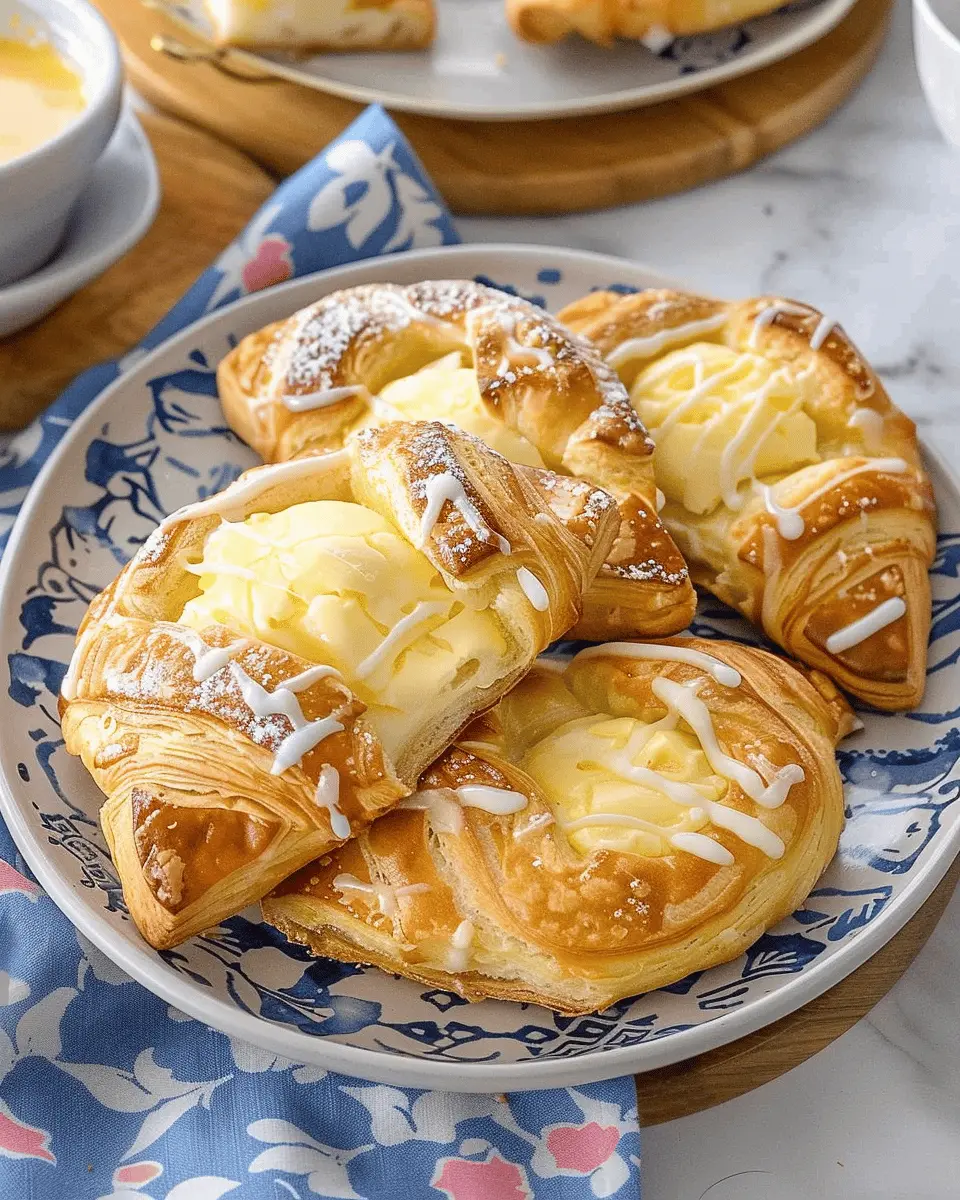
Nothing quite compares to the satisfaction of biting into a fresh, flaky cheese danish that you’ve made yourself. It’s not just the taste; it’s the experience of creating something delightful in your own kitchen. With each step, from mixing the cream cheese to shaping the dough, you pour a piece of yourself into this pastry.
Imagine serving your homemade cheese danish to friends over coffee or enjoying it as a cozy morning treat. The warmth and comfort it brings can transform an ordinary day into a special occasion. Plus, with variations such as adding fresh fruits or drizzling chocolate, the options are endless! If you’re looking for more inspiration, check out King Arthur Baking for tips and tricks.
In short, crafting a cheese danish at home isn’t just rewarding; it’s an invitation to share joy with others. So roll up your sleeves and enjoy the process!
PrintCheese Danish Delight: Easy Recipes for Your Home Kitchen

Discover how to make delicious Cheese Danish pastries at home with easy recipes and step-by-step instructions.
- Prep Time: 20 minutes
- Cook Time: 20 minutes
- Total Time: 40 minutes
- Yield: 12 pastries
- Category: Dessert
- Method: Baking
- Cuisine: American
- Diet: Vegetarian
Ingredients
- 1 package puff pastry
- 8 ounces cream cheese
- 1/2 cup granulated sugar
- 1 teaspoon vanilla extract
- 1 egg
- 1 tablespoon milk
- 1/4 cup powdered sugar
Instructions
- Preheat your oven to 400°F (200°C).
- Roll out the puff pastry on a floured surface and cut into squares.
- In a bowl, mix together cream cheese, granulated sugar, and vanilla until smooth.
- Place a spoonful of the cream cheese mixture in the center of each square.
- Fold the corners of the pastry over the filling and pinch to seal.
- Brush the tops with a mixture of egg and milk.
- Bake for 15-20 minutes or until golden brown.
- Let cool and drizzle with powdered sugar icing if desired.
Notes
- For extra flavor, add lemon zest to the cream cheese mixture.
- Store leftovers in an airtight container at room temperature.
Nutrition
- Serving Size: 1 pastry
- Calories: 250
- Sugar: 10g
- Sodium: 180mg
- Fat: 15g
- Saturated Fat: 8g
- Unsaturated Fat: 5g
- Trans Fat: 0g
- Carbohydrates: 28g
- Fiber: 1g
- Protein: 3g
- Cholesterol: 40mg