Introduction to Red Velvet Cake
A Delicious Chocolatey Twist on Tradition
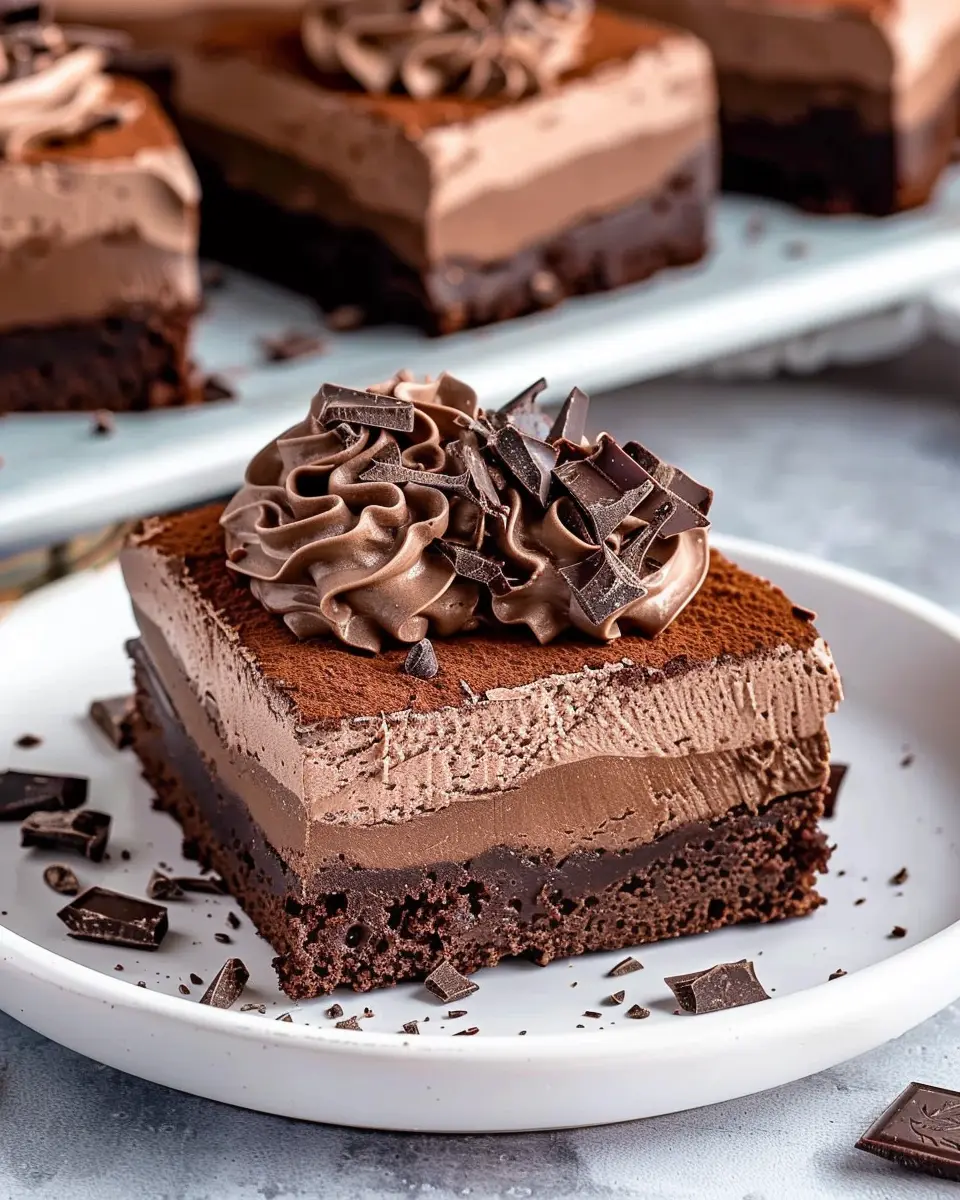
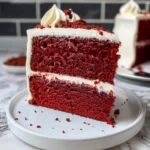
Red velvet cake has a unique charm that captivates dessert lovers everywhere. With its velvety texture and striking color, this cake isn’t just an eye-catching centerpiece; it offers a delightful blend of flavors that hit the sweet spot perfectly.
Originally hailing from the southern United States, red velvet cake combines the lightness of a classic sponge cake with a hint of cocoa, which gives it that subtle chocolatey undertone. While its origins may be a bit murky, it’s said that the cake gained popularity in the 1920s, particularly during the Great Depression when people were keen to add a splash of joy to their plates. You can find a well-rounded history of it on Smithsonian, which highlights its intriguing journey.
So, what makes this cake truly special? It’s not just the flavor; it’s also the gorgeous contrast of the deep red sponge against the creamy white frosting, usually made from cream cheese. This combination is perfect for special occasions, making it a staple for birthdays, weddings, and even Valentine’s Day. And let’s be honest, who doesn’t love a slice of something that looks this good?
If you’re looking to impress your friends at your next gathering, baking a red velvet cake from scratch not only adds a personal touch but also allows you to control the ingredients—something store-bought versions often lack. This cake typically features pantry staples such as flour, sugar, eggs, and buttermilk, along with a hint of vinegar and baking soda for that signature rise and moistness.
As you explore your inner baker, don’t hesitate to get creative! From adjusting the level of cacao to experimenting with flavors like vanilla or almond extract, every cake can be a deliciously unique reflection of your culinary style. Are you ready to dive into the world of red velvet cake and create your delectable masterpiece? Let’s make your kitchen the sweet spot for indulgence!
Ingredients for Red Velvet Cake
Creating the perfect red velvet cake starts with gathering the right ingredients. This classic dessert is not just eye-catching with its vibrant color but also boasts a deliciously moist texture. Let’s break it down into two sections—one for the cake and the other for the cream cheese frosting!
For the Cake
To achieve that rich flavor and stunning hue, you will need:
- 2 ½ cups all-purpose flour
- 1 ½ cups granulated sugar
- 1 teaspoon baking soda
- 1 teaspoon salt
- 1 tablespoon cocoa powder
- 1 ½ cups vegetable oil
- 1 cup buttermilk, room temperature (find a great DIY recipe here)
- 2 large eggs, room temperature
- 2 tablespoons red food coloring
- 1 teaspoon vanilla extract
- 1 teaspoon white vinegar
For the Cream Cheese Frosting
No red velvet cake is complete without its luscious topping. For that dreamy cream cheese frosting, gather:
- 8 oz cream cheese, softened
- ½ cup unsalted butter, softened
- 4 cups powdered sugar
- 1 teaspoon vanilla extract
With these ingredients in hand, you’re just a few steps away from creating a stunning cake that’s perfect for any celebration! So, are you ready to dive into baking?
Preparing Red Velvet Cake
Baking a stunning red velvet cake at home doesn’t need to be daunting. With the right steps, you’ll create a delicious, eye-catching centerpiece for any gathering. Here’s how to make it, from the initial prep to the final frosting.
Preheat and Prepare Your Baking Pans
Start your adventure by preheating your oven to 350°F (175°C). This ensures an even bake. While the oven warms, prepare your cake pans. You’ll need two 9-inch round cake pans for this recipe. Grease them well with butter or cooking spray, and if you want an extra guarantee against sticking, dust them lightly with flour. This small step makes a big difference when it’s time to remove those beautiful cake layers.
Mix the Wet Ingredients
Next, gather your wet ingredients. In a large mixing bowl, beat together:
- 1 cup vegetable oil
- 1 cup granulated sugar
- 1 cup buttermilk (you can make your own by mixing milk with a tablespoon of vinegar)
- 2 large eggs
- 2 tablespoons of red food coloring (this is what gives our cake its signature color)
- 1 teaspoon vanilla extract
- 1 teaspoon white vinegar
Using an electric mixer, beat these ingredients until they’re smooth and well combined. The buttermilk will yield a moist cake, and the red food coloring will bring your cake to life. Feel free to experiment with natural coloring options as well, like beet juice, if you prefer!
Combine the Dry Ingredients
In another bowl, whisk together the dry ingredients:
- 2 ½ cups all-purpose flour
- 1 tablespoon cocoa powder (just a hint to add depth)
- 1 teaspoon baking soda
- 1 teaspoon salt
Be sure to sift them together to avoid any lumps and ensure an even distribution of the baking soda. This will help your red velvet cake rise beautifully in the oven.
Create the Cake Batter
Now it’s time to bring everything together! Gradually add the dry ingredients to the wet mixture, mixing gently until just combined. Do not over-mix; a few lumps are okay. Over-mixing might lead to a tough cake, and we want it melt-in-your-mouth tender!
Bake the Cake
Evenly pour the batter into the prepared cake pans, dividing it as equally as possible. Place them in your preheated oven and bake for 25 to 30 minutes. To test for doneness, insert a toothpick in the center of the cakes; if it comes out clean, they’re ready. While your red velvet cake is baking, take a moment to enjoy the lovely aroma filling your kitchen. Baking is truly one of the most delightful experiences!
Cool the Cake Layers
Once the cakes are done, let them cool in the pans for about 10 minutes. Then carefully turn them out onto a wire rack to cool completely. Cooling is crucial for the frosting’s integrity, so let them sit for at least an hour. In the meantime, you can feel free to clean up and prepare for the next step!
Prepare the Cream Cheese Frosting
What’s a red velvet cake without the iconic frosting? For a classic cream cheese frosting, you’ll need:
- 1 cup cream cheese, softened
- ½ cup unsalted butter, softened
- 4 cups powdered sugar
- 1 teaspoon vanilla extract
In a bowl, combine the softened cream cheese and butter, mixing until smooth. Gradually add in the powdered sugar and continue mixing until fluffy. Incorporating the sugar slowly helps achieve the desired texture without a cloud of powdered sugar!
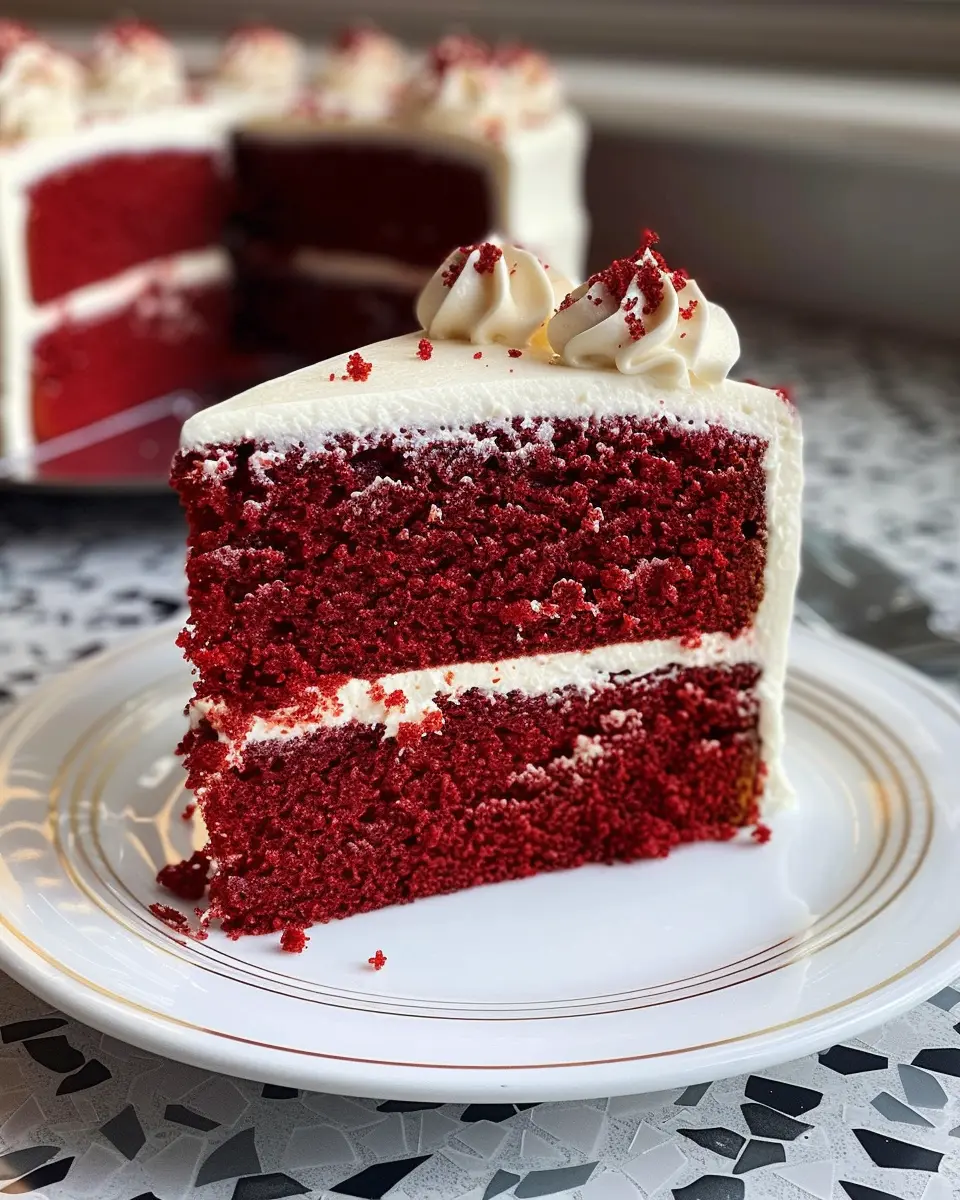
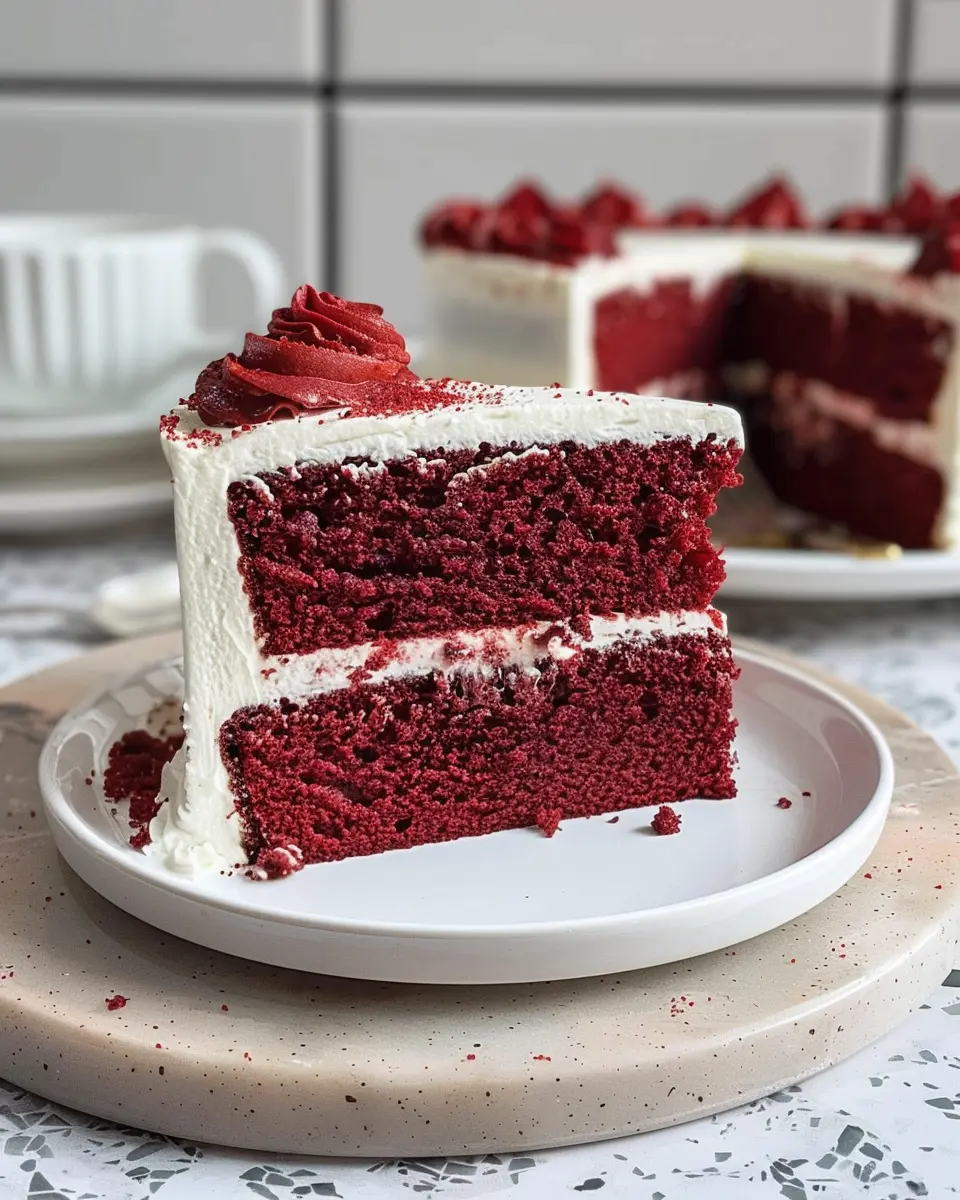
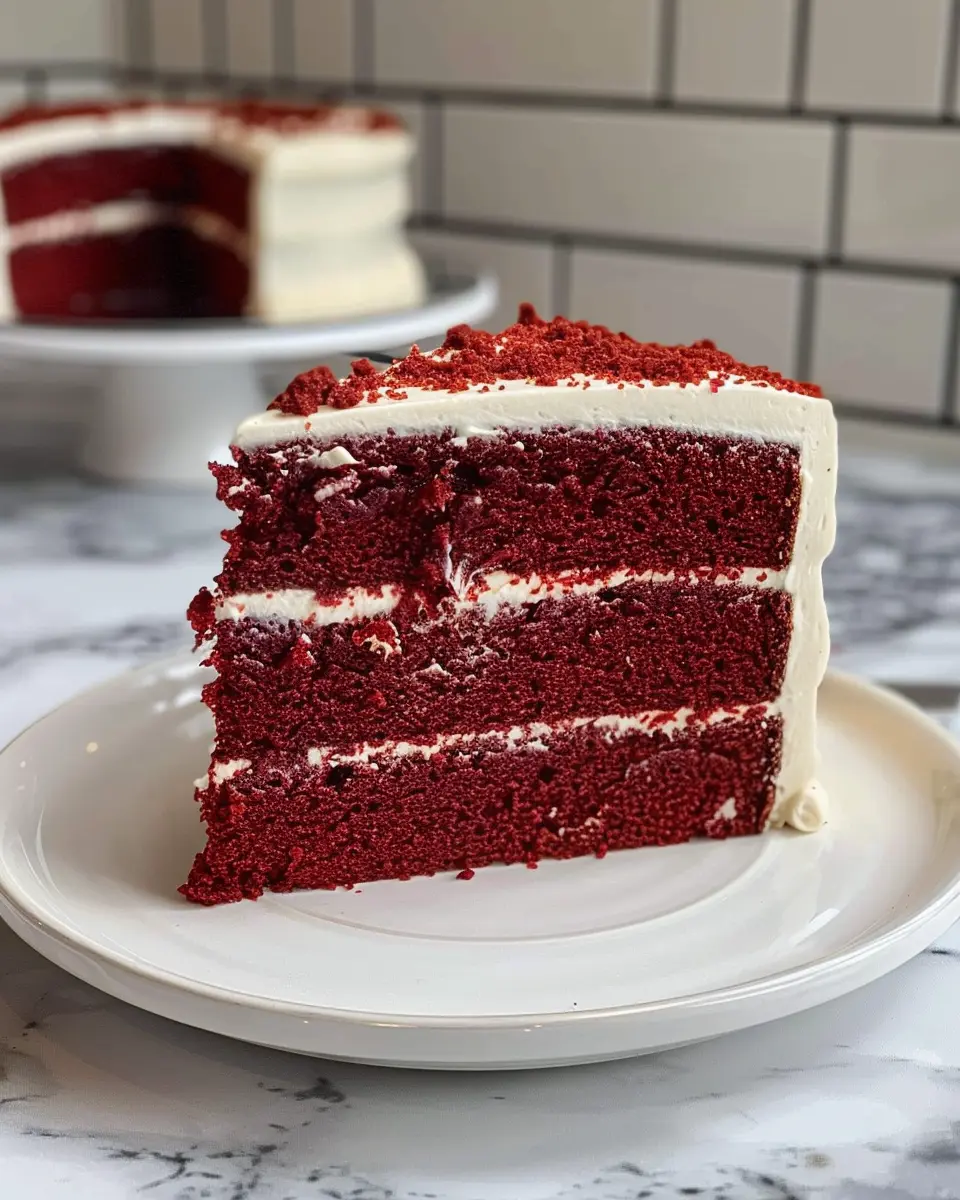
Assemble and Frost the Cake
With your cakes cooled and your frosting ready, it’s time to assemble! Place one cake layer on a serving plate, spread a generous amount of cream cheese frosting on top, then gently place the second layer over it. Smooth frosting over the top and sides of the cake for a beautiful finish. If you’re feeling fancy, add some sprinkles or nuts for decoration.
And there you have it – a stunning homemade red velvet cake that’s sure to impress! For more tips and tricks on baking, don’t forget to check out resources from America’s Test Kitchen and King Arthur Baking. Happy baking!
Variations on Red Velvet Cake
Red Velvet Cake is not just a delightful dessert; it’s also surprisingly versatile! Whether you’re looking to switch things up for a special occasion or just want a sweet treat, these variations can elevate your experience.
Classic Red Velvet Cake Variations
The classic version is always a hit, but you can take it up a notch! Consider adding layers of cream cheese frosting for extra richness, or incorporate chocolate chips to add a hint of decadence. You might also want to experiment with flavor additions like orange zest for a subtle citrus twist. All of these changes maintain the signature red velvet appeal while introducing new dimensions.
Red Velvet Cupcakes for a Quick Treat
Short on time? Red velvet cupcakes are your answer! They capture all the charming qualities of the cake but bake up in mere minutes. Top them with a cream cheese frosting swirl and—voila!—you have single-serving delights perfect for a casual gathering or a midday snack. Plus, they stay fresh longer than a whole cake, making them ideal for meal prep.
Gluten-Free Red Velvet Options
For those needing a gluten-free option, there are fantastic alternatives available! Substitute all-purpose flour with a blend of gluten-free flour and xanthan gum. Many bakers report success with almond or coconut flour, too. You can find excellent gluten-free recipes on King Arthur Baking that retain the tender crumb we all love in red velvet cake.
Vegan Red Velvet Alternatives
Want a plant-based version? Many recipes swap eggs for applesauce or flaxseed meal. Use your favorite plant-based milk to keep things moist, and make sure to choose vegan food coloring. You’ll be surprised how easy it is to create a scrumptious vegan red velvet cake that everyone’s sure to enjoy!
These variations allow you to explore and enjoy red velvet cake in many forms while catering to dietary preferences. Don’t hesitate to experiment and make these recipes your own!
Baking Tips and Notes for Red Velvet Cake
Tips for Perfecting the Cake
To truly master your red velvet cake, ensure your ingredients are at room temperature. This makes for a smoother batter and a more tender crumb. Also, using a high-quality cocoa powder can enhance the flavor profile. To add an extra layer of richness, consider adding a tablespoon of buttermilk to your frosting.
Common Mistakes to Avoid
One common pitfall is overmixing the batter. This can lead to a dense cake instead of the fluffy texture we all crave. Make sure to fold the ingredients together gently, just until combined. Another mistake? Skipping the food coloring entirely! The quintessential red hue is what makes this cake unique, so don’t hold back.
Storage Tips for Leftovers
If you happen to have red velvet cake leftovers (though that’s rare!), store them in an airtight container at room temperature for up to three days. For longer storage, wrap slices in plastic wrap and freeze. They’ll keep for up to three months. When you’re ready to indulge again, simply thaw at room temperature.
For more expert baking tips, check out The Spruce Eats for guidance from culinary professionals.
Serving Suggestions for Red Velvet Cake
Pairing with Fresh Berries
Consider enhancing your red velvet cake experience by serving it alongside fresh berries. Strawberries, raspberries, and blueberries not only add a splash of color but also introduce a refreshing tartness that perfectly balances the cake’s rich flavor. You might even try a simple berry compote; just simmer some berries with a splash of lemon juice and sugar to create a delicious topping.
Enhancing with Ice Cream
A scoop of vanilla or cream cheese ice cream can elevate your red velvet cake slice to new heights. The creaminess melts beautifully into the cake, creating a delightful contrast. For a fun twist, try pairing it with a flavored ice cream like caramel or chocolate, which can add an exciting layer to the taste.
Presentation Tips for Special Occasions
When showcasing your red velvet cake for special events, think about decorating with swirls of cream cheese frosting, and sprinkle some edible glitter for a festive touch. Plating slices on elegant dessert plates, perhaps with a side of fruit or a drizzle of berry sauce, can make a simple cake feel extraordinary. Personal touches like these can transform your serving into a delightful centerpiece that impresses your guests.
For even more ideas, check out resources from The Spruce Eats and BBC Good Food to explore creative serving suggestions!
Time Breakdown for Red Velvet Cake
When you’re ready to whip up a delightful red velvet cake, understanding how long each step takes can make the process more enjoyable and less stressful. Here’s a quick guide to help you plan your baking adventure!
Preparation Time
To get things rolling, you’ll need about 20-30 minutes for preparation. This includes gathering your ingredients, prepping your cake pans, and mixing your batter. Don’t forget to take a moment to appreciate the vibrant red color of your batter—it’s a feast for the eyes!
Baking Time
Once your batter is ready, the baking time is around 25-30 minutes. This varies slightly depending on your oven, so keep an eye on the cakes during the last few minutes.
Cooling Time
After you’ve baked your red velvet cake, allow it to cool for 30-60 minutes. This step is crucial, as it helps the cake set properly and makes frosting a breeze!
Total Time
In total, you’re looking at about 1.5 to 2 hours from start to finish, depending on how quickly you move and how many layers you’re baking.
With this breakdown, you’ll have the perfect timeline for a scrumptious homemade red velvet cake. Ready to impress your friends at the next gathering? Check out more baking tips for success in the kitchen here, or dive into the world of cake decorating here.
Nutritional Facts for Red Velvet Cake
Calories per Slice
A typical slice of red velvet cake contains about 350–400 calories. This might seem a bit indulgent, but it’s a delightful treat that many save for special occasions.
Key Nutrients
In addition to its rich flavor, this cake provides:
- Carbohydrates: Essential for energy
- Fat: A source of healthy fats depending on the recipe
- Protein: Some cakes may include eggs and dairy, offering a protein boost
- Vitamins and Minerals: Ingredients like cocoa powder can provide antioxidants
Curious about the baking process? For an in-depth look, check out this source on baking essentials.
Suggested Serving Size
For a satisfying dessert experience, a slice of red velvet cake is perfect. Sharing is encouraged—perhaps even consider pairing it with a scoop of vanilla ice cream!
Incorporating treats like red velvet cake into a balanced diet can help make special moments even more memorable. Just remember, moderation is key, and it’s best enjoyed during those celebrations that bring us together!
FAQs about Red Velvet Cake
When it comes to red velvet cake, many people have questions swirling in their minds. Let’s tackle some of the most common ones.
Why is Red Velvet Cake Red?
The deep red color of red velvet cake traditionally comes from a reaction between cocoa powder and acidic ingredients like buttermilk and vinegar. In the past, bakers used natural ingredients like beet juice to enhance its hue. These days, many folks prefer to rely on food coloring to achieve that signature look, making the cake not just delicious, but visually stunning as well!
What Makes It Different from Chocolate Cake?
While both cakes contain cocoa powder, red velvet cake has a unique texture and flavor profile. It’s lighter and fluffier, often featuring a hint of tanginess due to ingredients like buttermilk. Additionally, it’s typically frosted with cream cheese frosting, which adds a delightful creaminess that chocolate cake often does not have. For more on these differences, consider checking out this article on cake types here.
Can I Use Liquid Food Coloring Instead of Gel?
You can, but gel food coloring is generally recommended. It provides vibrant color without adding much liquid to the batter, ensuring the red velvet cake maintains its perfect texture. If you do use liquid coloring, just be cautious as it could affect the moistness of your cake.
How Do I Store Red Velvet Cake?
To keep your red velvet cake fresh, always store it in an airtight container at room temperature for up to three days. If you’re keeping it for longer, refrigerate it. When serving after refrigeration, let it sit at room temperature for about 30 minutes for optimal flavor and texture. For more detailed storage tips, you can visit this guide.
Feel free to ask more questions or share your favorite red velvet cake experiences in the comments below!
Conclusion on Red Velvet Cake
Emphasizing the Joy of Homemade Baking
There’s something truly special about creating a red velvet cake from scratch. The vibrant layers and velvety texture not only satisfy your taste buds but also invite you into the joyous world of homemade baking. As you mix the ingredients, let the aroma fill your kitchen—it’s all part of the delightful experience.
Baking your own red velvet cake allows for creativity and personal touches, making it an unforgettable centerpiece for life’s celebrations. So gather your loved ones, share a slice, and relish in the magic of your culinary creation. Remember, each bite is a testament to your baking journey. For more tips on baking, check out King Arthur Baking for inspiration!
PrintRed Velvet Cake Delight: Easy Recipe for Irresistible Flavor
Learn how to make an irresistible Red Velvet Cake with this easy recipe that guarantees delightful flavor and texture.
- Prep Time: 20 minutes
- Cook Time: 30 minutes
- Total Time: 50 minutes
- Yield: 12 servings
- Category: Desserts
- Method: baking
- Cuisine: American
- Diet: vegetarian
Ingredients
- 2 cups all-purpose flour
- 1 1/2 cups granulated sugar
- 1 teaspoon baking soda
- 1 teaspoon salt
- 1 teaspoon cocoa powder
- 1 1/2 cups vegetable oil
- 1 cup buttermilk, room temperature
- 2 large eggs, room temperature
- 2 tablespoons red food coloring
- 1 teaspoon vanilla extract
- 1 teaspoon white vinegar
Instructions
- Preheat your oven to 350°F (175°C) and grease two 9-inch round cake pans.
- In a large mixing bowl, sift together the flour, sugar, baking soda, salt, and cocoa powder.
- In another bowl, mix the oil, buttermilk, eggs, food coloring, vanilla extract, and vinegar.
- Combine the wet and dry ingredients until just combined.
- Divide the batter evenly between the prepared pans and smooth the tops.
- Bake for 25-30 minutes or until a toothpick comes out clean.
- Let the cakes cool in the pans for 10 minutes before transferring to wire racks to cool completely.
Notes
- For a richer flavor, refrigerate the cake overnight before serving.
- You can add cream cheese frosting for an extra delicious touch.
Nutrition
- Serving Size: 1 slice
- Calories: 350
- Sugar: 25g
- Sodium: 300mg
- Fat: 18g
- Saturated Fat: 3g
- Unsaturated Fat: 15g
- Trans Fat: 0g
- Carbohydrates: 45g
- Fiber: 1g
- Protein: 4g
- Cholesterol: 50mg