Introduction to Red Velvet Cake
Red velvet cake has become a beloved classic for many dessert enthusiasts, commanding its own spot in both celebrations and casual indulgences. But what is it about this cake that keeps people coming back for more? Let’s dive into the allure of red velvet cake and discover why it remains a favorite across various occasions.
The Allure of Red Velvet Cake: Why it’s a Favorite
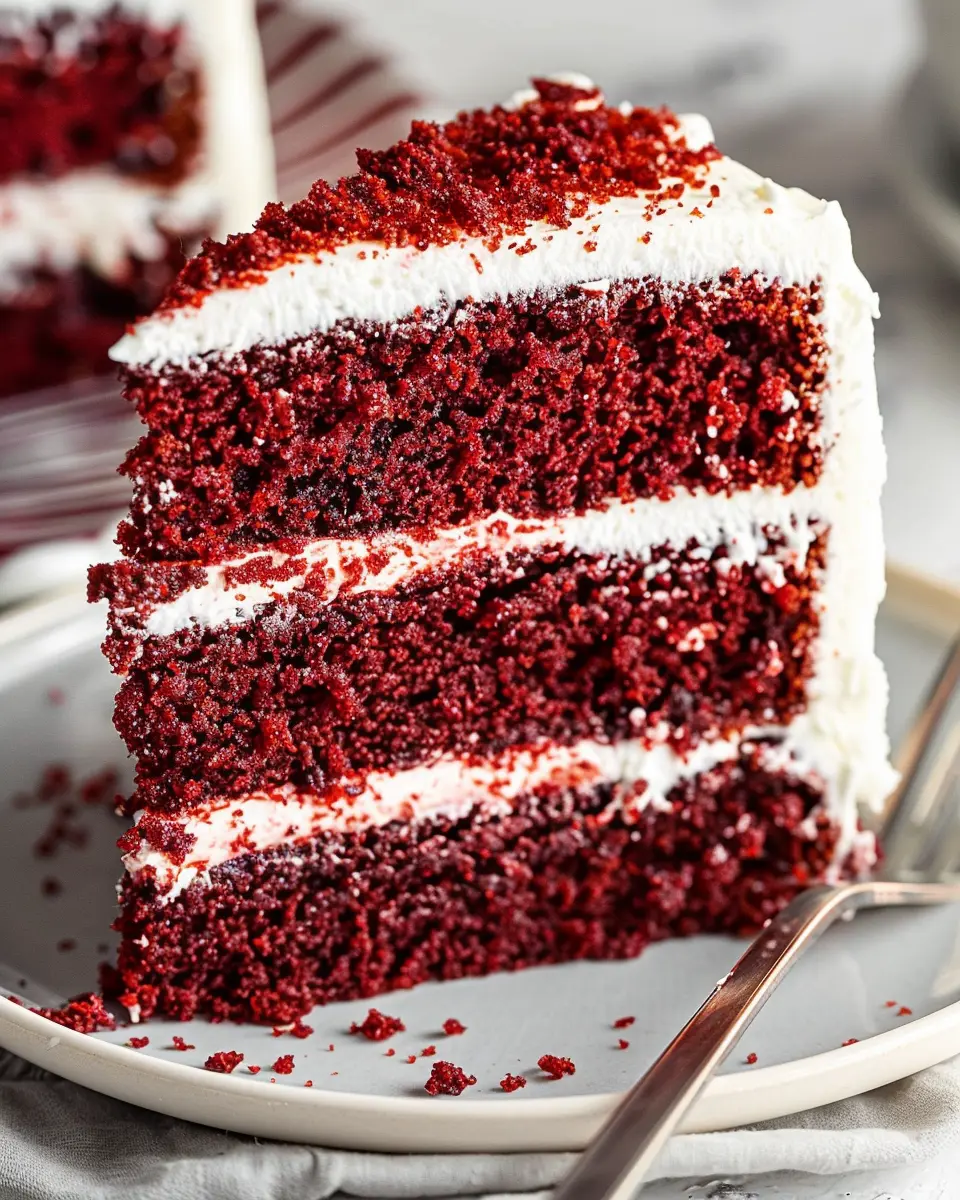
First and foremost, the stunning appearance of red velvet cake draws people in. The vibrant red hue contrasts beautifully with the creamy white frosting, usually made from cream cheese or buttercream. This visual appeal makes it the perfect centerpiece for celebrations, from birthdays to weddings. People often say that we eat with our eyes first. It’s no wonder red velvet has become a showstopper at dessert tables.
But the allure doesn’t just stop at looks. Red velvet cake boasts a unique flavor profile that combines the richness of cocoa with subtle hints of vanilla. The cake’s mild chocolate flavor sets it apart from other traditional cakes, inviting even those who may shy away from pure chocolate desserts to give it a try. This harmony of flavors creates a sense of nostalgia for many; it reminds us of family gatherings or special moments.
Interestingly, red velvet cake has historical roots that date back to the early 20th century. Emerging from the kitchens of the American South, it became a symbol of indulgence, often associated with celebration and Southern hospitality. Over the years, the cake has evolved, incorporating modern twists and variations. You can read more about its fascinating history here.
Moreover, red velvet cake is incredibly versatile. While traditional recipes remain beloved, many bakers have adapted them to include various flavors or even unique dietary alternatives, allowing everyone to enjoy this delightful dessert. Personal touches like adding nuts, using different kinds of frosting, or baking into cupcakes can elevate the basic recipe into something truly special.
In conclusion, red velvet cake is much more than just a dessert; it’s a piece of culinary art that captures our hearts. Whether you’re looking for a nostalgic treat from your childhood or an elegant addition to your next gathering, the charm and flavor of red velvet cake are sure to please. Let’s get started on making your own delectable creation!
Ingredients for Red Velvet Cake
Creating a stunning red velvet cake begins with the right ingredients. Here’s what you’ll need:
Essential Ingredients for the Cake
To whip up a classic red velvet cake, gather these essential items:
- All-purpose flour: It forms the base of the cake.
- Granulated sugar: This adds sweetness and moisture.
- Cocoa powder: Just a bit for that subtle chocolate flavor.
- Baking soda and baking powder: These leavening agents help the cake rise.
- Vegetable oil: For moisture and a tender crumb.
- Buttermilk: This adds a tangy flavor that’s characteristic of red velvet cake.
- Eggs: They bind everything together and provide structure.
- Vanilla extract: For an aromatic touch.
- Red food coloring: The star of the show, giving it that iconic hue.
Key Ingredients for the Cream Cheese Frosting
Now, for that rich and creamy frosting:
- Cream cheese: The main ingredient for a rich flavor.
- Unsalted butter: It adds smoothness and depth.
- Powdered sugar: This sweetens the frosting and thickens it.
- Vanilla extract: A simple addition that elevates the flavor.
With these ingredients on hand, you’re all set to create your beautiful red velvet cake! For more insights on baking tips, check out resources from King Arthur Baking and Food Network. Happy baking!
Preparing Red Velvet Cake
Baking a delightful red velvet cake is an experience that combines creativity, science, and a touch of nostalgia. In this section, I’ll walk you through each crucial step to ensure your cake turns out luscious and inviting. Whether it’s a special occasion or just a treat for yourself, the process is both rewarding and fun!
Gather Your Ingredients and Tools
Before diving into the baking process, gather all your ingredients and tools. This will make your experience smoother and more enjoyable. Here’s what you’ll need:
Ingredients:
- 2 ½ cups all-purpose flour
- 1 ½ cups granulated sugar
- 1 cup vegetable oil
- 1 cup buttermilk, at room temperature
- 2 large eggs, at room temperature
- 2 tablespoons cocoa powder, unsweetened
- 2 tablespoons red food coloring (gel is preferred for intensity)
- 1 teaspoon vanilla extract
- 1 teaspoon baking soda
- 1 teaspoon vinegar (white or apple cider works)
- 1 teaspoon salt
Tools:
- 2 round 9-inch cake pans
- Mixing bowls
- Electric mixer (or whisk)
- Rubber spatula
- Measuring cups and spoons
- Cooling rack
By having everything ready, you’ll be able to focus on enjoying the process!
Make the Cocoa and Coffee Mixture
Now, let’s elevate that red velvet cake with a rich undertone. Mix together the cocoa powder and a cup of hot water or brewed coffee. This combination not only enhances the flavor but also adds a slight depth to your cake. Let it cool while we prepare the dry ingredients — multitasking at its best!
Blend the Dry Ingredients
In a separate bowl, sift together the flour, sugar, and salt. Sifting helps create a light and airy texture, which is essential for a great red velvet cake. If you’re interested in improving baking skills, consider reading a great resource here that dives deeper into the science of baking.
Mix the Wet Ingredients
Now, in another bowl, whisk together the eggs, buttermilk, oil, vanilla extract, and the cooled cocoa-coffee mixture. Make sure everything is well combined and smooth. The vibrant red color will come from the red food coloring, which you can blend in at this stage for even distribution.
Combine Dry and Wet Ingredients
Gradually add the dry mixture to the wet ingredients, stirring gently to avoid over-mixing. A few lumps are perfectly fine; they’ll disappear as the cake bakes. Once combined, add the baking soda and vinegar. This reaction creates a fluffy texture — don’t skip this step!
Divide and Bake the Cake Layers
Grease your cake pans and evenly divide the batter between them. Smooth the tops with a spatula for an even rise. Bake in a preheated oven at 350°F (175°C) for 25 to 30 minutes or until a toothpick inserted in the center comes out clean. The scent of the baking red velvet cake will fill your kitchen with warmth and anticipation!
Cool the Cake Layers
After removing them from the oven, let the layers cool in the pans for about 10 minutes. Then, gently transfer them to a wire rack to cool completely. Patience is key here—don’t rush this step, or you’ll risk a messy frosting situation later!
Prepare the Cream Cheese Frosting
While the cake cools, whip up your cream cheese frosting. Combine:
- 8 oz cream cheese, softened
- ½ cup unsalted butter, softened
- 4 cups powdered sugar
- 1 teaspoon vanilla extract
Mix until smooth and creamy; this fluffy frosting perfectly complements your red velvet cake.
Frost the Cake
Finally, it’s time to assemble! Place one layer on your serving plate and generously spread a layer of cream cheese frosting on top. Add the second layer and frost the top and sides of the cake. Feel free to get creative with decoration—chocolate shavings, sprinkles, or even fresh berries can add that extra touch!
And there you have it! You’ve just prepared a classic red velvet cake that’s sure to impress. Baking is all about enjoyment, so take a moment to appreciate your hard work. Cheers to delicious creations!
Variations on Red Velvet Cake
Gluten-free Red Velvet Cake
For those who are gluten-sensitive or just looking to mix things up, gluten-free red velvet cake is a delightful alternative. You can substitute all-purpose flour with a gluten-free blend, which is widely available in most grocery stores. We recommend using a combination of almond flour and coconut flour for a nutty undertone that complements the classic flavors. Adding a bit of vinegar and baking soda can help achieve that fluffy texture synonymous with traditional red velvet cake.
Check out resources like Gluten-Free Gigi for tips on creating the perfect gluten-free cake. You might be surprised at how well the cake holds together – it’s just as moist and delicious!
Red Velvet Cake with a Twist
Feeling adventurous? Try spicing up your red velvet cake with unique flavor profiles. Consider adding a hint of cardamom or cinnamon for a warm kick. Another fun twist is to experiment with the frosting. Instead of traditional cream cheese, consider a chocolate ganache, which adds a rich layer of decadence.
Or, why not try a fruity surprise? Mango or strawberry puree in your frosting can give a refreshing contrast to the cake’s richness. If you love citrus, a lemon cream cheese frosting can brighten the flavor, making for an intriguing dessert experience.
For ideas and inspiration, check out Bon Appétit and see how other bakers have creatively taken on red velvet cake. Why stick to the traditional when there are so many incredible variations waiting to be discovered?
Baking Notes for Red Velvet Cake
Common pitfalls and how to avoid them
When baking your red velvet cake, it’s easy to make some common mistakes. One frequent issue is overmixing the batter, which can lead to a dense cake instead of the fluffy texture you crave. Be gentle when combining your ingredients—switch to a spatula rather than an electric mixer in the final stages.
Another pitfall is using the wrong type of cocoa powder; always choose unsweetened cocoa to achieve that signature flavor. And don’t forget to measure your ingredients accurately! Check out this guide on baking measurement for tips.
Tips for achieving the perfect color and texture
To achieve that iconic bright red hue in your red velvet cake, opt for high-quality red food coloring. Some bakers recommend using gel coloring for a more vibrant result. For texture, buttermilk is essential; it reacts with baking soda to provide that tender crumb.
Remember, don’t skimp on the cream cheese frosting! A generous layer will elevate your cake to new heights, both visually and in taste. Happy baking!
Serving suggestions for Red Velvet Cake
Ideal Moments to Delight with Red Velvet Cake
There’s something special about serving red velvet cake that adds a touch of elegance to any occasion. Whether it’s a birthday bash, a cozy dinner party, or a wedding celebration, this cake is a showstopper. Imagine cutting into its rich, crimson layers while everyone gathers around for a slice — that’s the kind of moment that creates lasting memories.
Perfect Pairings to Enhance Your Experience
When it comes to pairing delicious sides and beverages with your red velvet cake, consider these delightful combinations:
- Cream Cheese Frosting: This is a must! The tangy, sweet icing complements the cake perfectly.
- Coffee: A rich brew, whether it’s decaf or a smooth espresso, enhances the flavors beautifully.
- Homemade Whipped Cream: Add a dollop on the side for a light, fluffy contrast.
- Fruits: Fresh berries like strawberries or raspberries not only add color but also a refreshing zing.
For more tips and tricks on cake pairings, check out this helpful guide on dessert accompaniments.
With these suggestions, your red velvet cake will not just be a dessert, but the star of the show!
Tips for Making the Perfect Red Velvet Cake
Ensuring Moisture and Fluffiness
A red velvet cake should be decadently moist and perfectly fluffy. To achieve this, consider these tips:
- Use Buttermilk: This ingredient not only adds moisture but also contributes to the cake’s tender crumb. If you’re out of buttermilk, a quick DIY version can be made by mixing milk with a splash of vinegar or lemon juice.
- Room Temperature Ingredients: Ensure that your eggs, buttermilk, and butter are at room temperature before mixing. This helps them combine more seamlessly, resulting in a lighter batter.
- Don’t Overmix: When incorporating your flour, mix just until combined. Overmixing can lead to a denser cake; we want it light and airy!
For further insights on cake moisture, check out The Spruce Eats.
Storage Tips for Keeping Your Cake Fresh
Storing your red velvet cake correctly is essential for maintaining its flavor and texture. Here’s how:
- Cool Completely: Before refrigerating, make sure the cake is completely cooled. Trapping heat can cause condensation, making the cake soggy.
- Airtight Container: Store the cake in an airtight container to lock in moisture. If you’re keeping it for a longer period, consider wrapping it tightly in plastic wrap and then placing it in a container.
- Freezing for Later: Did you know you can freeze your cake? Simply slice it, wrap each piece in plastic wrap, and put it in a freezer-safe container. When you’re ready, let it thaw in the fridge overnight.
By following these tips, your red velvet cake will remain deliciously fresh, whether you’re enjoying it the day you make it or weeks later!
Time details for Red Velvet Cake
Preparation time
Preparing your red velvet cake is a breeze, taking about 30 minutes. During this time, you’ll gather your ingredients, mix your batter, and prepare your pans. It’s a great moment to put on some music and enjoy the process.
Baking time
Once the batter is ready, it’s time for the magic to happen in the oven! The baking time is approximately 30-35 minutes. While the cake bakes, you can prepare your frosting or even clean up a bit—your future self will thank you later.
Total time
When you combine the preparation and baking stages, the total time to make this decadent red velvet cake is about 1 hour to 1 hour and 10 minutes. With just a short investment of your time, you’ll be able to impress your friends and family with a stunning dessert they’ll want to dive into. Looking for more tips? Check out this article on cake baking essentials for additional insights!
Nutritional Information for Red Velvet Cake
Calories
One slice of red velvet cake typically contains around 350 to 400 calories, depending on portion size and ingredients used. This delicious dessert can be a sweet treat in moderation but is certainly energy-dense!
Sugar Content
You might be surprised to learn that a single serving can pack over 25 grams of sugar. If you’re keeping an eye on your sugar intake, consider enjoying red velvet cake as an occasional indulgence rather than a daily staple.
Key Nutrients
While red velvet cake is primarily a dessert, it does contribute some essential nutrients, such as:
- Calcium: Important for bone health
- Iron: Necessary for oxygen transport in the blood
- Vitamin A: Supports immune function and vision
To make your dessert even healthier, you can consider using whole wheat flour or substituting some sugar with natural sweeteners. For more insights on cake nutrition, check out the USDA’s FoodData Central site for comprehensive food data.
FAQs about Red Velvet Cake
What’s the origin of red velvet cake?
The origin of red velvet cake is an intriguing blend of history and culture. Many believe it traces back to the early 1900s, with roots in the American South. Initially, it was a simple cocoa-flavored cake with a velvety texture, characterized by its rich color. Some say the distinct hue was enhanced by the reaction of cocoa powder with acidic ingredients like buttermilk and vinegar. Others have linked its rise to fame to the Waldorf-Astoria Hotel in New York during the 1920s, where it became a gourmet option, captivating the taste buds of many.
Can I substitute ingredients for diet restrictions?
Absolutely! Many people want to enjoy red velvet cake without worrying about dietary restrictions. Here are some substitutes:
- Gluten-Free: Use a gluten-free all-purpose flour blend to maintain that delightful texture.
- Dairy-Free: Swap regular buttermilk for almond or oat milk combined with a splash of vinegar.
- Sugar-Free: Opt for zero-calorie sweeteners or coconut sugar as a healthier alternative.
These substitutions can help you create a delicious version of the cake while accommodating specific dietary needs.
How do I get the red color right?
Getting that iconic red color in your red velvet cake can be a bit tricky, but here are a few tips:
- Use quality food coloring: Opt for gel food coloring, which offers a vibrant hue without altering the cake’s texture.
- Try beet juice: For a natural alternative, beet juice can create a lovely red tint while adding a subtle sweetness.
- Don’t skimp on the acidity: Ingredients like vinegar or buttermilk help enhance the color, so be sure to include them in your recipe.
For more tips on enhancing flavors and colors, check out resources like the American Culinary Federation, which offers insights into baking science.
With these answers, you’re better equipped to tackle your red velvet cake. Dive in and enjoy the baking adventure!
Conclusion on Red Velvet Cake
Celebrating the joy of homemade treats
There’s something truly special about baking a red velvet cake at home. The vibrant colors, rich flavors, and soft texture make each bite a delightful experience. It’s not just a dessert; it’s a centerpiece for celebrations, whether a birthday or an intimate dinner party.
Creating this delicious cake from scratch allows you to customize it to your taste, experimenting with different frostings or flavors. If you’re looking to impress friends or simply indulge in a bit of comfort food, nothing beats the charm of a homemade treat. So why not roll up your sleeves and give this red velvet cake recipe a try? Your taste buds will thank you!
For more baking inspiration, check out resources like the American Cake Decorating Magazine or Taste of Home.
PrintRed Velvet Cake: Indulgent Recipe for a Homemade Delight

Discover the rich flavors and vibrant colors of a classic Red Velvet Cake with this indulgent homemade recipe.
- Prep Time: 30 minutes
- Cook Time: 30 minutes
- Total Time: 1 hour
- Yield: 12 servings
- Category: Dessert
- Method: Baking
- Cuisine: American
Ingredients
- 2 1/2 cups all-purpose flour
- 1 1/2 cups granulated sugar
- 1 cup vegetable oil
- 1 cup buttermilk
- 3 large eggs
- 2 tablespoons red food coloring
- 1 teaspoon vanilla extract
- 1 teaspoon baking soda
- 1 teaspoon white vinegar
- 1 teaspoon cocoa powder
Instructions
- Preheat the oven to 350°F (175°C) and grease two 9-inch round cake pans.
- In a large bowl, mix together the flour, sugar, cocoa powder, baking soda, and salt.
- In another bowl, whisk together the oil, buttermilk, eggs, vanilla extract, and red food coloring.
- Combine the wet and dry ingredients until fully incorporated.
- Add the vinegar and mix well.
- Divide the batter evenly between the prepared pans.
- Bake for 25-30 minutes, or until a toothpick comes out clean.
- Allow to cool in the pans for 10 minutes before transferring to a wire rack.
Notes
- For a richer flavor, substitute buttermilk with sour cream.
- Let the cake cool completely before frosting.
Nutrition
- Serving Size: 1 slice
- Calories: 350
- Sugar: 25g
- Sodium: 250mg
- Fat: 18g
- Saturated Fat: 3g
- Unsaturated Fat: 12g
- Trans Fat: 0g
- Carbohydrates: 40g
- Fiber: 1g
- Protein: 4g
- Cholesterol: 60mg