Easy Homemade Red Velvet Cake Recipe Outline
If you’re on the hunt for a delicious dessert that’s as striking as it is scrumptious, look no further! The easy homemade red velvet cake recipe you’ve been searching for is right here. This cake is not just a feast for the palate but also a delight for the eyes—its vibrant red color makes it the showstopper at any gathering. Below, I’ll lay out a simple outline to help guide you through crafting this delightful treat step-by-step.
Gather Your Ingredients
Before you get started, it’s essential to assemble all your ingredients. Here’s what you’ll need:
-
For the cake:
-
2 cups all-purpose flour
-
1 cup granulated sugar
-
1 teaspoon baking soda
-
1 teaspoon salt
-
1 teaspoon cocoa powder
-
1 cup vegetable oil
-
1 cup buttermilk, at room temperature
-
2 large eggs
-
2 tablespoons red food coloring
-
1 teaspoon vanilla extract
-
1 teaspoon white vinegar
-
For the cream cheese frosting:
-
8 oz cream cheese, softened
-
½ cup unsalted butter, softened
-
4 cups powdered sugar
-
1 teaspoon vanilla extract
-
A pinch of salt
Gathering these ingredients beforehand will make your baking experience much smoother and more enjoyable.
Preparing the Cake Batter
Now that you’ve got everything laid out, let’s dive into mixing up your cake batter. This is where the fun begins!
-
Preheat your oven: Preheat your oven to 350°F (175°C) and grease and flour two 9-inch round cake pans.
-
Mix dry ingredients: In a large bowl, whisk together the flour, sugar, baking soda, salt, cocoa powder, and set aside.
-
Combine wet ingredients: In another bowl, whisk together the vegetable oil, buttermilk, eggs, red food coloring, vanilla extract, and vinegar.
-
Combine the mixtures: Gently fold the wet ingredients into the dry ingredients until just combined. Take care not to overmix; a few lumps are perfectly fine.
Baking the Cake
Once your batter is mixed, it’s time to bake!
- Divide the batter evenly between the prepared pans.
- Bake for about 25-30 minutes or until a toothpick inserted in the center comes out clean.
While you let the cakes cool, why not take a moment to savor the rich aroma filling your kitchen? Baking can be such a therapeutic experience.
Crafting the Cream Cheese Frosting
While the cake is cooling, it’s perfect timing to whip up the most delectable cream cheese frosting. This added touch will elevate your easy homemade red velvet cake recipe to a whole new level.
-
Mix the cream cheese and butter: In a large mixing bowl, beat the softened cream cheese and butter until light and fluffy.
-
Add the dry ingredients: Gradually add the powdered sugar, mixing until well combined. Stir in the vanilla extract and a pinch of salt to enhance the flavors.
Assembling Your Cake
Now comes the exciting part—putting it all together!
- Place one cake layer on a serving platter and spread a layer of cream cheese frosting on top.
- Top with the second layer and frost the top and sides of the cake as desired.
You have the option to get creative here! Add sprinkles, berries, or chocolate shavings for that extra flair.
Final Touches and Serving Suggestions
Once your cake is beautifully frosted, it’s time to slice into it and serve. Here are some serving suggestions to take it up a notch:
- Pair your red velvet cake with a scoop of vanilla ice cream for a winning combination.
- Consider serving alongside a coffee or herbal tea for a cozy afternoon treat.
And remember, this cake is not only perfect for birthdays; it might become your go-to for any celebration!
If you’re looking for more inspiration or alternatives to pair with this cake, check out sources like Baker’s Royale and Serious Eats for tips and tricks.
Conclusion
In just a few simple steps, you’ve navigated through the easy homemade red velvet cake recipe. By following this outline, not only will you impress your friends and family, but you’ll also create a memory-filled event whenever you bake. So why wait? Gather your ingredients, put on your apron, and let’s get started on this delightful journey of baking!
Introduction to Easy Homemade Red Velvet Cake
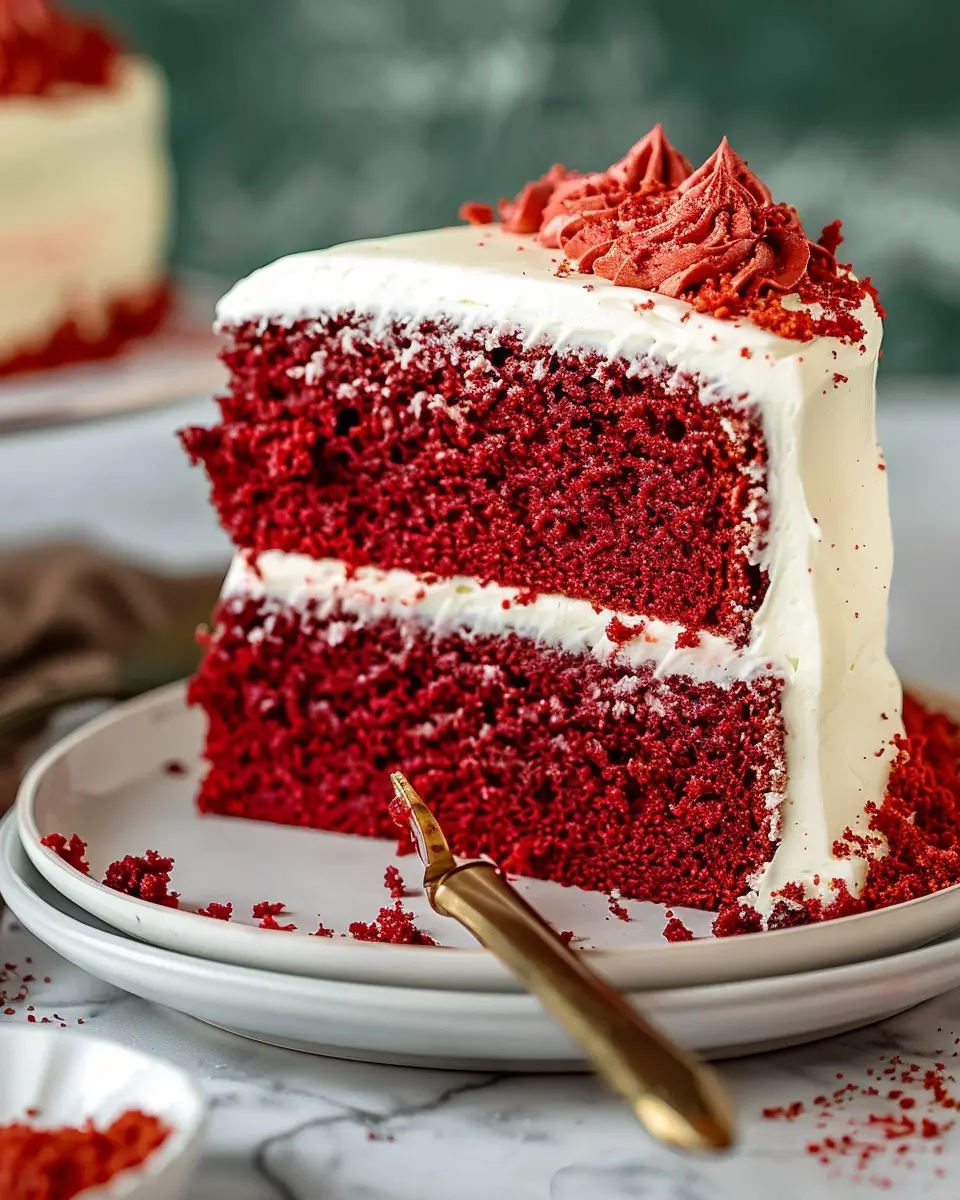
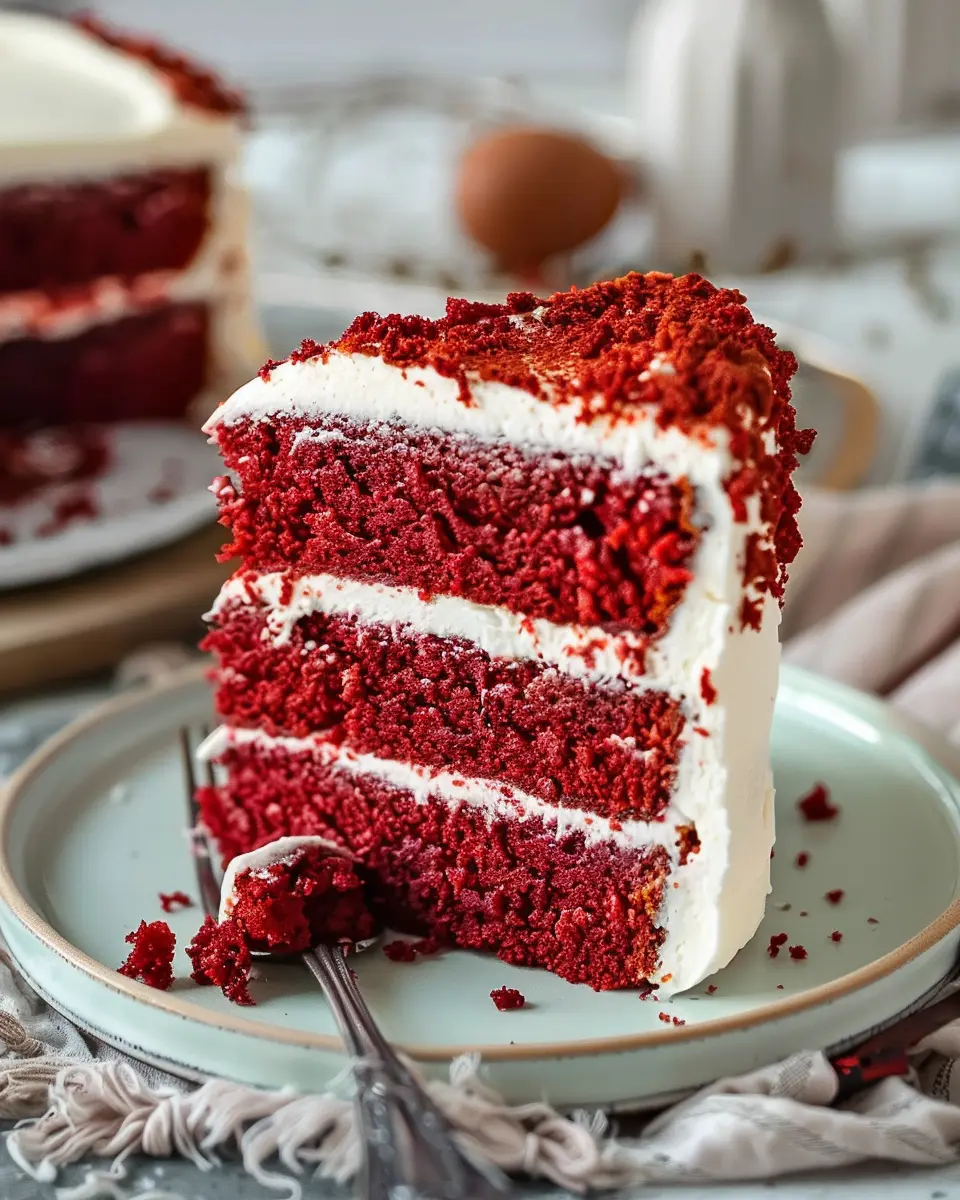
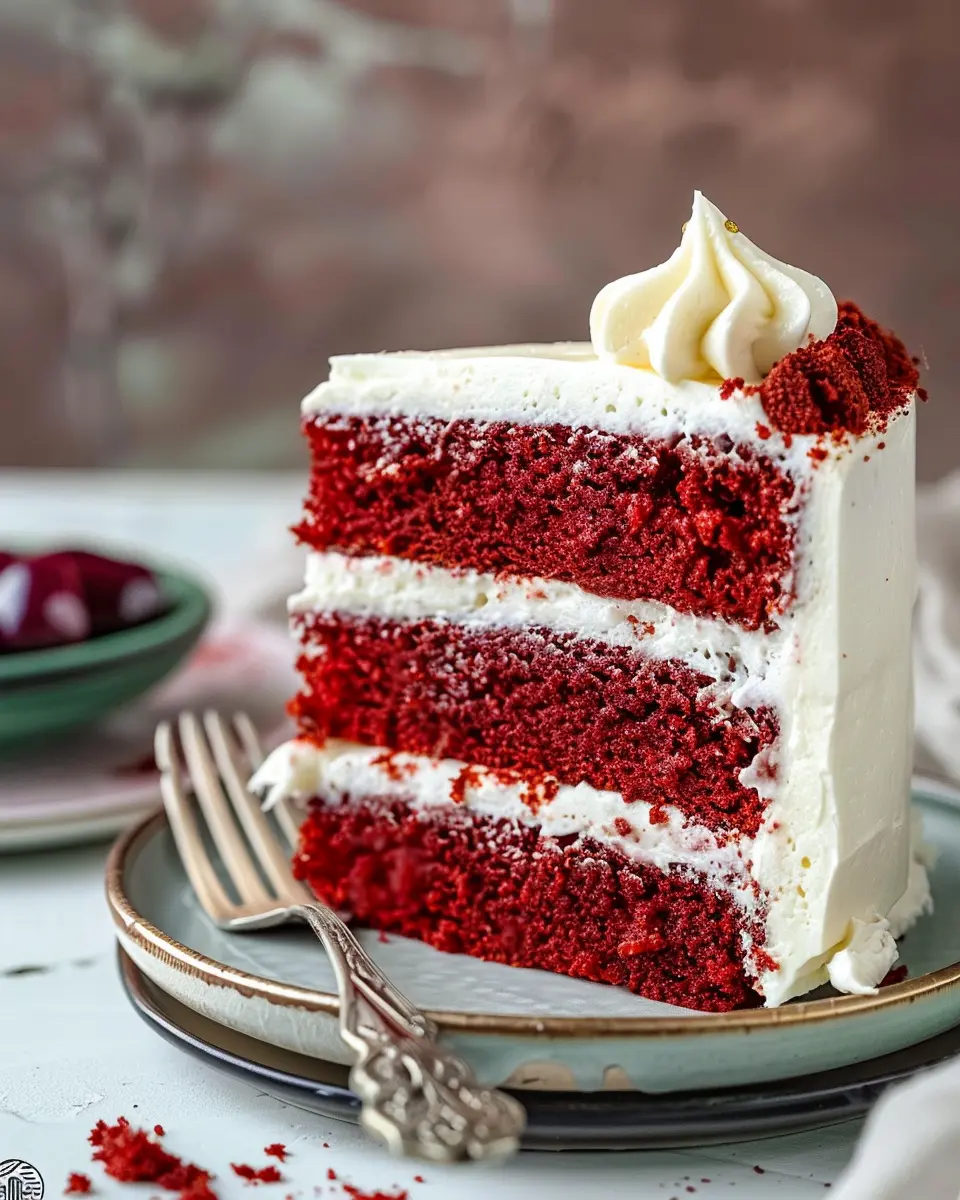
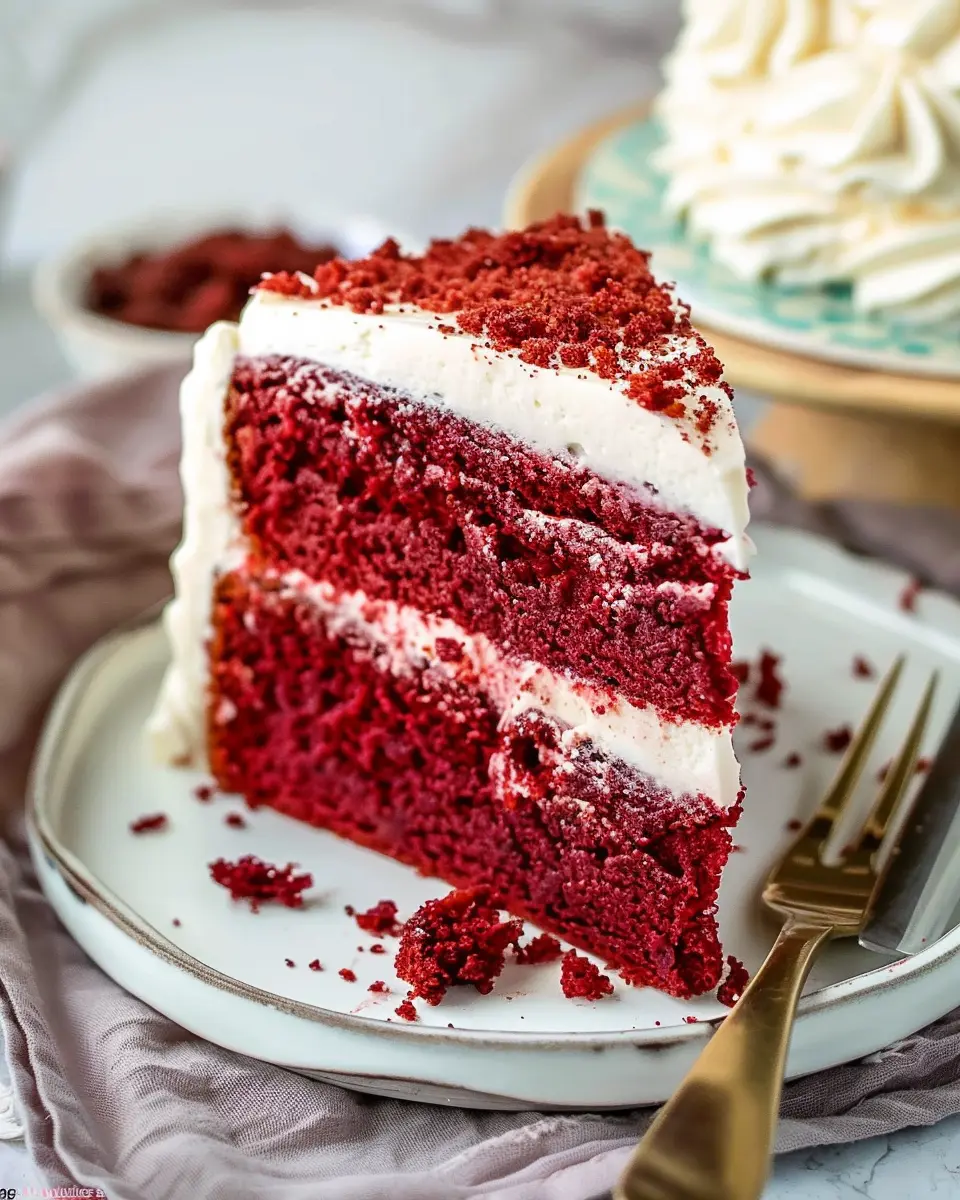
When you think of a classic dessert that never fails to impress, the rich and vibrant red velvet cake often comes to mind. Why is it such a beloved choice? First off, it’s beautifully eye-catching, with its deep red hue contrasting against fluffy white cream cheese frosting. But beyond its stunning appearance, its unique flavor—just a hint of cocoa combined with a buttery richness—makes it memorable. Whether you’re honoring a special occasion or simply enjoy a slice with your afternoon coffee, a slice of red velvet cake takes the dessert experience to a whole new level.
Why Red Velvet Cake is a Classic Choice?
There’s something undeniably special about red velvet cake. Its origins date back to the Victorian era, and it has maintained a reputation as a luxurious dessert throughout the years. The combination of tangy buttermilk, subtle chocolate undertones, and an exquisite cream cheese frosting creates layers of flavor and texture that delight the palate. In a world where trends come and go, this cake has stood the test of time.
Plus, if you choose to make this easy homemade red velvet cake recipe, you’ll not only find it rewarding, but you might even impress friends and family with your baking skills. For inspiration on fantastic frosting options, check out this resource from Serious Eats.
The Joy of Baking at Home for Young Professionals
As young professionals juggling countless responsibilities, finding time to indulge in something personal can be challenging. Baking at home provides a therapeutic escape, allowing you to unwind and express creativity. There’s something satisfying about watching simple ingredients transform into something beautiful and delicious. Imagine the aroma of baked cake wafting through your kitchen, instantly lifting your spirits.
Baking also encourages a sense of community. Share your creations with coworkers or plan a small gathering with friends. It’s a wonderful way to bond and connect. Plus, you’ll impress them with your stunning dessert that will be the talk of the evening!
So, if you’re ready to explore the wonderful world of baking, let’s get started with this easy homemade red velvet cake recipe. Trust me; it’ll be the beginning of many delicious adventures in your kitchen!
Key Ingredients for Easy Homemade Red Velvet Cake
Essential Ingredients for Rich Flavor and Texture
Creating the perfect easy homemade red velvet cake recipe hinges on a few key ingredients. Firstly, a quality all-purpose flour provides the structure, while granulated sugar lends sweetness and moisture. Don’t forget to include eggs, as they help bind the ingredients and add richness.
The Role of Cocoa Powder, Buttermilk, and Vanilla Extract
Now let’s talk about the magic trio: cocoa powder, buttermilk, and vanilla extract.
-
Cocoa Powder: You might think red velvet cake is all about the color, but cocoa powder is essential for that subtle chocolate flavor. Opt for a high-quality cocoa for the best results.
-
Buttermilk: This tangy ingredient not only adds moisture but also reacts with baking soda to create a fluffy texture. If you don’t have buttermilk, a mix of milk and vinegar can be a great substitute.
-
Vanilla Extract: Finally, a good splash of vanilla extract enhances the overall flavor profile, making your cake irresistibly delicious.
If you want to delve deeper into the science of baking, check out King Arthur Baking’s resources for great insights!
Step-by-Step Preparation of Easy Homemade Red Velvet Cake
Crafting the perfect easy homemade red velvet cake recipe is a delightful adventure that not only fills your home with wonderful aromas but also brings a sense of accomplishment when you present your creation. Whether it’s for a birthday, an anniversary, or just a casual weekend dessert, follow these straightforward steps to get it just right.
Gather Your Ingredients and Equipment
Before diving into the baking process, ensure you have everything you need. Here’s a list to get you started:
Ingredients:
- 2 ½ cups all-purpose flour
- 1 ½ cups granulated sugar
- 1 teaspoon baking soda
- 1 teaspoon salt
- 1 tablespoon unsweetened cocoa powder
- 1 ½ cups vegetable oil
- 1 cup buttermilk, at room temperature
- 2 large eggs, at room temperature
- 1 tablespoon red food coloring
- 1 teaspoon vanilla extract
- 1 teaspoon white vinegar
Equipment:
- Two 9-inch round baking pans
- Mixing bowls
- A whisk or electric mixer
- Rubber spatula
- Cooling rack
Gathering your ingredients ahead of time not only makes the process smoother but also helps you avoid those last-minute dashes to the store. You can find quality baking supplies at stores like Walmart or Target, which often have good deals.
Preparing Your Baking Pans
One of the keys to ensuring your cake comes out beautifully is properly preparing your baking pans. Here’s how you can do it:
- Preheat your oven to 350°F (175°C).
- Grease the bottom and sides of your baking pans with either butter or non-stick spray to prevent sticking.
- For an extra layer of protection, you can also line the bottoms with parchment paper. Just cut the paper to fit and place it in the pan after greasing.
By ensuring your pans are well-prepped, you’re setting the stage for success! The last thing you want is a sticky situation when it’s time to unmold your cakes.
Mixing the Cake Batter
Now comes the fun part—mixing your batter! Here’s how to do it step-by-step:
- In a large mixing bowl, whisk together the flour, sugar, baking soda, salt, and cocoa powder.
- In another bowl, combine the vegetable oil, buttermilk, eggs, red food coloring, vanilla extract, and vinegar. Mix until everything is well incorporated.
- Gradually add the wet ingredients to the dry ingredients, mixing gently. Be careful not to over-mix; a few lumps are perfectly okay.
This part is essential because the texture of your cake relies heavily on how you mix your ingredients. If you’re short on time, an electric mixer can speed things up, but remember to scrape down the sides for an even mix.
Baking the Cake to Perfection
Once your batter is ready, it’s time to pour it into your prepared pans:
- Divide the batter equally between the two pans, ensuring they’re filled to about two-thirds full.
- Bake in your preheated oven for 25 to 30 minutes. You’ll know they’re done when a toothpick inserted in the center comes out clean.
Keep an eye on them towards the end, as oven temperatures can vary. Feel free to check out some baking tips from reliable sources like King Arthur Baking to ensure you nail this step.
Cooling the Cake Before Frosting
Patience is key! Once your cakes are baked, it’s essential to cool them properly:
- Remove the cakes from the oven and let them cool in the pans for about 10 minutes.
- Carefully transfer them to a cooling rack, where they should cool completely before frosting.
If you rush this process, you might end up with melting frosting! While waiting, you can prepare your cream cheese frosting to enhance the classic flavor profile of your easy homemade red velvet cake recipe.
By following these steps, you’ll be well on your way to creating a delicious red velvet cake that not only looks stunning but will also impress your friends and family. Enjoy the baking journey!
Variations on Easy Homemade Red Velvet Cake
Red Velvet Cupcakes: A Fun Alternative
Who can resist the allure of a classic red velvet cake? But have you ever considered taking that easy homemade red velvet cake recipe and transforming it into delightful cupcakes? These mini treats are perfect for parties, picnics, or just a cozy night in by yourself. Simply use the same batter but pour it into cupcake liners for a fun twist. Top each cupcake with cream cheese frosting and a sprinkle of cocoa powder for a striking finish. They are easy to share and even easier to eat—no slicing required!
Adding Unique Flavors or Toppings
Sometimes, it’s fun to mix things up! Think about adding unique flavors or toppings to your red velvet masterpiece. Want to infuse a hint of zest? A touch of orange or lemon zest can bring a refreshing twist to the traditional flavor profile. For the adventurous, consider blending in spices like cinnamon or cardamom for an unexpected depth.
Toppings are where you can really get creative:
- Chopped nuts: Walnuts or pecans add a delightful crunch.
- Berries: Fresh strawberries or raspberries not only look stunning but also add a burst of freshness.
- Chocolate chunks: Mix in dark chocolate for a rich contrast to the velvet texture.
Remember, cooking is all about personal expression. So, don’t hesitate to explore and experiment with your version of this classic dessert. You can find more inspiring ideas for variations at Taste of Home or Food Network. Let your imagination run wild, and enjoy making this timeless treat uniquely yours!
Baking Tips and Notes for Easy Homemade Red Velvet Cake
Common Mistakes to Avoid
When following an easy homemade red velvet cake recipe, it’s easy to overlook some key details. One common mistake is not measuring ingredients accurately—baking is a science! Ensure you’re using the right tools, like a kitchen scale or proper measuring cups. Another pitfall is overmixing the batter. Too much air can lead to a dense cake, so mix just until combined.
How to Ensure Moistness in Your Cake
To achieve a moist and tender cake, consider the following tips:
- Use buttermilk: This adds richness and moisture to the cake. If you don’t have any, mix regular milk with a tablespoon of vinegar and let it sit for a few minutes.
- Incorporate oil: Oil keeps your cake sweet and moist longer than butter, which can dry out faster.
- Don’t overbake: Every oven is different, so check your cake a few minutes before the suggested baking time. A toothpick should come out with a few moist crumbs, not clean.
Experiment and find your perfect balance for an irresistible dessert! For more baking insights, you might enjoy checking out Serious Eats or King Arthur Baking. Happy baking!
Serving Suggestions for Easy Homemade Red Velvet Cake
Creative Ways to Serve Your Cake
Transform your easy homemade red velvet cake recipe into a stunning centerpiece by considering a few fun serving ideas. Start by layering slices with a dollop of fresh whipped cream and berries for a burst of freshness. You can even stack smaller slices to create a cake parfait, adding a layer of vanilla ice cream or yogurt for extra indulgence. Another delightful option is to cut the cake into heart shapes using cookie cutters—perfect for birthdays or anniversaries!
Feel free to elevate your cake further with a drizzle of cream cheese frosting or chocolate ganache that will keep your guests coming back for seconds. Don’t forget to sprinkle some chopped nuts or edible flowers for an elegant touch. For even more inspiration, check out this creative serving guide from Food52.
Perfect Pairings with Beverages
When it comes to beverages, your easy homemade red velvet cake pairs beautifully with a variety of drinks. Consider serving it with a rich hazelnut coffee or a smooth chai latte to complement the flavors. If you’re in the mood for something more refreshing, an iced herbal tea can provide the perfect contrast to the cake’s sweetness.
For a cozy gathering, try a glass of almond milk or even a classic hot cocoa—there’s something so comforting about chocolate and cake together! Consider exploring these beverage recipes at Serious Eats for additional ideas.
With these serving suggestions, you’ll not only create a memorable dessert experience but also impress your friends and family!
Time Breakdown for Easy Homemade Red Velvet Cake
Preparation Time
Getting your kitchen ready for this easy homemade red velvet cake recipe is straightforward. You’ll want to dedicate about 20 minutes for preparation. During this time, gather all your ingredients, including cocoa powder, flour, and that signature red food coloring. Ensuring everything is within reach will streamline the process.
Baking Time
The baking process requires approximately 30 minutes. Keep an eye on your cake as it’s baking; a toothpick test is a reliable way to check doneness. Bake it until a toothpick inserted in the center comes out clean.
Total Time
In total, you’ll invest about 50 minutes from start to finish. This includes prep and baking time, allowing you to serve your friends or family a delightful homemade treat without spending an entire day in the kitchen. Perfect for a casual get-together or a cozy night in!
For more tips on making the perfect cake, consider checking out resources from King Arthur Baking or The Baking Company. They’re packed with helpful insights and techniques!
Nutritional Facts for Easy Homemade Red Velvet Cake
When baking your easy homemade red velvet cake recipe, it’s essential to know what you’re indulging in. This delightful dessert offers a rich taste with some noteworthy nutritional facts.
Calories
A standard slice contains approximately 350 calories. While it’s a treat, moderation is key for those mindful of their daily intake—perhaps enjoy it as a special dessert rather than an everyday staple.
Sugar Content
Your slice of red velvet cake typically has around 20 grams of sugar. This contributes to its sweetness but can also be reduced by adjusting the recipe if desired.
Key Nutrients
Filled with enriching ingredients, this cake also delivers important nutrients:
- Iron: Great for your blood health.
- Calcium: Important for strong bones.
- Vitamin A: Supports immune function.
If you’re keen to dive deeper into health-conscious baking, consider checking out resources like the USDA FoodData Central for more insights.
FAQs about Easy Homemade Red Velvet Cake
How do I store leftover red velvet cake?
If you find yourself with leftover slices of your delicious easy homemade red velvet cake, you’ll want to store it properly to keep it fresh. The best way to do this is to cover the cake with plastic wrap or place it in an airtight container. You can keep it at room temperature for about 2-3 days, depending on your climate. If you want to extend its shelf life, consider refrigerating it, where it can last up to a week. For even longer storage, you can freeze the cake. Just wrap it tightly in plastic wrap and place it in a freezer-safe container. When you’re ready to enjoy it again, let it thaw in the refrigerator overnight.
Can I substitute any ingredients?
Absolutely! One of the great things about this easy homemade red velvet cake recipe is its flexibility. If you’re short on buttermilk, you can mix 1 cup of regular milk with 1 tablespoon of vinegar or lemon juice and let it sit for about 5 minutes. For a gluten-free option, you can use a 1:1 gluten-free flour blend instead of all-purpose flour. Don’t hesitate to make adjustments based on dietary needs or personal preferences — this cake is rich in flavor and can still taste amazing with variations.
What to do if my cake turns out dry?
A dry cake can be a bummer, but fear not! If you find your easy homemade red velvet cake has dried out, you can try a couple of quick fixes. First, you can brush a simple syrup (made with equal parts sugar and water) over the cake layers. This will add moisture and sweetness. Another option is to serve the cake with a scoop of vanilla ice cream or a dollop of whipped cream, which can complement dry cake beautifully. And of course, make sure to double-check your baking time next time; sometimes, a couple of minutes can make all the difference.
For more baking tips and tricks, check out resources like America’s Test Kitchen. Happy baking!
Conclusion on Easy Homemade Red Velvet Cake
In closing, I encourage you to try this easy homemade red velvet cake recipe. There’s something incredibly satisfying about baking from scratch, and this recipe simplifies it perfectly. The rich, velvety texture combined with the subtle tang of cream cheese frosting makes every bite a celebration.
Embrace the joy of homemade baking, and share it with friends and family—imagine their smiles as they savor your creation! Don’t hesitate to experiment a little, whether it’s adding your favorite flavors or customizing it for special occasions. For more baking inspiration, check out resources from the Kitchn or Serious Eats. Happy baking!
PrintEasy Homemade Red Velvet Cake Recipe – The Best Classic Dessert
Learn how to make the perfect red velvet cake with this easy recipe that combines rich flavors and a beautiful appearance.
- Prep Time: 20 minutes
- Cook Time: 30 minutes
- Total Time: 50 minutes
- Yield: 12 servings
- Category: Dessert
- Method: Baking
- Cuisine: American
Ingredients
- 2 cups all-purpose flour
- 1 ½ cups granulated sugar
- 1 cup vegetable oil
- 1 cup buttermilk
- 2 large eggs
- 2 tablespoons cocoa powder
- 1 tablespoon vanilla extract
- 1 teaspoon baking soda
- 1 teaspoon salt
- 1 tablespoon red food coloring
Instructions
- Preheat your oven to 350°F (175°C).
- In a large mixing bowl, combine the sugar and oil until well mixed.
- Add the eggs and buttermilk, and mix until smooth.
- In a separate bowl, sift together the flour, cocoa powder, baking soda, and salt.
- Gradually add the dry ingredients to the wet mixture, stirring until just combined.
- Stir in the red food coloring and vanilla extract.
- Grease and flour three 9-inch round cake pans.
- Divide the batter evenly between the prepared pans.
- Bake for 25-30 minutes or until a toothpick comes out clean.
- Let the cakes cool in the pans for 10 minutes before transferring to a wire rack.
Notes
- Using buttermilk helps keep the cake moist.
- You can adjust the amount of food coloring to achieve your desired shade of red.
Nutrition
- Serving Size: 1 slice
- Calories: 400
- Sugar: 35g
- Sodium: 300mg
- Fat: 20g
- Saturated Fat: 4g
- Unsaturated Fat: 10g
- Trans Fat: 0g
- Carbohydrates: 50g
- Fiber: 1g
- Protein: 4g
- Cholesterol: 50mg