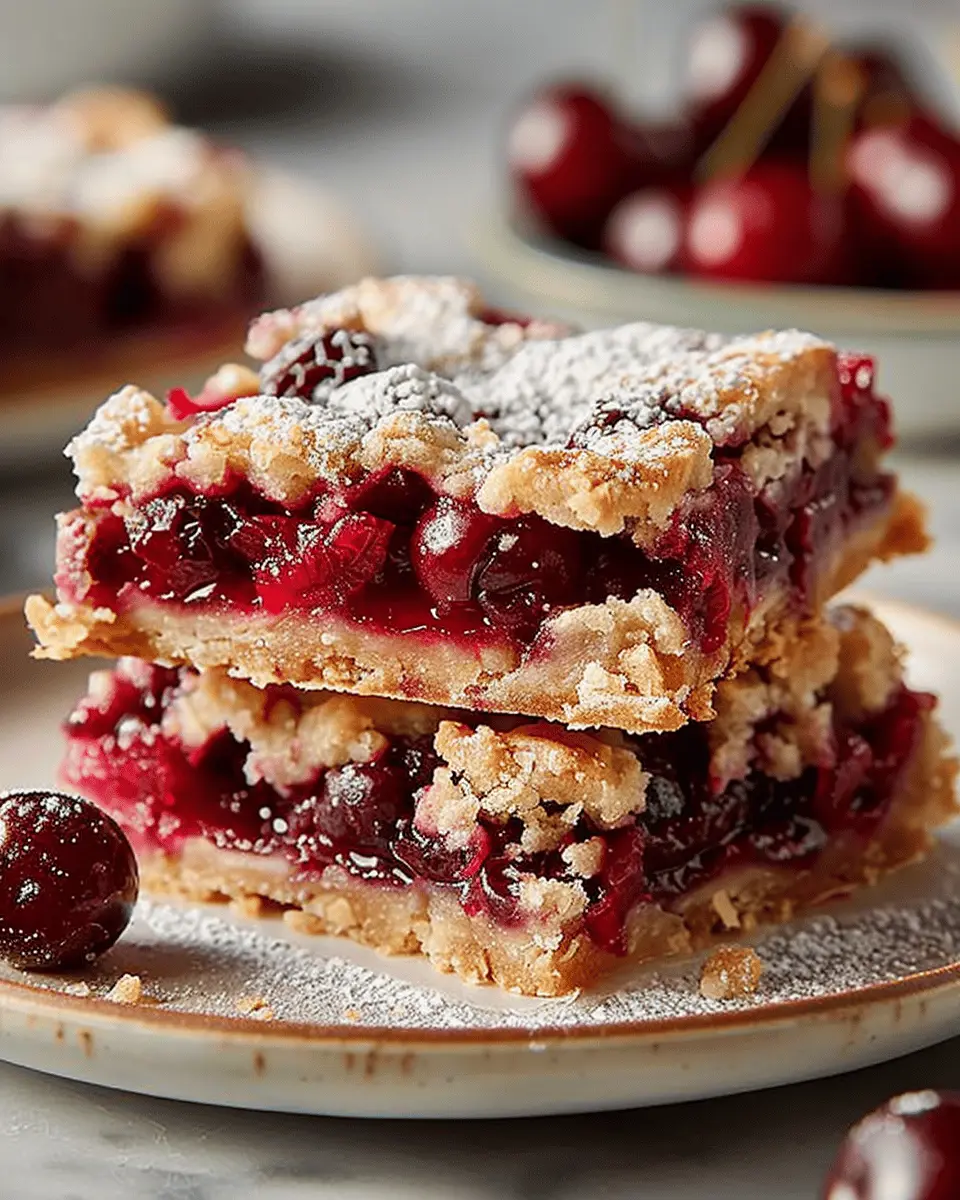
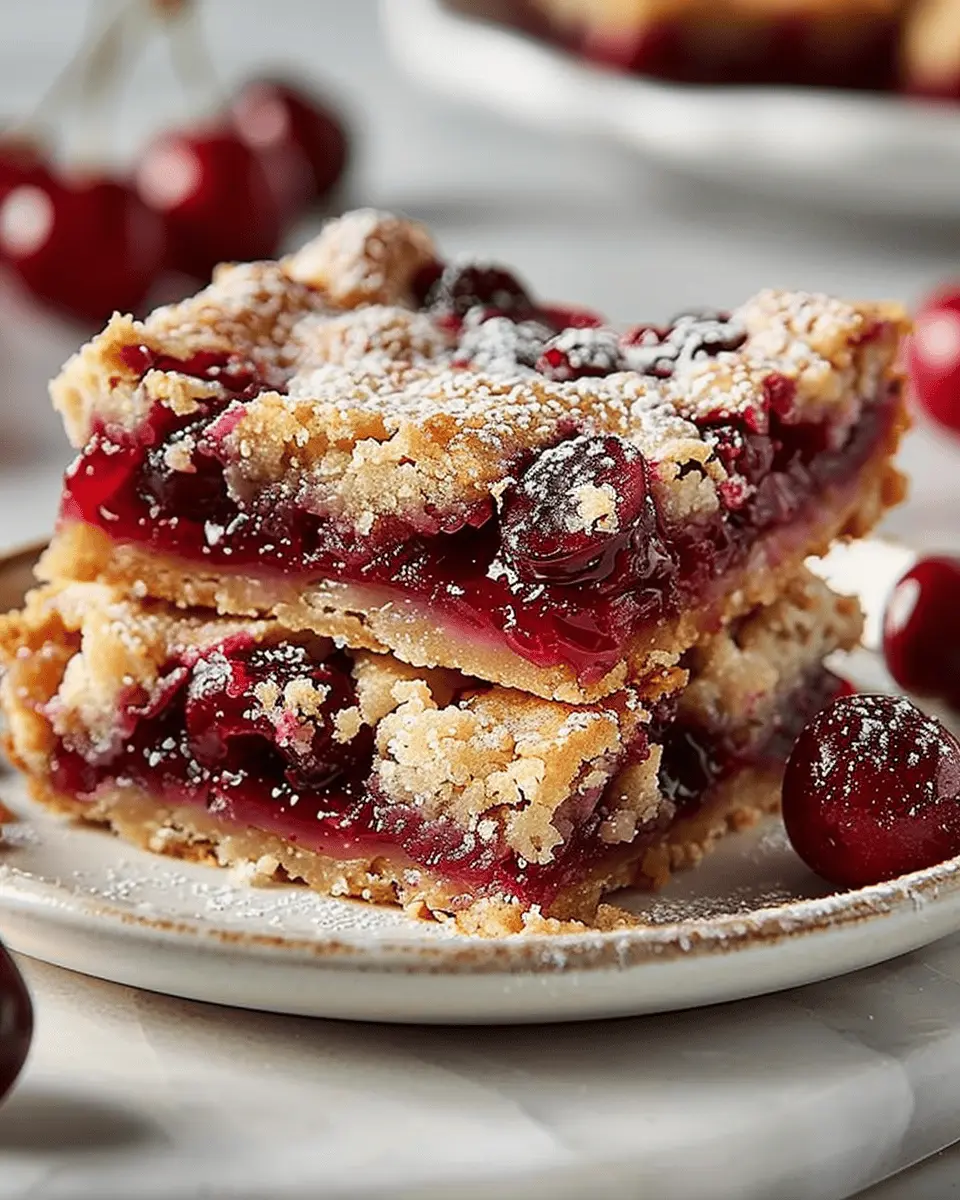
Introduction to Cherry Slab Pie Bars
Cherry slab pie bars are more than just a delightful dessert; they represent an innovation in pie-making that has captured the hearts (and taste buds) of many. Imagine the essence of a classic cherry pie, transformed into a convenient, shareable format that’s perfect for gatherings, picnics, or simply an after-dinner treat. Unlike traditional pie, which often requires careful slicing and handling, these bars are easy to cut and serve, making them a game-changer for bakers everywhere.
What are Cherry Slab Pie Bars and Why Are They a Game-Changer?
At their core, cherry slab pie bars combine the juicy sweetness of cherry filling with a buttery, flaky crust, all baked into a large pan. This means instead of fiddling with a round pie dish, you can pour your filling into a rectangular baking tray, making it easier to serve and enjoy. The generous portioning allows you to share with friends and family without the anxiety of uneven slicing.
One of the best parts? They are incredibly customizable! You can swap out the cherries for other fruits like strawberries or blueberries, adapting the recipe to suit seasonal ingredients or personal tastes. This flexibility is what sets cherry slab pie bars apart from traditional pies and encourages creativity.
Additionally, if you’re a busy professional, these bars are ideal for meal prepping or sharing at potlucks. With just a bit of planning, you can whip up a batch and have a delicious treat ready to satisfy your sweet tooth or impress guests. Moreover, it’s a fantastic way to use fresh cherries when they’re in season, ensuring you get the best flavor possible.
Curious about how to bake the perfect cherry slab pie bars? You might want to check out resources like The Kitchn or Serious Eats for expert tips and tricks.
In conclusion, cherry slab pie bars are not just pies; they are an experience—a deliciously easy way to enjoy homemade treats while sharing joyful moments with loved ones. So, roll up your sleeves and embrace this slab pie revolution—you won’t regret it!
Ingredients for Cherry Slab Pie Bars
Creating delightful cherry slab pie bars comes down to using the right ingredients for a delicious and flaky treat. Let’s break it down!
Essential ingredients for the perfect crust
The foundation of any great slab pie is a buttery, flaky crust. For our cherry slab pie bars, you’ll need:
- All-purpose flour: Essential for structure; it’s the backbone of your crust.
- Granulated sugar: Just a touch adds sweetness and balance.
- Unsalted butter: This is where the magic happens; cold and cubed, it gives the crust its rich flavor and flaky texture.
- Salt: A little pinch enhances all the flavors.
- Ice water: Helps bind everything together without melting the butter.
For detailed tips on choosing the best butter, check out this helpful guide from The Kitchn.
Key ingredients for the cherry filling
The filling takes center stage in cherry slab pie bars, and it needs to be both flavorful and just the right amount of sweet. Here’s what you’ll need:
- Fresh or frozen cherries: These are the stars of the show; opt for ripe and juicy cherries if possible.
- Granulated sugar: Adds sweetness that complements the tartness of the cherries.
- Cornstarch: This acts as a thickener, ensuring your filling holds together beautifully.
- Lemon juice: Just a splash brightens the flavor and balances the sweetness.
- Vanilla extract: For that warm, cozy flavor that makes every bite remarkable.
So, are you ready to whip up these cherry slab pie bars? The combination of the flaky crust and the sweet-tart cherry filling makes for a delightful dessert that’s bound to impress your friends and family. Happy baking!
Preparing Cherry Slab Pie Bars
Making cherry slab pie bars can be a delightful experience, filled with sweet aromas and the satisfaction of creating something delicious from scratch. Let’s walk through the steps together to ensure you get the most scrumptious results!
Gather Your Ingredients and Tools
Before diving in, let’s ensure you have everything you need. This will make the baking process smoother and more enjoyable. Here’s what you’ll need:
Ingredients:
-
For the crust:
-
2 ½ cups all-purpose flour
-
1 cup unsalted butter (chilled and diced)
-
¾ cup granulated sugar
-
1 teaspoon salt
-
1 large egg (for egg wash)
-
For the cherry filling:
-
4 cups pitted cherries (fresh or frozen)
-
1 cup granulated sugar
-
¼ cup cornstarch
-
2 tablespoons lemon juice
-
1 teaspoon vanilla extract
-
A pinch of cinnamon (optional)
Tools:
- Mixing bowls
- A 9×13-inch baking dish
- A rolling pin
- A large spoon for mixing
- Parchment paper (for easy removal)
Having everything at hand makes the process exciting, right?
Make the Pie Crust Dough
The first step in creating your cherry slab pie bars is making that irresistible crust. In a large mixing bowl, combine your flour, sugar, and salt. Add the chilled, diced butter and use a pastry cutter or your fingers to mix until the mixture resembles coarse crumbs.
Next, you’ll want to bring the dough together. If it feels a bit crumbly, add a tablespoon of ice-cold water at a time until it’s cohesive. Form the dough into a disk, wrap it in plastic, and chill in the refrigerator for about 30 minutes. This resting time is crucial—you’ll thank yourself later when that crust bakes up flaky and tender!
Prepare the Cherry Filling
While your dough chills, it’s the perfect time to prepare the cherry filling. If you’re using fresh cherries, wash, pit, and slice them. Frozen cherries can be used straight from the freezer, but remember to drain excess liquid to avoid a soggy filling.
In a medium mixing bowl, combine the cherries, sugar, cornstarch, lemon juice, and vanilla extract. Feel free to add a pinch of cinnamon here. This not only enhances the flavor but also adds a warm, inviting scent that is simply irresistible. Let the mixture sit for about 10-15 minutes to combine the flavors and let the juices seep out.
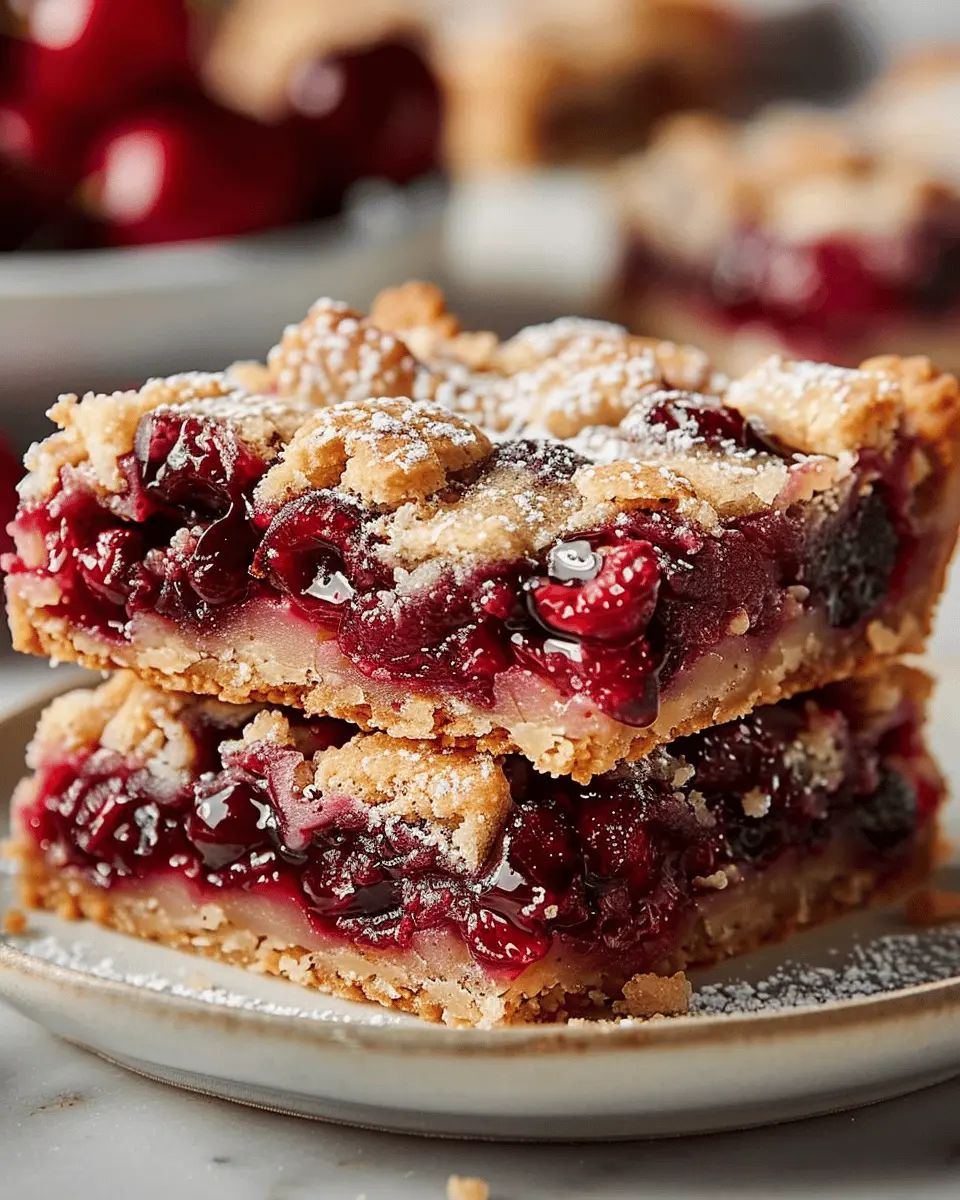
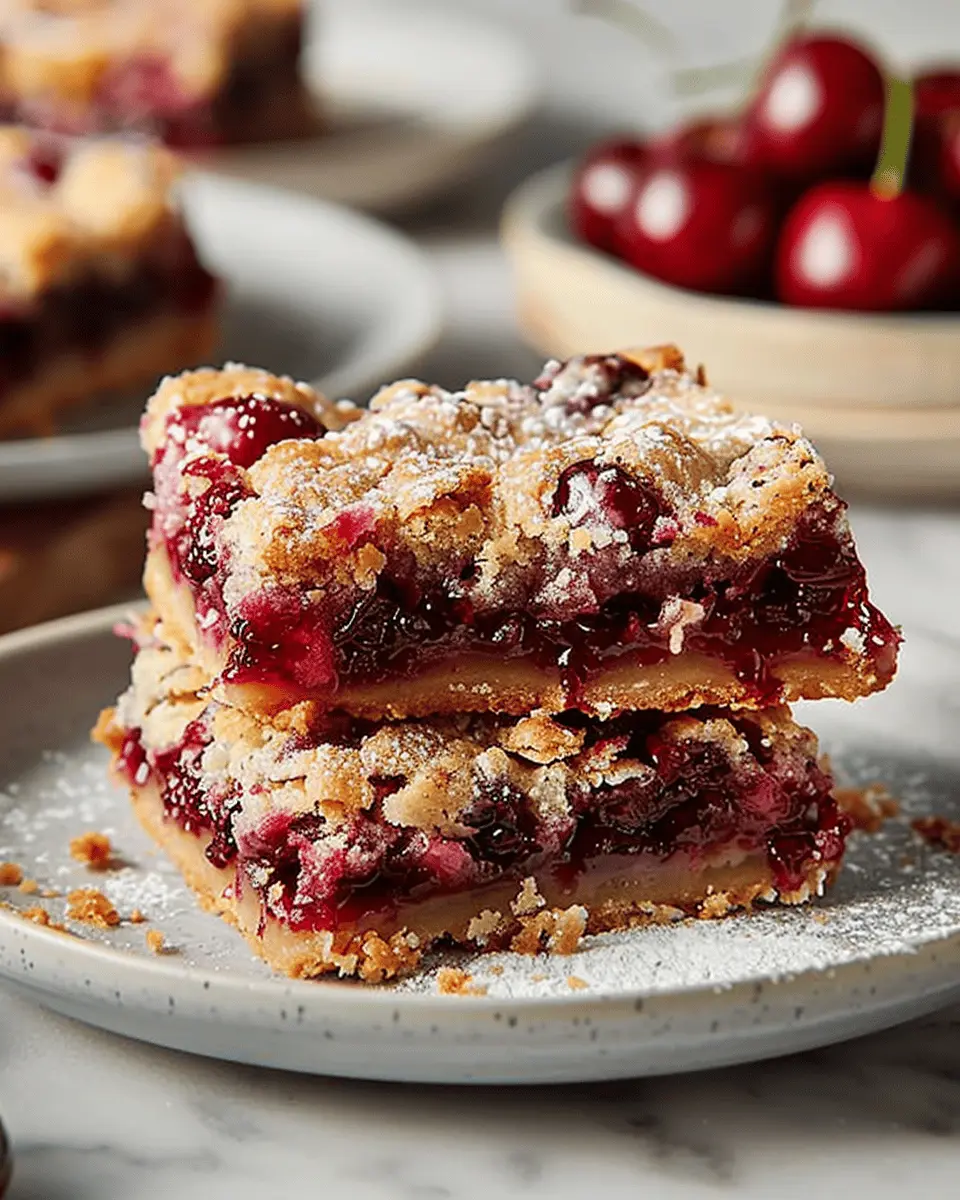
Assemble the Cherry Slab Pie Bars
Once your dough has chilled and the filling is ready, it’s time to bring everything together. Preheat your oven to 375°F (190°C). Roll out about two-thirds of the dough on a floured surface until it’s large enough to cover your baking dish. Press it into the bottom of the dish, ensuring it’s evenly distributed.
Next, pour in the cherry filling, spreading it evenly across the crust. Roll out the remaining dough and cut it into strips to create a lattice crust over the cherries. This not only looks charming but allows the filling to peek through, tempting anyone who walks by!
Bake to Perfection
Finally, it’s time to bake your cherry slab pie bars. Brush the lattice with an egg wash (a mixture of beaten egg and a splash of water) to give it that golden color. Bake for about 45-55 minutes or until the crust is golden brown and the cherries are bubbling.
Once done, let the bars cool completely in the dish before cutting them into squares. This cooling period allows the filling to set, making each bite perfectly sweet and satisfying.
Enjoy your homemade cherry slab pie bars with a scoop of vanilla ice cream or a dollop of whipped cream for an extra indulgence. Trust me, you’ll be the star at any gathering with these sweet treats! If you find yourself captivated by these flavors, consider checking out more baking tips at King Arthur Baking or America’s Test Kitchen for other enticing recipes.
Happy baking!
Variations on Cherry Slab Pie Bars
When it comes to cherry slab pie bars, the classic version is always a hit, but there’s a whole world of exciting flavors to explore. Why not mix things up with these delicious variations?
Cherry Almond Slab Pie Bars
For a nutty twist, try making cherry almond slab pie bars. The pairing of cherries and almonds is a match made in dessert heaven! Simply add a teaspoon of almond extract to the cherry filling, and sprinkle slivered almonds on top before baking. The toasted nuts will add a delightful crunch and elevate the almond flavor beautifully.
If you’re interested in learning more about how almond complements fruits, you can check out this informative article from The Almond Board of California.
Chocolate Cherry Slab Pie Bars
Now, if you’re a chocolate lover, you can’t miss out on chocolate cherry slab pie bars. This variation combines the tartness of cherries with the rich creaminess of chocolate. Just fold in some chocolate chips to the cherry filling or drizzle melted chocolate over the cooled bars.
An added bonus? Research shows that chocolate can boost your mood and energy, making these bars not only delicious but a little pick-me-up too!
If you’re curious about chocolate’s health benefits, hop over to Healthline for some interesting insights.
Getting Creative
Feel free to remix your cherry slab pie bars further with spices like cinnamon or adding a crumbly streusel topping. The possibilities are endless! So gather your friends, try out these variations, and enjoy the process of making these delightful treats. You might just find your new favorite way to enjoy slab pie!
Cooking Tips and Notes for Cherry Slab Pie Bars
Tips for Achieving a Flaky Crust
A flaky crust is essential for delicious cherry slab pie bars. Here are a few tips to nail that perfect texture:
- Cold Ingredients: Always use cold butter and chilled water. This helps create those lovely layers. You can even chill your mixing bowl!
- Don’t Overwork the Dough: Mix just until combined. Over-kneading can lead to tough crusts, so keep it gentle.
- Resting Time: After making the dough, let it rest in the fridge for at least 30 minutes. This relaxes the gluten and enhances flakiness.
Important Notes on Cherry Selection
Choosing the right cherries makes all the difference. Look for:
- Fresh or Frozen: Fresh cherries are delightful in summer, but frozen can work just as well any time of the year (check out the pros at The Cherry Marketing Institute for more tips!).
- Sweet vs. Tart: Use sweet cherries for a dessert-like flavor or tart cherries for a refreshing zing. Mixing both can add complexity to your bars.
With these simple tips, your cherry slab pie bars will be a hit at any gathering! Happy baking!
Serving suggestions for Cherry Slab Pie Bars
Pairing with ice cream or whipped cream
Nothing elevates the experience of enjoying cherry slab pie bars like a generous scoop of vanilla ice cream or a dollop of whipped cream. The creamy texture complements the tart cherry filling beautifully, balancing flavors in every bite. You might even consider flavors like almond or chocolate ice cream for a fun twist. You could also try a bit of sour cream for a tangy finish—sounds odd, but it works!
Serving with a refreshing beverage
When it comes to drinks, think outside the box! A chilled glass of sparkling water with a slice of lemon can cleanse the palate and keep the focus on those sweet cherries. Alternatively, a refreshing iced tea—maybe with a hint of mint—can be a delightful pairing. For those who enjoy coffee, an espresso shot can provide a robust contrast to the sweetness. Check out this guide to pair refreshing drinks with desserts, where you can discover more options to complement your cherry slab pie bars delightfully!
These serving suggestions can transform your dessert experience from enjoyable to unforgettable, allowing you and your guests to savor your creation fully.
Time Breakdown for Cherry Slab Pie Bars
Preparation Time
Preparing your cherry slab pie bars is a breeze! It typically takes about 15-20 minutes to whip up the crust and filling. This is the time to let your creativity shine! While you’re mixing ingredients, consider adding a unique twist with spices like cinnamon or nutmeg for an extra flavor kick. According to experts, using fresh ingredients can significantly elevate your dish – and let’s be honest, who doesn’t want the freshest taste?
Baking Time
Once everything is assembled, pop your cherry slab pie bars into the oven for 30-35 minutes. The golden-brown crust and bubbling cherry filling are truly worth the wait. You’ll want to check on them halfway through; that’s a great time to savor the aromas wafting through your kitchen!
Total Time
In total, you’re looking at around 45-55 minutes from start to finish. Perfect for a busy weekday dessert or a weekend treat! These cherry slab pie bars not only save you time but also keep everyone coming back for seconds. So, whether you’re hosting a gathering or just treating yourself, these bars are sure to impress! For more kitchen tips, check out this expert guide on pie-making.
Nutritional Facts for Cherry Slab Pie Bars
Calories
If you’re a fan of dessert, you’ll be pleased to know that each serving of cherry slab pie bars typically contains around 250 calories. This makes them a satisfying treat without going overboard—perfect for a mid-day snack or a sweet treat after dinner.
Sugar Content
One of the concerns when indulging in desserts is sugar content. These cherry slab pie bars usually pack about 15 grams of sugar per serving. To keep your sweet tooth happy without feeling guilty, consider pairing your bar with a dollop of Greek yogurt instead of whipped cream for added protein!
Dietary Considerations
While these treats are delicious, it’s essential to think about dietary needs. Those watching their sugar intake may want to opt for a sugar substitute. Additionally, you might find plenty of gluten-free options for the crust, making cherry slab pie bars a versatile choice for gatherings. If you’d like to explore alternatives, check out this resource on gluten-free baking here.
By keeping these nutritional facts in mind, you can enjoy your cherry slab pie bars while still staying mindful of your health goals!
FAQs about Cherry Slab Pie Bars
Can I use frozen cherries instead of fresh?
Absolutely! Using frozen cherries is a great option if fresh ones aren’t available or if you’re looking for convenience. Just keep in mind that frozen cherries tend to release more liquid as they bake, which might result in a slightly softer texture in your cherry slab pie bars. To counteract this, consider thawing and draining them before mixing them into the filling.
How do I store leftovers?
Storing your cherry slab pie bars is simple! If you have any leftovers (which may be unlikely because they’re so delicious), let them cool completely. Then, place them in an airtight container. They can be stored at room temperature for a couple of days or in the fridge for up to a week. If you want to keep them fresh even longer, consider freezing them. Just make sure to wrap them tightly in plastic wrap or aluminum foil, or place them in a freezer-safe container to avoid freezer burn.
What are some common mistakes to avoid?
Here are a few pitfalls to watch out for:
- Not chilling the dough: This can result in a tougher crust. Always chill your dough before rolling it out.
- Overfilling the pan: Stick to the recommended amount of filling for the best results.
- Skipping the cornstarch: This is key for thickening your filling, especially if you’re using frozen cherries.
With these tips in mind, you’ll be well on your way to baking delicious cherry slab pie bars that your friends and family will love! Looking for more tips? Check out Baking 101 for all things baking-related!
Conclusion on Cherry Slab Pie Bars
Why you should try making these delicious bars today!
If you’re looking for a delightful dessert that combines the classic flavors of cherry pie with an easy-to-serve format, cherry slab pie bars are your answer. These bars not only satisfy your sweet tooth but are also perfect for gatherings, potlucks, or just a cozy weekend at home. Imagine indulging in the tartness of fresh cherries combined with a buttery crust that melts in your mouth.
Making these bars is simpler than you might think! With just a few ingredients and some fun time in the kitchen, you can impress friends and family. Plus, chose high-quality cherries for the best flavor—fresh or frozen works wonderfully! So why not whip up a batch today? You won’t regret it! For more tips on the perfect fruit desserts, check out Culinary Institute of America.
PrintCherry Slab Pie Bars: The Easy Indulgence You’ll Adore
These Cherry Slab Pie Bars are a delightful treat that’s easy to make and absolutely delicious. Perfect for any occasion, they combine the sweetness of cherries with a buttery crust.
- Prep Time: 15 minutes
- Cook Time: 35 minutes
- Total Time: 50 minutes
- Yield: 12 servings
- Category: Dessert
- Method: baking
- Cuisine: American
- Diet: vegetarian
Ingredients
- 2 cups all-purpose flour
- 1 cup unsalted butter, softened
- 1 cup granulated sugar
- 1 large egg
- 1 teaspoon vanilla extract
- 1/2 teaspoon salt
- 1 can (21 ounces) cherry pie filling
Instructions
- Preheat the oven to 350°F (175°C).
- In a large bowl, cream together the butter and sugar until smooth.
- Add the egg and vanilla extract, mixing well.
- Gradually stir in the flour and salt until well combined.
- Press half of the dough into the bottom of a greased 9×13 inch baking pan.
- Spread the cherry pie filling over the dough.
- Drop the remaining dough by spoonfuls over the cherry filling.
- Bake for 30-35 minutes or until the top is golden brown.
- Allow to cool before cutting into bars.
Notes
- Serve with whipped cream for an extra treat.
- These bars can be easily frozen for later enjoyment.
Nutrition
- Serving Size: 1 bar
- Calories: 250
- Sugar: 20g
- Sodium: 150mg
- Fat: 10g
- Saturated Fat: 6g
- Unsaturated Fat: 4g
- Trans Fat: 0g
- Carbohydrates: 34g
- Fiber: 1g
- Protein: 3g
- Cholesterol: 30mg