Introduction to 10 Minute Tiramisu Balls
If you’re anything like me, you crave delightful desserts that don’t steal away your entire afternoon to whip up. That’s where 10 Minute Tiramisu Balls come in. They are the perfect sweet treat to impress guests or indulge in after a long day without the hassle of a complicated baking process. But let’s dive into why homemade treats are simply the best.
Why Homemade Treats Are the Best?
Few things can match the joy of sharing homemade desserts with loved ones. When you create something from scratch, you are adding your own personal touch, which makes it not just a food item but a heartfelt gesture. Various studies have shown that home-cooked meals, including sweets, foster a sense of community and bonding.
-
Healthier Choices: By making your own tiramisu balls, you get to control the ingredients. This means you can swap traditional components for healthier alternatives, making it a guilt-free indulgence. Want to use low-fat mascarpone or gluten-free cookies? Go for it! When you make it at home, the possibilities are endless.
-
Simplicity and Speed: With a quick 10-minute prep time, these tiramisu balls fit perfectly into your busy lifestyle. No one wants to spend hours in the kitchen, especially on a weeknight after a nine-to-five grind. You can pop these in the fridge while you unwind, and voilà, a delectable treat almost instantly.
-
Culinary Creativity: Crafting your own desserts allows you to unleash your creativity. Why not experiment with flavors? Perhaps a dash of coconut, a drizzle of caramel, or even a sprinkle of nuts can take your tiramisu balls to the next level.
So, why settle for store-bought when you can make tantalizingly delicious treats in a flash? The joy of transforming simple ingredients into 10 Minute Tiramisu Balls goes far beyond mere taste; it’s an experience, one that can bring a little sweetness into ordinary moments. Plus, they’re an absolute showstopper at any gathering.
Ready to dive into the recipe? Let’s get rolling with these easy and delectable delights!
Ingredients for 10 Minute Tiramisu Balls
Essential ingredients for the perfect bite
Creating delightful 10 Minute Tiramisu Balls is all about having the right ingredients on hand. Here’s what you’ll need for those scrumptious bites:
- Mascarpone cheese: This is the creamy base that gives your tiramisu its rich flavor.
- Ladyfingers: The traditional choice for tiramisu; these sponge cookies add just the right texture.
- Espresso or strong coffee: Brew a fresh cup to energize your balls with that classic coffee taste.
- Cocoa powder: A dusting of cocoa on top adds a bittersweet finish and a touch of elegance.
- Sugar: For sweetening the mascarpone, balancing out the bitterness of the coffee.
- Vanilla extract: This enhances the flavor profile with a sweet, aromatic punch.
With these essentials, you’re set to whip up a batch in no time!
Optional add-ons for a personalized touch
Want to make your 10 Minute Tiramisu Balls unique? Consider these optional add-ons:
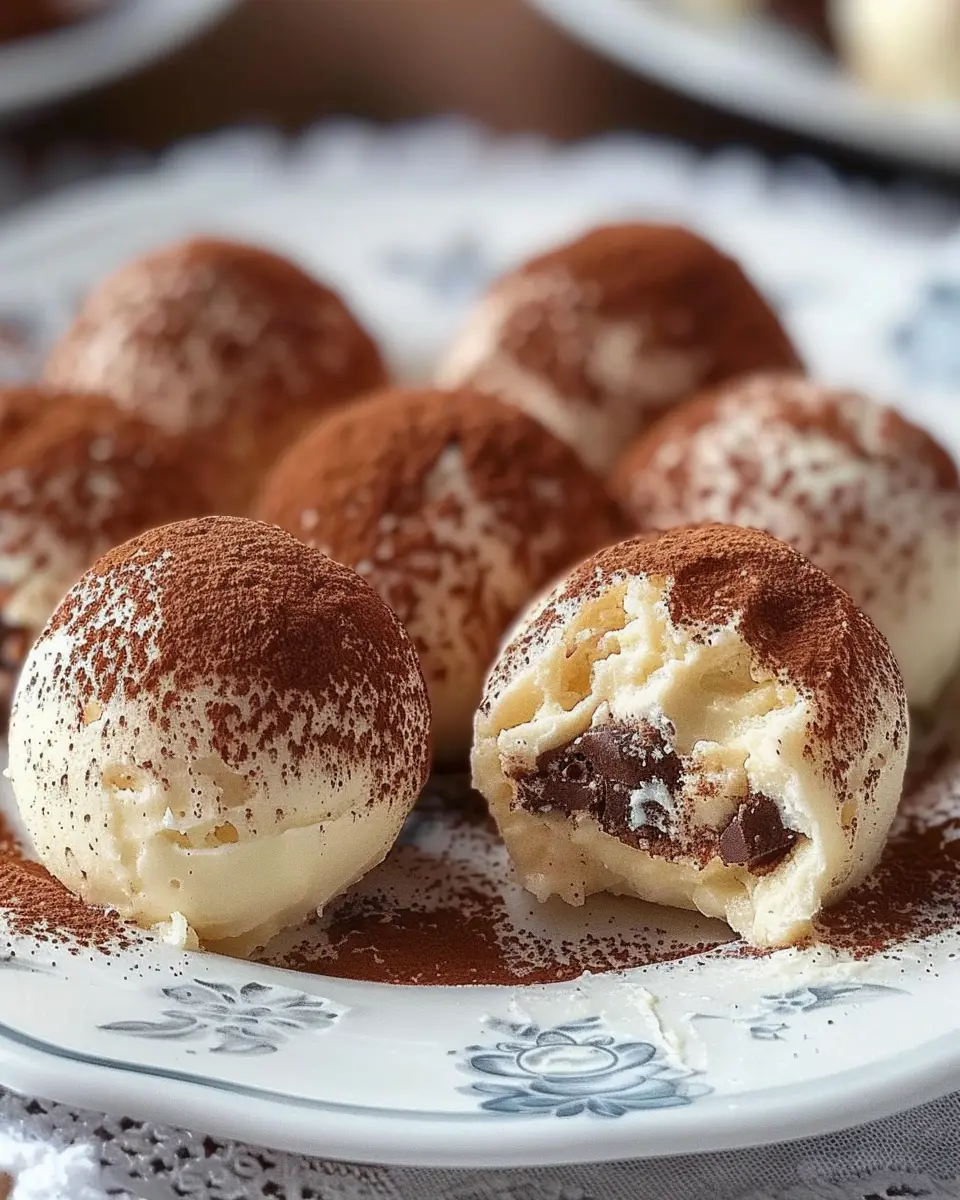
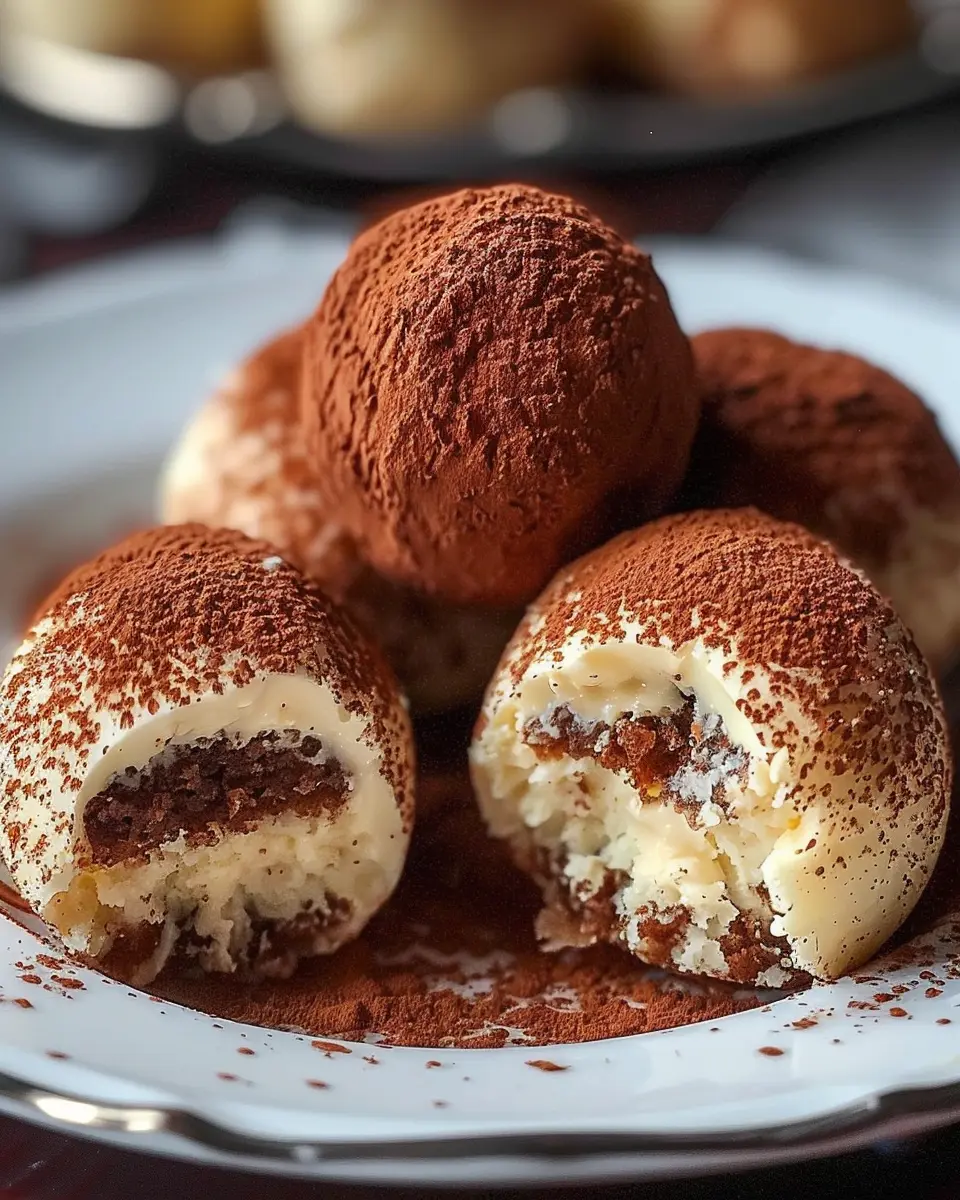
- Chocolate chips: Stir some into the mixture for a surprising crunch.
- Nuts: Chopped almonds or hazelnuts can add an interesting texture.
- Flavored liqueurs: If you want a flavor twist, try a non-alcoholic coffee syrup for that extra kick.
- Fruit puree: Adding a layer of raspberry or strawberry puree can brighten the taste and color.
These simple enhancements will elevate your tiramisu balls and make them truly your own. Remember, cooking is all about creativity—don’t hesitate to try new combinations! If you’re looking for more tips on ingredient selection, check out BBC Good Food for a wealth of culinary inspiration.
Step-by-step Preparation of 10 Minute Tiramisu Balls
Are you ready to indulge in a sweet escape that takes just ten minutes to whip up? Making 10 Minute Tiramisu Balls is an enjoyable experience that won’t leave you scrambling in the kitchen. Perfect for a quick treat or a last-minute dessert for a gathering, these little bites pack the rich, creamy flavor of classic tiramisu into manageable spheres. Let’s dive right into the preparation process!
Crush the ladyfingers
The first step to creating these luscious tiramisu balls is to crush the ladyfingers. You can either place them in a zipper bag and smash them with a rolling pin or a heavy bottole, or if you want a more hands-on approach, use your hands to break them into smaller pieces. The key is to achieve a mix of fine crumbs and coarse bits to give your dessert the ideal texture. You’ll need about 1 cup of ladyfinger crumbs; this will serve as the base for your delicious creation.
It’s interesting to note that ladyfingers, also known as savoiardi, originated in Italy and are often used in various desserts beyond tiramisu. You can read more about their history here.
Mix the mascarpone and wet ingredients
Next up, it’s time to blend the creamy goodness! In a mixing bowl, combine 1 cup of mascarpone cheese (the star of any tiramisu), ½ cup of strong brewed coffee (cooled), and 2 tablespoons of maple syrup for sweetness. If you prefer extra flavor, add a splash of vanilla extract. Using an electric mixer or a whisk, blend the ingredients until smooth and creamy. The rich texture of the mascarpone will create that signature creaminess in your 10 Minute Tiramisu Balls that you won’t be able to resist.
Combine all ingredients
Once you have your mascarpone mixture ready, it’s time to fold in the crushed ladyfingers. Patience is key here; gently mix everything together until the ladyfingers are evenly coated in the mascarpone concoction. To enhance the chocolatey flavor, consider adding 2 tablespoons of cocoa powder into the mixture—this little touch can elevate the dessert significantly.
The combination of textures here—the smooth creaminess alongside the crisp bite of the ladyfingers—is what makes these balls so delightful.
Chill for easier rolling
If you think the process is already fun, just wait until you chill the mixture! Pop it into the fridge for about 15–20 minutes. This step is crucial because it firms up the mixture, making it significantly easier to roll into balls. You can use this time to clean up the kitchen or get started on your toppings.
According to chef and food scientist Harold McGee, cooling ingredients can significantly enhance their flavor. So don’t skip this step!
Roll into delightful bite-sized balls
Once your mixture is chilled and ready to go, it’s time to bring out your inner chef! Use a small cookie scoop or your hands to form bite-sized balls, about one inch in diameter. Place the rolled balls on a parchment-lined tray. This step is where the fun really begins, as you can get creative with the size and shape!
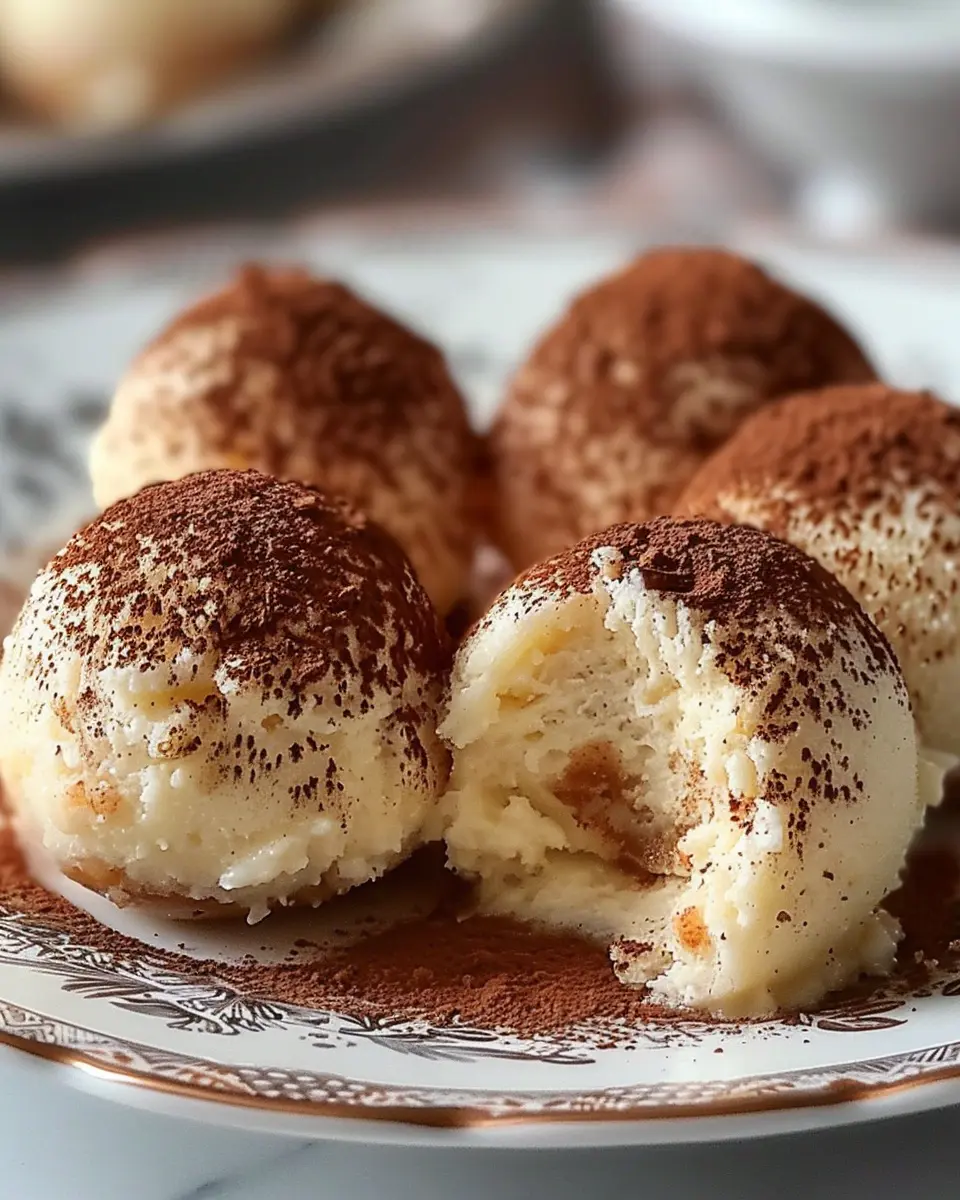
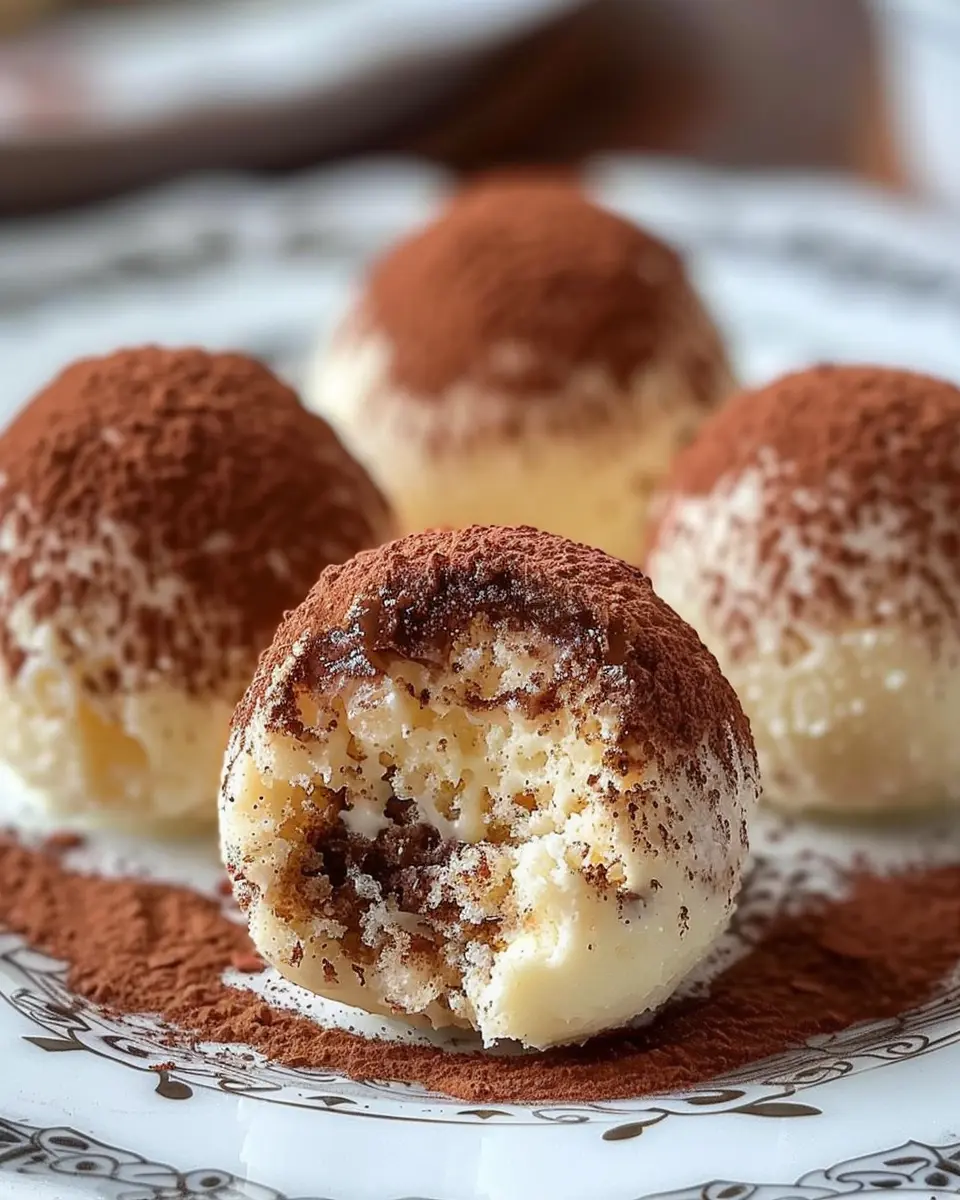
Coat with cocoa powder or toppings
Now for the finishing touches! You can either roll your tiramisu balls in cocoa powder for that traditional flair or experiment with other toppings. Crushed chocolate, crushed nuts, or even desiccated coconut can add a unique twist.
Dip them in cocoa powder for that classic tiramisu taste, and serve them cold! Your guests will be thrilled with a delightful surprise when they take a bite.
In just ten minutes, you will have created delightful 10 Minute Tiramisu Balls that are sure to impress. Enjoy your treat, and happy indulging!
Variations on 10 Minute Tiramisu Balls
Tiramisu Balls with a Twist: Coffee Liqueur Version
If you’re looking to elevate your 10 Minute Tiramisu Balls, adding a splash of coffee liqueur can bring a delightful twist. Instead of regular brewed coffee, swap it out for your favorite non-alcoholic coffee liqueur or even espresso-based syrups. The rich flavor deepens the coffee experience while maintaining that classic tiramisu essence. Simply mix the liqueur into your mascarpone and cream cheese filling for a sumptuous, indulgent treat.
To make these irresistible bites even more enticing:
- Roll them in cocoa powder or finely chopped dark chocolate for a gorgeous finish.
- Garnish with chocolate shavings or a dusting of cocoa for an extra touch of elegance.
For more ideas on variations, check out resources like AllRecipes or Food & Wine for inspiration on flavor combinations!
Kid-Friendly Tiramisu Balls
Want to make these 10 Minute Tiramisu Balls kid-approved? It’s super easy! Simply skip the coffee liqueur and substitute brewed coffee with warm chocolate or even a milk-based coffee alternative. This transformation keeps all the creaminess while making it palatable for younger taste buds.
Here are a few tips to make them kid-favorite:
- Incorporate different flavors, like vanilla or butterscotch pudding, to switch things up.
- Dip them in colorful sprinkles instead of cocoa powder for a festive look at birthday parties or family gatherings.
These variations not only keep the adult flavors intact but also ensure that everyone gets to join in on the fun. For more kid-friendly dessert ideas, sites like Taste of Home can give you plenty of delicious options to explore. Happy baking!
Cooking Tips and Notes for 10 Minute Tiramisu Balls
Achieving the perfect texture
Getting the texture just right is critical for your 10 Minute Tiramisu Balls. When mixing your mascarpone and cream, aim for a smooth yet thick consistency. Too much mixing can make it grainy, while not mixing enough will leave it runny. Use a spatula instead of a whisk for gentler incorporation, folding in the ingredients rather than beating them. This helps maintain a light and airy feel, ensuring your dessert is as delicious as it is easy to make.
Storing and serving suggestions
To keep your 10 Minute Tiramisu Balls fresh, store them in an airtight container in the fridge. They can typically last for 3-4 days, but trust us—once they hit the fridge, they often vanish quickly! When serving, consider dusting with cocoa powder right before presentation for that professional touch. If you’re looking to impress, try garnishing with fresh mint or dark chocolate shavings. Want a creative twist? Why not serve them with a side of coffee-infused whipped cream? Your guests will love it!
For more tips on desserts, check out resources like Serious Eats and Bon Appétit.
Serving Suggestions for 10 Minute Tiramisu Balls
Creative ways to present your dessert
Presenting your 10 Minute Tiramisu Balls in an eye-catching way can elevate your dessert game! Consider these creative ideas:
- Mini Dessert Cups: Scoop individual servings into small glasses. Layer with cocoa powder, and sprinkle some chocolate shavings on top for a textured look.
- Dessert Platter: Arrange the tiramisu balls on a beautiful platter, garnished with coffee beans or mint leaves for a pop of color.
- Giftable Treats: Package the 10 Minute Tiramisu Balls in clear cellophane bags tied with a ribbon. They make delightful homemade gifts!
Pairing ideas for gatherings
Looking for perfect pairings to enhance your experience? Try these ideas:
- Coffee or Herbal Tea: Complement the rich flavors of your tiramisu with a robust cup of coffee or a relaxing herbal tea, like chamomile or mint.
- Fruity Accents: Fresh berries (like raspberries or strawberries) not only add color but also bring a refreshing contrast to the creaminess.
- Savory Bites: Serve alongside light appetizers, such as turkey bacon canapés or chicken ham wraps, for a delightful mix of flavors.
For more creative serving ideas, check out this fun dessert presentation article. Enjoy your decadent treats!
Time Breakdown for 10 Minute Tiramisu Balls
Preparation time
If you’re craving a delightful sweet treat but short on time, the 10 Minute Tiramisu Balls have got you covered! The preparation time for this recipe is just about 5 minutes. All you need to do is gather your ingredients, mix them together, and roll those tasty bites into shape. They are perfect for quick gatherings or a late-night snack!
Total time
In total, you’re looking at around 10 minutes from start to finish. With that easy timeline, you can indulge in some delicious homemade tiramisu flavors without spending hours in the kitchen. Why not whip these up next time you have friends over? For more insights on quick dessert ideas, check out this article on fast desserts.
Making these 10 Minute Tiramisu Balls will be a delightful addition to your dessert arsenal!
Nutritional Facts for 10 Minute Tiramisu Balls
When indulging in 10 Minute Tiramisu Balls, it’s helpful to be mindful of their nutritional profile. These delightful bites balance flavor with a satisfying treat.
Calories
Each ball contains approximately 100 calories, making it easy to enjoy guilt-free! These little treats can spark joy without derailing your daily calorie goals.
Sugar Content
With about 8 grams of sugar per ball, you’ll get that hint of sweetness that pairs perfectly with the coffee flavor. To reduce the sugar, consider using a sugar substitute or reducing the amount of sweetener used in your recipe.
Protein Information
Despite their dessert status, each 10 Minute Tiramisu Ball packs in around 2 grams of protein. This can help you stay fuller longer, especially when shared after a meal or enjoyed as a snack.
For more information on balanced nutrition or alternative sweeteners, you can check this nutrition article from Healthline. If you’re also interested in coffee benefits, explore this coffee benefits guide on NCBI.
Enjoy your scrumptious treat while keeping these facts in mind!
FAQ about 10 Minute Tiramisu Balls
How do I make these tiramisu balls ahead of time?
Making 10 Minute Tiramisu Balls ahead of time is not only possible but also a great way to save time for gatherings! Simply prepare the balls, roll them in cocoa powder or crushed biscuits, and store them in an airtight container. Keep them in the refrigerator for up to three days. The flavors meld beautifully, enhancing the taste. Just make sure to mention in the serving suggestions that they should be brought to room temperature before serving for optimal flavor!
What can I substitute for mascarpone?
If you’re in a pinch and don’t have mascarpone, don’t fret! You can mix cream cheese with heavy cream (using a 2:1 ratio) for a smooth, creamy alternative. Another option is a blend of cottage cheese and sour cream, which provides a lighter taste while still reflecting that classic tiramisu flavor. For dairy-free versions, consider using vegan cream cheese—just ensure it’s well-blended to retain a smooth texture.
Are these tiramisu balls suitable for nutrition-sensitive diets?
When it comes to dietary considerations, 10 Minute Tiramisu Balls can be quite accommodating! You can easily make them gluten-free by swapping regular biscuits for gluten-free ones or making your own from scratch. For a lighter version, consider using reduced-fat cheese and sugar substitutes. If you’re looking for a vegan option, mash up silken tofu with cocoa powder for a similar texture and flavor profile. All these adaptations ensure everyone can enjoy these delicious treats!
For more insights on dietary swaps, you might want to check out websites like Nutrition.gov or Healthline.
Conclusion on 10 Minute Tiramisu Balls
Why you’ll love making these at home
Making 10 Minute Tiramisu Balls at home is a game-changer for dessert lovers! Not only do they whip up in no time, but they also deliver that classic tiramisu flavor we all crave. Imagine impressing your friends with a delightful, no-fuss treat that satisfies your sweet tooth.
- Quick and Easy: Perfect for those late-night cravings or unexpected guests.
- Customizable: You can easily switch up ingredients, making them gluten-free or vegan.
- No Baking Required: Enjoy the delicious taste of tiramisu without turning on the oven.
Give these a try for your next gathering or just as a sweet pick-me-up after a long day. Your tastebuds will thank you! For more inspiration, check out this chocolate dessert article that explores diverse recipes to satisfy your cravings.
Print10 Minute Tiramisu Balls: Easy and Indulgent No-Bake Treat

These 10 Minute Tiramisu Balls are a quick and delightful no-bake dessert, perfect for satisfying your sweet tooth in no time.
- Prep Time: 10 minutes
- Total Time: 10 minutes
- Yield: 6 servings
- Category: Dessert
- Method: No-Bake
- Cuisine: Italian
- Diet: Vegetarian
Ingredients
- 1 cup mascarpone cheese
- 1 cup heavy whipping cream
- 1/2 cup powdered sugar
- 1/2 cup brewed coffee, cooled
- 1 cup ladyfingers, crushed
- 2 tablespoons cocoa powder
Instructions
- In a medium bowl, beat the mascarpone cheese, heavy whipping cream, and powdered sugar until soft peaks form.
- Quickly dip the ladyfingers in the cooled coffee and place a layer in the bottom of a serving dish.
- Spread half of the mascarpone mixture over the ladyfingers.
- Add another layer of coffee-dipped ladyfingers followed by the remaining mascarpone mixture.
- Chill for at least 10 minutes before serving. Dust with cocoa powder before serving.
Notes
- For a stronger coffee flavor, let the ladyfingers soak in the coffee for a few seconds longer.
- These can be stored in the refrigerator for up to three days.
Nutrition
- Serving Size: 1 ball
- Calories: 150
- Sugar: 12g
- Sodium: 50mg
- Fat: 10g
- Saturated Fat: 6g
- Unsaturated Fat: 3g
- Trans Fat: 0g
- Carbohydrates: 15g
- Fiber: 0g
- Protein: 3g
- Cholesterol: 30mg